跳转到主内容
Samsung Galaxy A10 Charging Port Replacement

Samsung Galaxy A10 Charging Port Replacement

ZFix

ZFix2 其他贡献者

最后更新于 February 21, 2023

25分钟
中等
语法警察
要点符号!
社区贡献指南

Samsung A10, A10s Micro USB Charging connector Replacement

视频概述

  1. Samsung Galaxy A10 Charging Port Replacement, Remove the back cover: 步骤 1 中的图像 1,3 Samsung Galaxy A10 Charging Port Replacement, Remove the back cover: 步骤 1 中的图像 2,3 Samsung Galaxy A10 Charging Port Replacement, Remove the back cover: 步骤 1 中的图像 3,3
    • Remove the SIM Tray.

    • Use plastic tools to separate the back cover.

  2. Samsung Galaxy A10 Charging Port Replacement: 步骤 2 中的图像 1,3 Samsung Galaxy A10 Charging Port Replacement: 步骤 2 中的图像 2,3 Samsung Galaxy A10 Charging Port Replacement: 步骤 2 中的图像 3,3
    • Remove the silver Phillips screws to be able to disassemble the motherboard shields.

  3. Samsung Galaxy A10 Charging Port Replacement: 步骤 3 中的图像 1,3 Samsung Galaxy A10 Charging Port Replacement: 步骤 3 中的图像 2,3 Samsung Galaxy A10 Charging Port Replacement: 步骤 3 中的图像 3,3
    • Disconnect the battery.

    • Remove the screws and the charging board shield.

  4. Samsung Galaxy A10 Charging Port Replacement, Remove the charging board: 步骤 4 中的图像 1,2 Samsung Galaxy A10 Charging Port Replacement, Remove the charging board: 步骤 4 中的图像 2,2
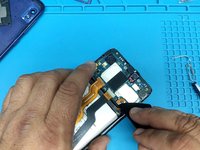
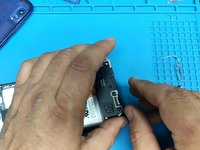
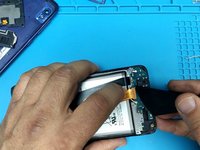
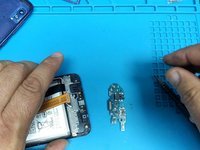
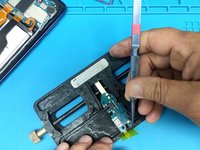
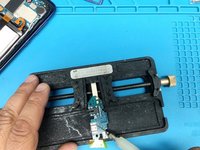
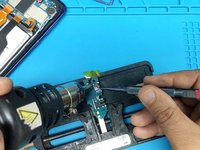
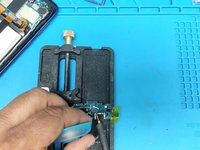
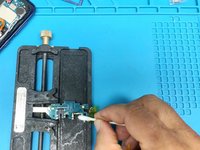
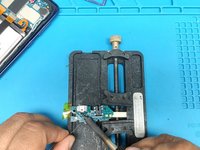
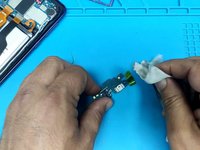
    • Disconnect the Main flex cable and the coaxial antenna cables and remove the charging board.

  5. Samsung Galaxy A10 Charging Port Replacement: 步骤 5 中的图像 1,3 Samsung Galaxy A10 Charging Port Replacement: 步骤 5 中的图像 2,3 Samsung Galaxy A10 Charging Port Replacement: 步骤 5 中的图像 3,3
    • Cover the microphone hole to prevent microphone damage.

    • Use hot air to remove the Micro USB connector.

  6. Samsung Galaxy A10 Charging Port Replacement: 步骤 6 中的图像 1,3 Samsung Galaxy A10 Charging Port Replacement: 步骤 6 中的图像 2,3 Samsung Galaxy A10 Charging Port Replacement: 步骤 6 中的图像 3,3
    • Clean the tin and install the new charging connector.

  7. Samsung Galaxy A10 Charging Port Replacement: 步骤 7 中的图像 1,2 Samsung Galaxy A10 Charging Port Replacement: 步骤 7 中的图像 2,2
    • Clean the board and test the device.

结论

To reassemble your device, follow these instructions in reverse order.

13等其他人完成本指南。

ZFix

于12/09/13注册

194,093 声望

创作了330篇指南

团队

Master Techs Master Techs 的会员

Community

327 名成员

创作了1,699篇指南

一条评论

Waste of time unless you're obsessed with soldering. Just buy a complete board. Cheaper, easier and quicker.

[deleted] - 回复

添加评论

浏览统计数据:

过去 24 小时: 12

过去 7 天: 73

过去 30 天: 225

总计 9,411