跳转到主内容
加入维修社区 - 创建账户

此翻译由机器生成,尚未经过人工审核。 会说这种语言吗? 查看评论

Retina MacBook 2015 触控板组件更换

你所需要的

视频概述

    1. Retina MacBook 2015 触控板组件更换, 松开下盖: 步骤 1 中的图像 1,1
      在这个步骤中使用的工具:
      Magnetic Project Mat
      $19.95
      • 在继续操作之前,请拔下电源线并关闭 MacBook。合上显示屏并将设备翻转过来。

      • 拧下固定下盖的以下八颗螺丝:

      • 两颗 1.8 mm Pentalobe 螺丝

      • 四颗 2.9 mm Pentalobe 螺丝

      • 两颗 6.1 mm Pentalobe 螺丝

      • 请注意这些螺丝拆卸时的朝向——它们在装回时需要保持一定的倾斜角度。

      • 在整个维修过程中,请妥善保管每一颗螺丝,并确保将其装回原来的位置,以免损坏你的设备。

      添加评论

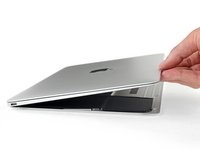
    2. Retina MacBook 2015 触控板组件更换, 拆卸底壳: 步骤 2 中的图像 1,3 Retina MacBook 2015 触控板组件更换, 拆卸底壳: 步骤 2 中的图像 2,3 Retina MacBook 2015 触控板组件更换, 拆卸底壳: 步骤 2 中的图像 3,3
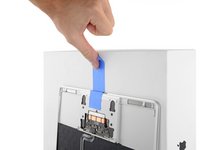
      • 将手指伸入上壳和底壳之间,从 MacBook 背部转轴处开始操作。

      • 仅将底壳微微抬起,以免损坏连接底壳与上壳的排线。

      • 握紧底壳,平稳地向上提起,直至底壳与上壳微微分离。

      • 在抬起底壳时,你可能会遇到较大的阻力。如有必要,将一个开启撬片或其他防静电撬棒沿底壳侧边边缘滑动,以松开两个隐藏的固定卡扣。

      • 在重新组装时,要重新接合卡扣,请在底壳两侧边缘附近(大致在第三张图片中插入撬片的位置)用力按压,直至听到卡扣卡入到位的声音。

      添加评论

    3. Retina MacBook 2015 触控板组件更换: 步骤 3 中的图像 1,1
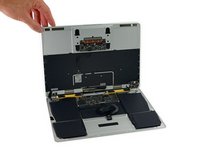
      • 在固定住底壳的同时,小心地将 MacBook 翻转过来,使 Apple 标志朝上。

      询问修复机器人
      添加评论

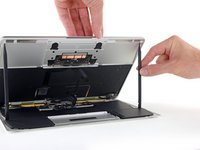
    4. Retina MacBook 2015 触控板组件更换: 步骤 4 中的图像 1,2 Retina MacBook 2015 触控板组件更换: 步骤 4 中的图像 2,2
      • 从前边缘同时抬起上盖和显示屏,将其升高至约 45˚ 的角度。

      • 将 MacBook 保持在这个位置进行下一步操作可能会更容易。

      添加评论

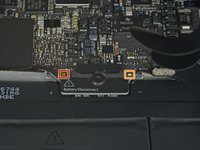
    5. Retina MacBook 2015 触控板组件更换: 步骤 5 中的图像 1,3 Retina MacBook 2015 触控板组件更换: 步骤 5 中的图像 2,3 Retina MacBook 2015 触控板组件更换: 步骤 5 中的图像 3,3
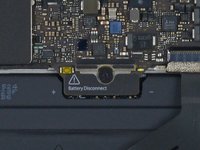
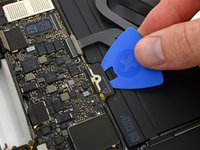
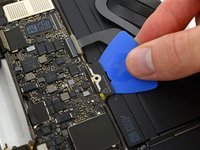
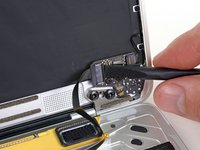
      • 使用撬棒的扁平端按压并按住那个小的金色“电池断开”按钮。

      • 如果电源指示灯亮起,继续按住按钮直到指示灯熄灭,然后松开。这可能需要最多 10 秒钟。

      • 如果指示灯未亮起,请在 5-10 秒后松开按钮。再次按住按钮 5-10 秒,然后松开。最后,第三次按住它 5-10 秒,然后松开。

      • 此步骤可确保 MacBook 完全断电,以便安全地进行维修。

      添加评论

    6. Retina MacBook 2015 触控板组件更换: 步骤 6 中的图像 1,1
      • 合上 MacBook,然后小心地将其翻转过来。

      询问修复机器人

      添加评论

    7. Retina MacBook 2015 触控板组件更换: 步骤 7 中的图像 1,1
      • 从前缘提起,将后盖打开至约 45° 的角度。

      • 注意不要损坏仍将后盖连接到 MacBook 的排线。

      添加评论

    8. Retina MacBook 2015 触控板组件更换: 步骤 8 中的图像 1,2 Retina MacBook 2015 触控板组件更换: 步骤 8 中的图像 2,2
      在这个步骤中使用的工具:
      Tweezers
      $4.99
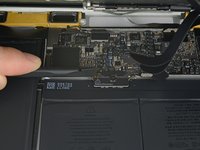
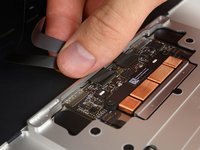
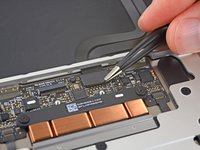
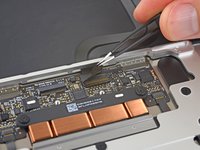
      • 使用 镊子 揭开覆盖在触控板排线 ZIF 连接器上的胶带。

      添加评论

    9. Retina MacBook 2015 触控板组件更换: 步骤 9 中的图像 1,2 Retina MacBook 2015 触控板组件更换: 步骤 9 中的图像 2,2
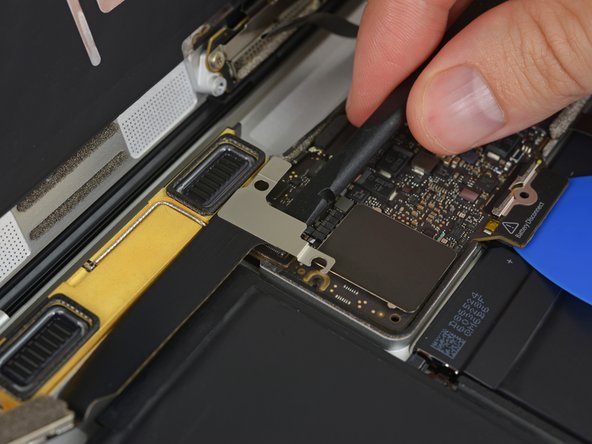
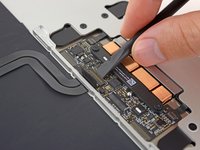
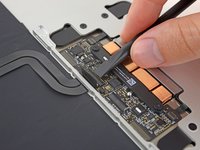
      • 使用撬棒小心地掀起触控板排线 ZIF 连接器上的锁定挡板。

      添加评论

    10. Retina MacBook 2015 触控板组件更换: 步骤 10 中的图像 1,2 Retina MacBook 2015 触控板组件更换: 步骤 10 中的图像 2,2
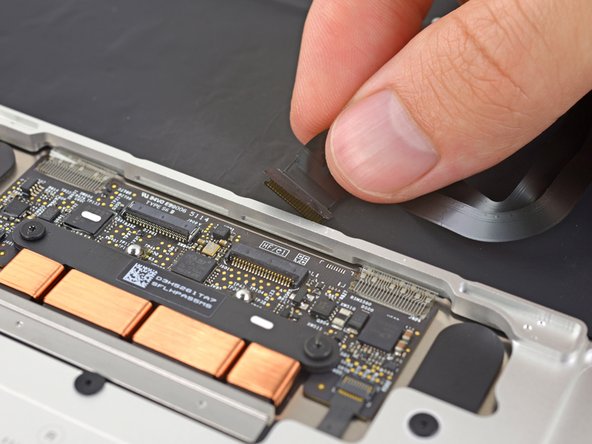
      • 轻轻地将触控板排线从中框的槽位中拉出,从而将其与触控板断开。

      添加评论

    11. Retina MacBook 2015 触控板组件更换: 步骤 11 中的图像 1,2 Retina MacBook 2015 触控板组件更换: 步骤 11 中的图像 2,2
      • 小心地将 MacBook 翻转过来,使底壳平放。

      • 将上壳/显示屏组件抬起至约 90° 角,并用稳固的物体将其支撑起来,这样你就无需用手扶着它了。

      • 在触控板附近贴上一段胶带,以固定上壳并防止其意外移动。

      • 虽然可以将 MacBook 完全打开并将两侧平放,但这可能会损坏柔性排线,因此不建议这样做。

      添加评论

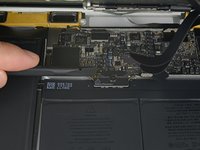
    12. Retina MacBook 2015 触控板组件更换: 步骤 12 中的图像 1,2 Retina MacBook 2015 触控板组件更换: 步骤 12 中的图像 2,2
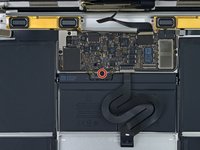
      • 拧下将电池连接器固定在逻辑板上的一颗 2.9 mm Torx 螺丝。

      • 2015 年款机型在此螺丝下方有一个银色的接地夹,上面带有两个泡沫垫,该部件可能会松脱。在重新组装时,请务必将其装回。

      添加评论

    13. Retina MacBook 2015 触控板组件更换: 步骤 13 中的图像 1,2 Retina MacBook 2015 触控板组件更换: 步骤 13 中的图像 2,2
      在这个步骤中使用的工具:
      Battery Blocker
      $5.95
      • 作为额外的预防措施,你可以插入一个 电池隔离撬片 在逻辑板和电池连接器之间,以物理方式断开电池连接。

      添加评论

    14. Retina MacBook 2015 触控板组件更换: 步骤 14 中的图像 1,1
      • 卸下固定 USB-C 接口线缆支架的两颗螺丝:

      • 1.1 mm Tri-point Y00 螺丝

      • 部分该型号的变体可能使用十字螺丝 #00。

      • 3.5 mm Torx 螺丝 T5

      添加评论

    15. Retina MacBook 2015 触控板组件更换, 断开 USB-C 接口线缆支架: 步骤 15 中的图像 1,2 Retina MacBook 2015 触控板组件更换, 断开 USB-C 接口线缆支架: 步骤 15 中的图像 2,2
      • 使用撬棒的扁平端撬起 USB-C 接口线缆支架,将其从逻辑板上直接撬起并断开。

      • 要重新连接此线缆,先将金属支架对准螺丝孔,然后按压支架的中间。请确保对齐准确,否则可能会损坏连接器。

      添加评论

    16. Retina MacBook 2015 触控板组件更换: 步骤 16 中的图像 1,2 Retina MacBook 2015 触控板组件更换: 步骤 16 中的图像 2,2
      • 使用撬棒翻开音频插孔板排线 ZIF 连接器上的锁定挡板。

      询问修复机器人

      添加评论

    17. Retina MacBook 2015 触控板组件更换: 步骤 17 中的图像 1,1
      • 将音频插孔板排线从 ZIF 连接器中直接向后拔出,以断开连接。

      • 在重新组装时,请确保排线带有白色条纹的一面朝向你,如图所示。

      添加评论

    1. Retina MacBook 2015 触控板组件更换, 触控板组件: 步骤 18 中的图像 1,2 Retina MacBook 2015 触控板组件更换, 触控板组件: 步骤 18 中的图像 2,2
      在这个步骤中使用的工具:
      Tweezers
      $4.99
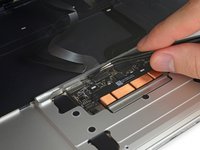
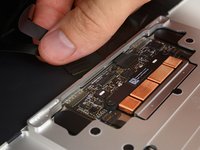
      • 使用 镊子 揭下盖住触控板上键盘排线连接器的胶带。

      询问修复机器人
      添加评论

    2. Retina MacBook 2015 触控板组件更换: 步骤 19 中的图像 1,2 Retina MacBook 2015 触控板组件更换: 步骤 19 中的图像 2,2
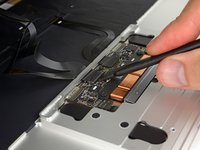
      • 使用撬棒翻开排线 ZIF 连接器上的锁定挡板。

      询问修复机器人
      添加评论

    3. Retina MacBook 2015 触控板组件更换: 步骤 20 中的图像 1,2 Retina MacBook 2015 触控板组件更换: 步骤 20 中的图像 2,2
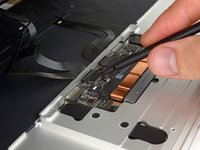
      • 将键盘排线轻轻地从中框的插槽中拔出。

      询问修复机器人

      添加评论

    4. Retina MacBook 2015 触控板组件更换: 步骤 21 中的图像 1,1
      • 拧下五颗 2.5 mm T3 Torx 螺丝,将触控板从外壳上拆下。

      添加评论

    5. Retina MacBook 2015 触控板组件更换: 步骤 22 中的图像 1,1
      • 将显示屏组件稍微打开,使触控板组件从上壳中脱离,然后取出触控板组件。

      • 触控板两侧的金属支架在拆卸过程中可能会掉落。重新组装时,请务必按照照片所示位置将其放置好。

      询问修复机器人

      添加评论

结论

要重新组装设备,请按相反顺序执行这些说明。为避免逻辑板损坏,维修完成后,在开机之前,请使用 5 瓦 iPhone 充电器和 USB-C 转 USB-A 线缆将你的 MacBook 连接至低压电源

取消:我没有完成这个指南。

12等其他人完成本指南。

Jeff Suovanen

于08/06/13注册

454,901 声望

创作了259篇指南

团队

iFixit iFixit 的会员

Staff

122 名成员

创作了72,303篇指南

2指南评论

Excellent instructions, a big thanks to the author. After completing them the MACBOOK worked OK and then I started to get intermittent problems with the power button and the system bringing the shutdown dialogue without pressing the power button. On closer examination and second removal of the trackpad IPD flex ribbon cable (which also routes keyboard signals to the logic board) the cable came apart at the fold half way along the cable. This cable is very fragile and as mentioned in step 7 you need to be very careful on handling them. In my case I think the cable was fatigued or mechanically damaged where the fold was during manufacture . A replacement cable has been installed and the laptop now works ok.

Mark Timms - 回复 分享

Hi. I've replaced the trackpad after the old one got damaged and started heating up. Macbook turns on perfectly without any trackpad connected, but doesn't even boot when the new trackpad is connected. The motherboard's LED near the battery connector is blinking. Is there something im missing?

Anton - 回复 分享

添加评论

浏览统计数据:

过去 24 小时: 6

过去 7 天: 36

过去 30 天: 182

总计 30,608