
Removing Dell Inspiron 15-7537 Bottom Cover
简介
转到步骤 1This guide shows you how to remove the bottom cover beneath the battery, which is needed to strip down to the mid-layer of the device, which is needed for the USB board replacement guide.


-
-
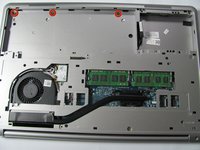
Make sure the display is closed. Then, flip the computer over so that you can see the bottom cover.
-
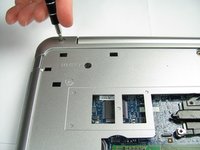
Loosen the two 5 mm Phillips #0 on the upper edge of the cover.
-
-
-
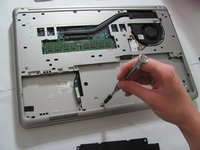
Remove the three 5mm Phillips #0 screws that keep the battery connected to the computer.
-
-
-
The model device did not come with a hard drive. However, you will need to remove the hard drive to proceed. Please remove the hard drive following the steps on page 16 of the official Dell Inspiron 15-7537 manual.
-
-
-
-
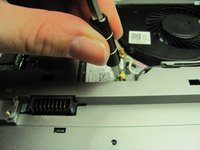
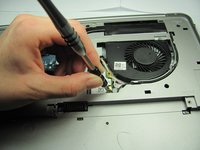
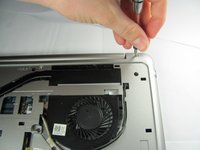
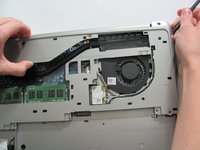
Completely unscrew the 2 mm screw that connects the WiFi card to the mother board using a Philips head screwdriver.
-
-
-
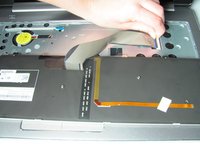
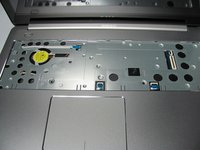
Remove the single 5mm screw that connects the keyboard to the palm assembly with the Phillips head screwdriver.
-
-
-
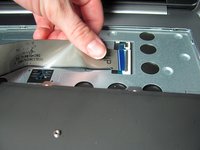
Unscrew the two black 5 mm screws underneath the keyboard using a Phillips head screwdriver.
-


To reassemble your device, follow these instructions in reverse order.
To reassemble your device, follow these instructions in reverse order.
团队

Cal Poly, Team 18-2, Maness Winter 2015 Cal Poly, Team 18-2, Maness Winter 2015 的会员
CPSU-MANESS-W15S18G2
4 名成员
创作了8篇指南