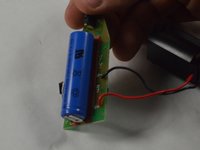
跳转到主内容

Remington MB4040 Battery Replacement

你所需要的

  1. Remington MB4040 Battery Replacement, Remove Blade Assembly: 步骤 1 中的图像 1,3 Remington MB4040 Battery Replacement, Remove Blade Assembly: 步骤 1 中的图像 2,3 Remington MB4040 Battery Replacement, Remove Blade Assembly: 步骤 1 中的图像 3,3
    • Press the black button below the blade to remove the blade.

  2. Remington MB4040 Battery Replacement, Remove Back Cover Hardware: 步骤 2 中的图像 1,2 Remington MB4040 Battery Replacement, Remove Back Cover Hardware: 步骤 2 中的图像 2,2
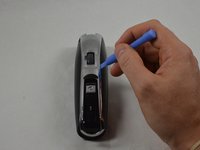
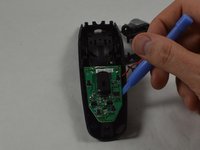
    • Place the device so the back of the product is facing up.

    • Remove the two 11.0 mm PH00 screws from the black plastic housing at the bottom of the device.

  3. Remington MB4040 Battery Replacement, Remove Front Cover Hardware: 步骤 3 中的图像 1,3 Remington MB4040 Battery Replacement, Remove Front Cover Hardware: 步骤 3 中的图像 2,3 Remington MB4040 Battery Replacement, Remove Front Cover Hardware: 步骤 3 中的图像 3,3
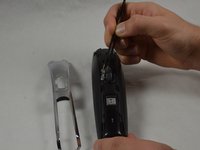
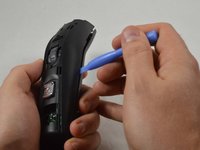
    • Remove the chrome plated plastic piece by using the plastic opening tool to pry it from the housing assembly.

    • Remove the small clear plastic piece that covers the zoom wheel numbers.

  4. Remington MB4040 Battery Replacement, Front Cover (cont.): 步骤 4 中的图像 1,2 Remington MB4040 Battery Replacement, Front Cover (cont.): 步骤 4 中的图像 2,2
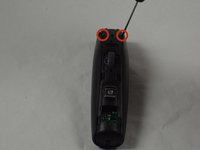
    • Remove the two 16.0 mm PH00 screws from the front cover.

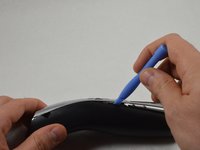
    • Use the blue plastic opening tool to pry apart the two halves of the device.

  5. Remington MB4040 Battery Replacement, Blade Button Removal: 步骤 5 中的图像 1,2 Remington MB4040 Battery Replacement, Blade Button Removal: 步骤 5 中的图像 2,2
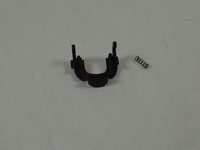
    • Remove the black blade button and the two 10.0 mm springs, which are sandwiched between the cover assembly halves.

    • The blade button is sandwiched between the halves and the two springs may fall out when the halves are separated.

  6. Remington MB4040 Battery Replacement, Remove Motherboard: 步骤 6 中的图像 1,2 Remington MB4040 Battery Replacement, Remove Motherboard: 步骤 6 中的图像 2,2
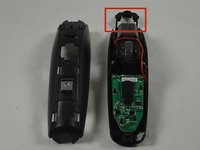
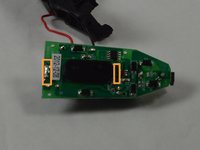
    • Remove the four 9.0 mm PH00 screws from the motherboard.

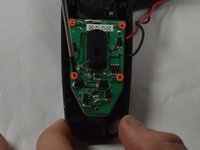
    • Use the plastic opening tool to remove the motherboard from its housing.

    • This can be completed with the Remington MB4040 Zoom Wheel Replacement installed or removed. Just adjust the zoom wheel until it no longer covers the motherboard.

  7. Remington MB4040 Battery Replacement, Remove Battery: 步骤 7 中的图像 1,3 Remington MB4040 Battery Replacement, Remove Battery: 步骤 7 中的图像 2,3 Remington MB4040 Battery Replacement, Remove Battery: 步骤 7 中的图像 3,3
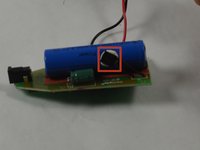
    • Remove the thermal switch from the battery by using the spudger to pry it from the adhesive.

    • Remove the battery by desoldering the battery from the motherboard.

    • Soldering tabs hold the battery onto the motherboard.

结论

To reassemble your device, follow these instructions in reverse order.

22等其他人完成本指南。

Cameron Carnahan

于01/20/15注册

1,067 声望

创作了6篇指南

团队

USF Tampa, Team 1-5, Blackwell Winter 2015 USF Tampa, Team 1-5, Blackwell Winter 2015 的会员

USFT-BLACKWELL-W15S1G5

3 名成员

创作了7篇指南

13条评论

Great work - but help on where to source the battery would be good too :)

Matt Purnell - 回复

It's available as a generic - it's a '14500' Li-Ion battery, 3.7V - typically 750-800mAh. Dimensions: 50mm x 14mm (diameter).

Matt Purnell - 回复

I have seen two types of these batteries: protected and unprotected. Which type do we need?

Amaury C -

You did everyrhing except the most important part to me

How did you unsolder the battery, and solder the new battery?

I was going to buy the tools from the local store but realized i don't know how to appropriately unsolder/solder battery tabs.

Non the less you are the only one who made such explanation, thank you.

Rakan - 回复

If you happen to lose the two springs, you can cut off 2 pieces from the spring of a pen :P

Merry Trimming & A Happy New Beard !

Mads Larsen - 回复

添加评论

浏览统计数据:

过去 24 小时: 8

过去 7 天: 62

过去 30 天: 242

总计 35,301