跳转到主内容

Opening Procedure

你所需要的

  1. Opening Procedure, Display Opening: 步骤 1 中的图像 1,2 Opening Procedure, Display Opening: 步骤 1 中的图像 2,2
  2. Opening Procedure, Safety Requirements: 步骤 2 中的图像 1,3 Opening Procedure, Safety Requirements: 步骤 2 中的图像 2,3 Opening Procedure, Safety Requirements: 步骤 2 中的图像 3,3
    在这个步骤中使用的工具:
    Safety Glasses
    $3.19
    购买
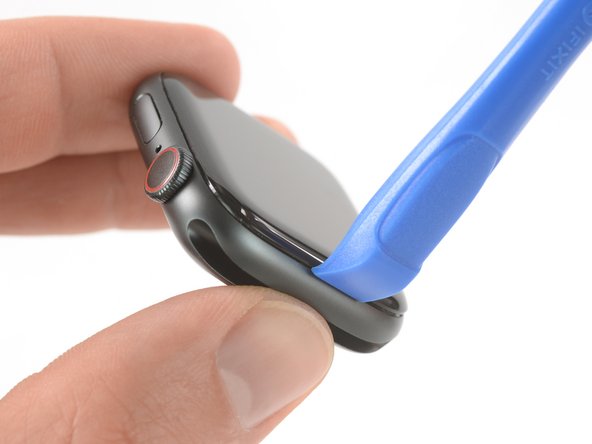
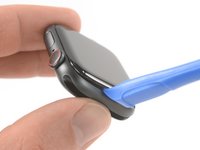
    • Because the gap between the screen and watch body is so thin, a sharp blade is needed to separate the two. Read the following warnings carefully before proceeding.

    • Protect your fingers by keeping them completely clear of the knife. If in doubt, protect your free hand with a heavy glove, such as a leather shop glove or gardening glove.

    • Be careful not to apply too much pressure, as this might cause the knife to slip and cut you, or damage the watch.

    • Wear eye protection. The knife or glass may break, sending pieces flying.

    • Feel free to attach or remove the watch band as needed to provide more control as you make repairs.

  3. Opening Procedure: 步骤 3 中的图像 1,1
    • Prepare an iOpener (or use a hair dryer or heat gun) and heat the face of the watch to loosen the display adhesive.

    • Leave the iOpener on the watch for at least two minutes to fully heat the screen and soften the adhesive holding it to the case.

    • You may need to reheat the iOpener and repeat this procedure several times until the display adhesive gets loose enough.

  4. Opening Procedure: 步骤 4 中的图像 1,3 Opening Procedure: 步骤 4 中的图像 2,3 Opening Procedure: 步骤 4 中的图像 3,3
    • Place the edge of a curved blade into the thin gap between the display and the outer case. Start at the short side of the display, closest to the digital crown.

    • Press firmly straight down into the gap.

    • Once inserted, tilt the blade to pry the display open slightly.

    • Do not insert the knife more than 1/16th of an inch (~2 mm) to avoid damaging the Force Touch sensor.

  5. Opening Procedure: 步骤 5 中的图像 1,2 Opening Procedure: 步骤 5 中的图像 2,2
    • Once you've opened a small gap with the curved blade, remove the blade and insert the thinner edge of an opening tool into the gap.

    • Push the opening tool into the gap, using your thumb as a pivot to lift the display open a bit farther.

    • Don't try to fully open or detach the display yet.

  6. Opening Procedure: 步骤 6 中的图像 1,3 Opening Procedure: 步骤 6 中的图像 2,3 Opening Procedure: 步骤 6 中的图像 3,3
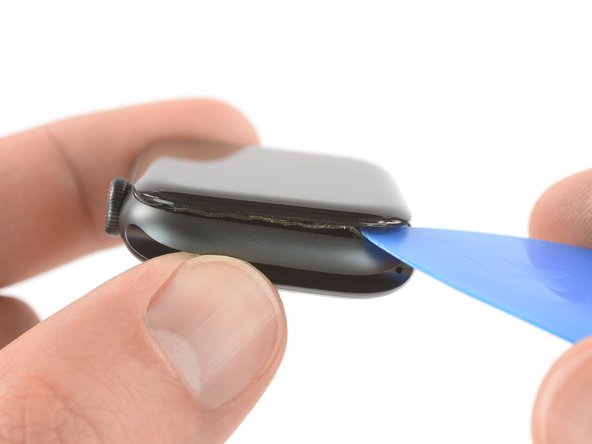
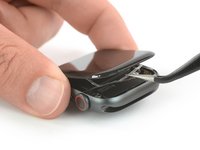
    • It's likely that the Force Touch sensor will stick to the display frame instead to the watch's body. In this case, insert an opening pick under the display and carefully separate the Force Touch gasket from the display.

    • To preserve the Force Touch gasket, pry carefully under the edge of the display. If the Force Touch gasket splits when lifting the display, or if you separate the gasket layers, you'll also need to replace the Force Touch gasket itself.

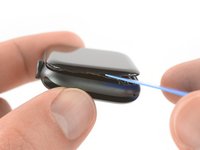
    • Slide the pick around the display to separate the adhesive between the Force Touch gasket and the display.

    • Don't insert the opening pick deeper than 1/16th of an inch (~2 mm) to avoid damaging other components.

  7. Opening Procedure: 步骤 7 中的图像 1,3 Opening Procedure: 步骤 7 中的图像 2,3 Opening Procedure: 步骤 7 中的图像 3,3
    • To avoid straining the display cables, don't open the display all the way yet.

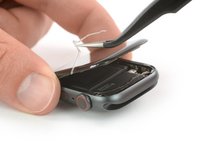
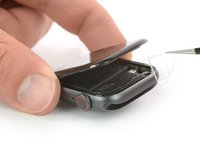
    • Open the display at max. to an 45° angle, and use tweezers to peel off the adhesive between the display and the Force Touch gasket.

    • Thread the adhesive around and behind the display cables to get it off completely. Since the adhesive needs to be replaced anyway, you can cut it if that makes removal easier for you.

    • Make sure to return to this point during the reassembly of your watch and then continue with the Resealing Procedure.

结论

To reassemble your device, follow these instructions in reverse order.

Take your e-waste to an R2 or e-Stewards certified recycler.

Repair didn’t go as planned? Check out our Answers community for troubleshooting help.

5等其他人完成本指南。

Dominik Schnabelrauch

于11/23/16注册

203,362 声望

创作了682篇指南

团队

iFixit iFixit 的会员

Staff

135 名成员

创作了16,817篇指南

0条评论

添加评论

浏览统计数据:

过去 24 小时: 1

过去 7 天: 13

过去 30 天: 65

总计 4,696