简介
Use this guide to replace the rear glass on your OnePlus 9 5G.
You'll need replacement adhesive for the rear glass in order to complete this repair.
Note: Retaining water resistance after the repair depends on how clean the mating surfaces are and how accurately the adhesive is reapplied. Your device will lose its factory-given IP (Ingress Protection) rating, however, only the T-Mobile versions of the OnePlus 9 5G offer an IP rating.
你所需要的
-
-
Prepare an iOpener and apply it to the rear glass for at least three minutes to loosen the adhesive underneath.
-
-
-
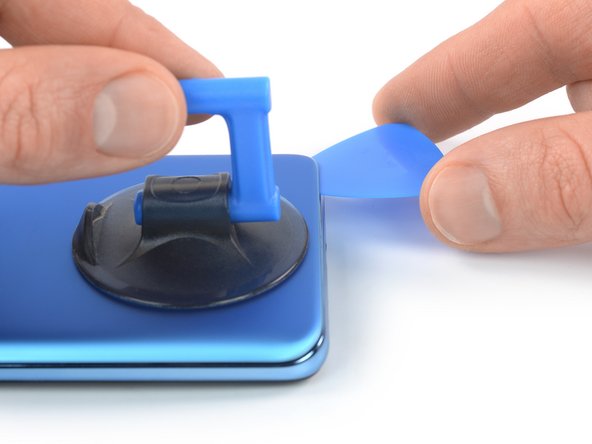
Apply a suction handle to the rear glass, as close to the bottom edge as possible.
-
Pull up on the suction handle with strong, steady force to create a gap between the glass and the frame.
-
Insert an opening pick into the gap.
-
-
-
Slide the opening pick to the bottom right corner to slice the adhesive.
-
Leave the opening pick in place to prevent the adhesive from resealing.
-
-
-
-
Insert a second opening pick underneath the bottom edge of the rear glass.
-
Slide the opening pick to the bottom left corner to slice the adhesive.
-
Leave the opening picks in place to prevent the adhesive from resealing.
-
-
-
Insert a third opening pick underneath the bottom left corner of the rear glass.
-
Slide the opening pick along the left edge of your phone to slice the adhesive.
-
Leave the opening pick in the top left corner to prevent the adhesive from resealing.
-
-
-
Insert a fourth opening pick underneath the top left corner of the rear glass.
-
Slide the opening pick along the top edge to slice the adhesive.
-
Leave the opening pick in the top right corner to prevent the adhesive from resealing.
-
-
-
Insert a fifth and final opening pick underneath the top right corner of the rear glass.
-
Slide the opening pick along the right edge of the back cover to slice the remaining adhesive.
-


To reassemble your device, follow these instructions in reverse order.
During reassembly, apply new adhesive where it's necessary after cleaning the relevant areas with isopropyl alcohol (>90%).
Take your e-waste to an R2 or e-Stewards certified recycler.
Repair didn’t go as planned? Try some basic troubleshooting, or ask our OnePlus 9 5G answers community for help.
2等其他人完成本指南。

