简介
This guide has been updated by iFixit staff! Read the new, official guide here.
A guide on how to replace the Nintendo DSi top LCD screen.
你所需要的
-
-
步骤 1 Battery
注意:步骤 1-2 源自标记为进行中的 指南。
-
Loosen the two screws on the battery panel. Then lift the panel up to remove it.
 询问修复机器人
-
-
-
-
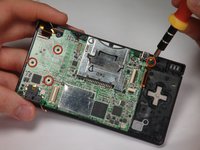
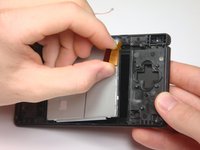
步骤 3 Motherboard
注意:步骤 3-4 源自标记为进行中的 指南。
-
Remove 4 Phillips screws from the board.
-
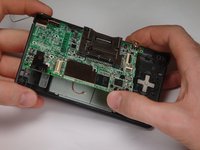
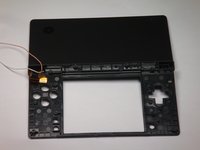
Lift the main board from the bottom end and flip it over to reveal the last connector.
-
-
-
-


To reassemble your device, follow these instructions in reverse order.
另外一个人完成了本指南。
团队

Cal Poly, Team 6-1, Maness Fall 2009 Cal Poly, Team 6-1, Maness Fall 2009 的会员
CPSU-MANESS-F09S6G1
5 名成员
创作了42篇指南