
Nikon Coolpix P510 LCD Replacement
简介
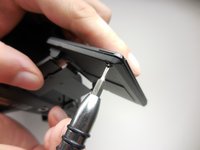
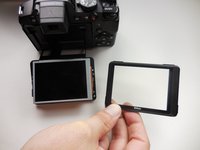
转到步骤 1If you are having issues with your LCD, this guide will help you replace it with a minimal effort. This part is easy to get to, and easy to replace. Other than a screwdriver and a plastic opening tool, nothing else is needed to accomplish this.


-
-
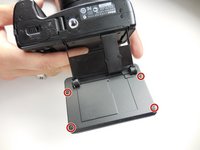
Flip the camera over and push the tab on the battery cover to open the battery compartment.
-
-
-
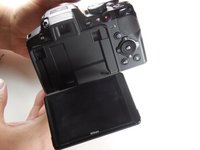
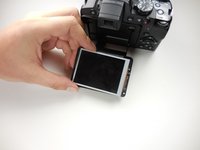
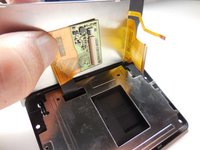
Extend the LCD screen out and turn the camera upside down to get access to the screws on the bottom.
-
-


To reassemble your device, follow these instructions in reverse order.
To reassemble your device, follow these instructions in reverse order.
6等其他人完成本指南。
团队

Colorado Springs, Team 2-2, Panko Spring 2015 Colorado Springs, Team 2-2, Panko Spring 2015 的会员
UCCS-PANKO-S15S2G2
3 名成员
创作了12篇指南
2条评论
Esse LSD tem outro fita preta que conecta pode estar ruim
Porque a minha não sei se ela é LCD ou esse negócio preto que conecta que tá ruim