
Nikon Coolpix L320 LCD Replacement

没有估计
中等
需要更多图片
更好的介绍
缺少细节
简介
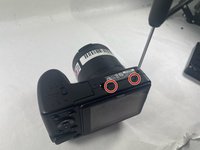
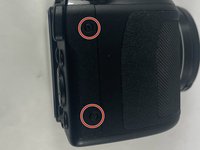
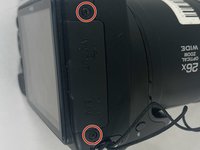
转到步骤 1This guide will help walk you through how to replace the LCD screen in you Nikon Coolpix L320

-
-
Flip the camera over to reveal the card/battery door.
-
Slide the button to the unlocked position and the door should pop open.
-


即将完成!
To reassemble your device, follow these instructions in reverse order.
结论
To reassemble your device, follow these instructions in reverse order.

团队

UMass Dartmouth, Team 5-6, Ramos Spring 2023 UMass Dartmouth, Team 5-6, Ramos Spring 2023 的会员
UMASSD-RAMOS-S23S5G6
3 名成员
创作了2篇指南