跳转到主内容
加入维修社区 - 创建账户

Nikon Coolpix 3500 Lens Replacement

你所需要的

    1. Nikon Coolpix 3500 Lens Replacement, Battery: 步骤 1 中的图像 1,1
      • Unlatch the battery cover and slide the cover out. Place cover to the side, it will not be needed for the next few steps.

      • Remove the battery.

      • Remove the battery cover without using excessive force. Keep in mind this cover is fragile.

      询问修复机器人

      添加评论

    1. Nikon Coolpix 3500 Lens Replacement, Front Cover: 步骤 2 中的图像 1,1
      • Remove the two 4.5 mm screws that sit next to the battery slot.

      • Remove the 3 mm screw that sits below the CF card slot.

      • Remove the 4.5 mm screw that sits above the digital I/O cover.

      询问修复机器人

      添加评论

    2. Nikon Coolpix 3500 Lens Replacement: 步骤 3 中的图像 1,1
      • Remove the two 4.5 mm screws that sit inside the battery slot.

      询问修复机器人

      添加评论

    3. Nikon Coolpix 3500 Lens Replacement: 步骤 4 中的图像 1,1
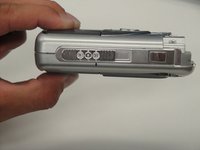
      • Remove the two 5 mm screws that sit near the camera strap eyelet.

      • Remove the camera strap eyelet.

      询问修复机器人

      添加评论

    4. Nikon Coolpix 3500 Lens Replacement: 步骤 5 中的图像 1,1
      • Remove the 5 mm screw and cap that were underneath the camera strap eyelet.

      询问修复机器人

      添加评论

    5. Nikon Coolpix 3500 Lens Replacement: 步骤 6 中的图像 1,2 Nikon Coolpix 3500 Lens Replacement: 步骤 6 中的图像 2,2
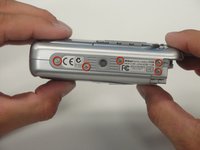
      • Remove the five 3.5 mm screws that sit at the bottom of the camera.

      • Remove the grey plastic piece, which the five screws held in place, by gently detaching the front cover.

      • Do not apply too much force; two wires still connect the front cover to the motherboard.

      询问修复机器人

      添加评论

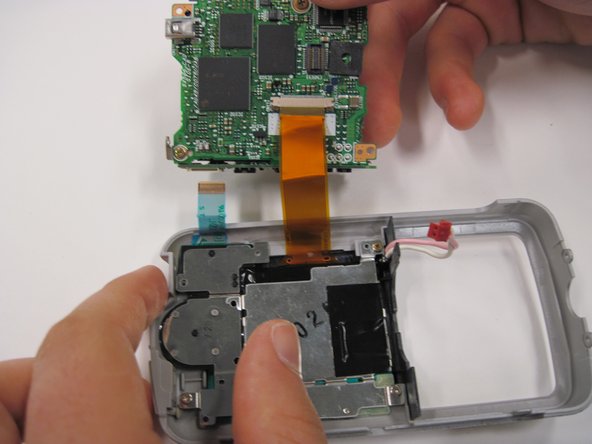
    6. Nikon Coolpix 3500 Lens Replacement: 步骤 7 中的图像 1,2 Nikon Coolpix 3500 Lens Replacement: 步骤 7 中的图像 2,2
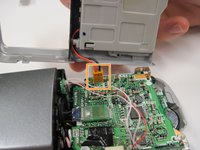
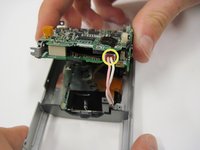
      • Using a spudger, detach the white-capped wire.

      • Using a spudger, detach the orange-capped wire and set the front cover aside.

      询问修复机器人

      添加评论

    1. Nikon Coolpix 3500 Lens Replacement, Lens: 步骤 8 中的图像 1,1
      • Disconnect the grey-capped wire from the motherboard.

      • Disconnect the blue wire attached to the green chip from the center of the motherboard.

      询问修复机器人

      添加评论

    2. Nikon Coolpix 3500 Lens Replacement: 步骤 9 中的图像 1,2 Nikon Coolpix 3500 Lens Replacement: 步骤 9 中的图像 2,2
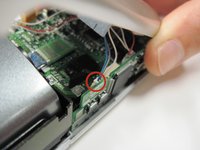
      • Remove the 3.5 mm screw from the motherboard next to the rotating lens.

      • Invert the motherboard and lens toward the orange and blue wires still connecting the motherboard to the LED screen.

      询问修复机器人

      添加评论

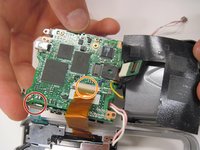
    3. Nikon Coolpix 3500 Lens Replacement: 步骤 10 中的图像 1,2 Nikon Coolpix 3500 Lens Replacement: 步骤 10 中的图像 2,2
      • Disconnect the blue wire connecting the motherboard to the LED screen.

      • Disconnect the orange wire using a spudger while pushing out horizontally.

      • Disconnect the red capped wire from the motherboard.

      • Lift the motherboard and lens (still connected) out of the back case.

      询问修复机器人

      添加评论

    4. Nikon Coolpix 3500 Lens Replacement: 步骤 11 中的图像 1,1
      • Lift up on the black covering and remove the orange wire connecting the lens to the motherboard.

      询问修复机器人

      添加评论

结论

To reassemble your device, follow these instructions in reverse order.

取消:我没有完成这个指南。

团队

Cal Poly, Team 30-38, Garner Spring 2010 Cal Poly, Team 30-38, Garner Spring 2010 的会员

CPSU-GARNER-S10S30G38

5 名成员

创作了17篇指南

0指南评论

添加评论

浏览统计数据:

过去 24 小时: 1

过去 7 天: 9

过去 30 天: 37

总计 3,528