

简介
转到步骤 1As of writing this (July 2024) Minirigs have been around for about 11 years. I bought my first set in 2014 (2 Minirigs and a Minirig Sub). These were all the original generation- no Bluetooth, lots of wires. They've been through 10 summers of camping trips and always performed perfectly.
Around 2018 I found a crack in the sub's plastic, so sent it back to Minirig for repair (they offer a flat rate service- whatever needed replacing then was replaced. While they couldn't confirm that the battery had been replaced, it's still giving me passable battery life, so I assume that it was. I've read that it's incredibly difficult to replace the batteries in the sub (there's a fragile ribbon cable that is likely to be broken) and would only do so if it's completely died and it would be scrapped anyway.
But I never had a problem with the 2 Minirigs themselves, until this year when the battery life seriously sloped off and I was only getting a few hours of use rather than the usual 2+ days of heavy use.
Minirig no longer offer a repair service for the older devices (not sure where their cutoff is currently, but they definitely won't repair the non- Bluetooth ones like mine), but last time I checked they were offering a Legacy Repair option- a small trade in discount on new devices if you send them your old ones.
As mine are still working fine other than the battery life, and I found enough info online to give me confidence that I could do the battery replacements myself, I figured I'd give it a go. Couldn't bear the thought of them being scrapped when all they need is new batteries.
They're now working perfectly with their new batteries. This guide details how I did it.
Note: I believe that the following model, the original Bluetooth Minirig, also has the same battery configuration, but recommend that you open yours following the steps here to see if yours looks the same before you order the batteries. More recent models use cylindrical 18650 cells and the process to replace those will be different.
你所需要的
配件


工具


查看更多...
-
-
Here's what we're dealing with- an OG, non Bluetooth Minirig that's over 10 years old.
-
It's working, but the battery life has dropped to unusable. The light switches from green to cyan an hour or so after being fully charged.
-
It's time to replace its battery!
-
-
-
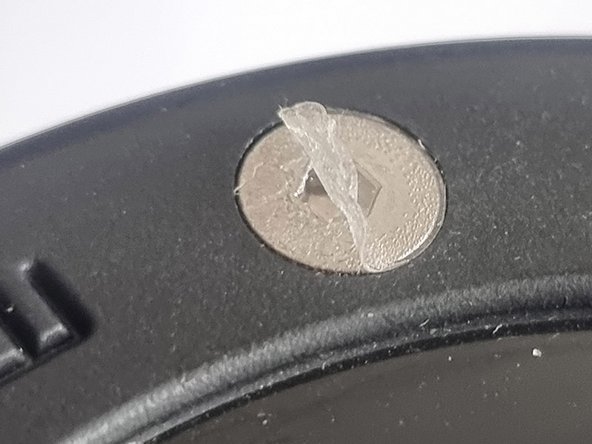
There are clear sqidgy feet covering the hex socket screw heads.
-
I used my fingernails to remove them, a spudger would work too.
-
-
-
The clear rubberised feet are now removed, but there is an adhesive layer over the screw heads that must be peeled off to expose the hex head screw sockets.
-
-
-
Once the screws have been removed, the base can be separated from the metal body.
-
One of mine came apart easily, but the other wasn't wanting to come apart. I partially inserted one of the screws, put some sideways pressure on it to lock it into the plastic while applying enough force downwards to pull the base off.
-
The base came off pretty easily using this technique and no chance of damaging the metal body or plastic base as long as you're not too heavy handed.
-
-
-
There's the amplifier and charging circuit on a single PCB.
-
The speaker driver is surrounded by wadding to improve the bass response.
-
The battery is attached to the base with double-sided tape.
-
We can leave the internals alone, all we need to do is remove the battery, ready for its replacement.
-
-
-
-
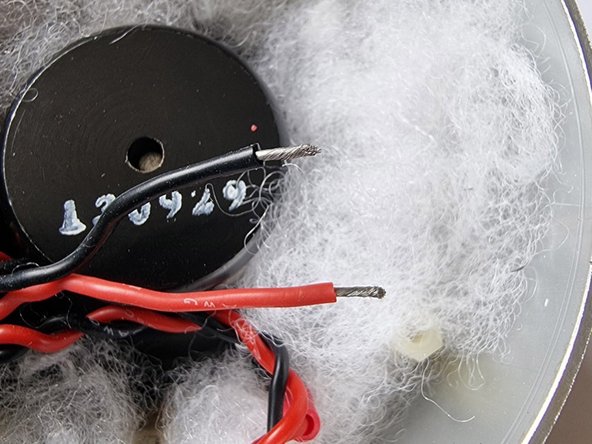
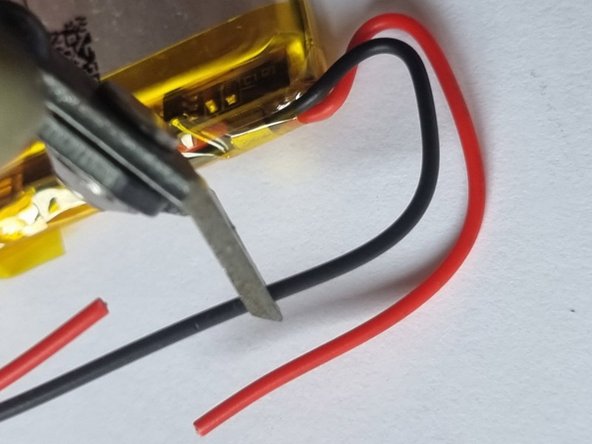
The battery is wired to a multi connector which also has wires to the speaker and charging socket. It's not possible to separate the battery wires from this connector without a special tool and an unnecessary amount of bother.
-
So we'll snip the battery wires to remove the battery and join our new battery onto those later.
-
It's best to cut them close to the battery so you have a decent amount of wire still attached to the main Minirig body.
-
-
-
Use fingers to prise the battery from the double-sided mounting tape
-
The tape should remain on the base. Leave it there as we'll be using that to mount our new battery later.
-
-
-
Strip about 4mm of insulation from the end of each wire that's coming from the main Minirig circuit board.
-
Tin the ends of the wire by applying a small amount of solder to the exposed metal.
-
-
-
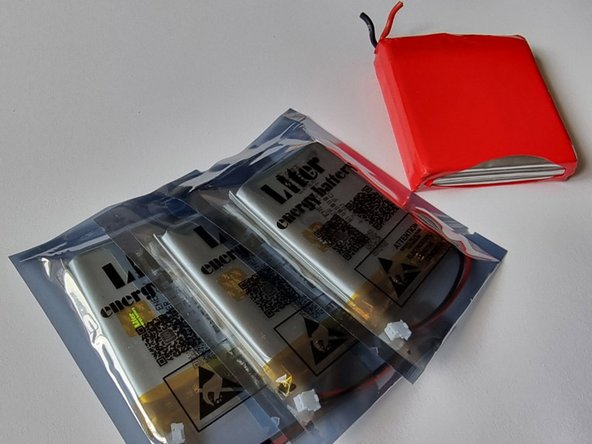
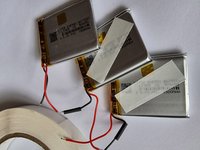
Here you can see the red original battery pack which is made from 3 Li-Po pouch cells wired in series.
-
In the foreground we have the new cells, ready to be turned into a replacement battery pack.
-
-
-
Prepare the cells by cutting off the supplied connector from each (if supplied with one).
-
-
-
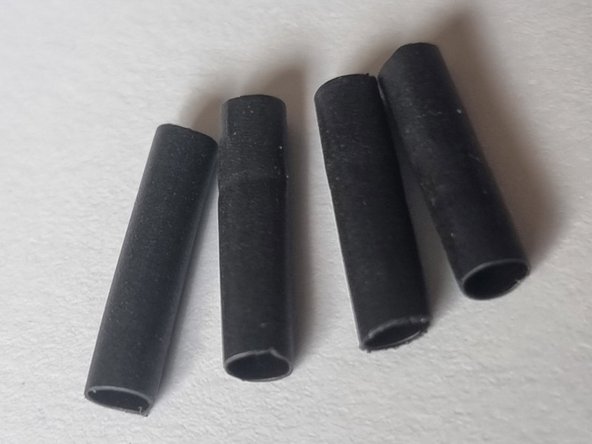
We'll need 4 lengths of heatshrink, each about 15mm long and with an internal diameter of around 3.5mm
-
-
-
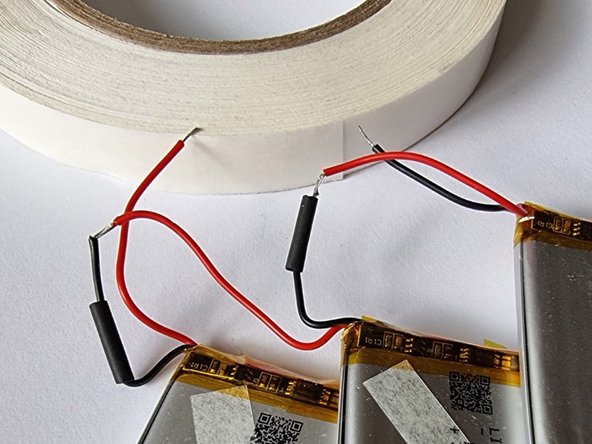
Each battery is wired to the next like this.
-
First, tin the ends of the wires by applying a small amount of solder.
-
Then hold the wires that you are joining next to each other while applying heat to melt the solder and permanently join the wires.
-
Positive goes to negative, leaving a red wire at one end of the chain and black at the other. This is wiring the cells in series, which increases the voltage. So here we have 3 3.7 Volt cells wired in series, giving us a nominal 11.1 V battery pack.
-
-
-
Use a heat gun to shrink the heatshrink tubing down onto the wires to create safe, insulated joins.
-
If you don't have a heat gun available, a hair dryer may work, or failing that a lighter.
-
Use double-sided tape between the cells to hold them together.
-
-
-
Use some PVC insulation tape around each side of the pack to ensure it all stays together
-
Tidy up the linking wires by tucking them under the PVC tape at that end.
-
-
-
The wires from the battery pack can now be connected to the wires going to the Minirig circuit board.
-
-
-
Put the base onto the main Minirig body, being careful that there aren't any battery wires caught between the speaker's magnet and the battery.
-
Line up the screw holes in the base with the screws in the front face.
-
Insert the screws and tighten.
-
Once tight, check around the join between the base and the metal body to ensure that it's correctly mounted with no gaps.
-


Charge & enjoy.
Note: parts list is for one Minirig. Remember to double up the quantities if you are replacing the batteries in a pair of them.
Charge & enjoy.
Note: parts list is for one Minirig. Remember to double up the quantities if you are replacing the batteries in a pair of them.
另外一个人完成了本指南。
