跳转到主内容
加入维修社区 - 创建账户

Main Board Replacement

你所需要的

    1. Main Board Replacement, Exterior Housing: 步骤 1 中的图像 1,3 Main Board Replacement, Exterior Housing: 步骤 1 中的图像 2,3 Main Board Replacement, Exterior Housing: 步骤 1 中的图像 3,3
      在这个步骤中使用的工具:
      iOpener
      $24.95
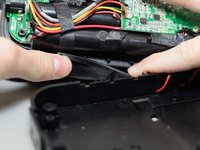
      • Pry the exterior housing off the iHome iP37. You may need extra leverage to do this.

      • Note: This step is the most difficult due to the way it is attached. The glue holding the exterior housing to the internals does not break easily. You may want to use iFixit's iOpener to soften the glue.

      • Note: The process is the same for both the upper half and the lower half. To identify the halves, look for these details: the upper half has a metal grid, and the lower half has buttons. If you are replacing any other components, pry off the lower half.

      询问修复机器人

      添加评论

    1. Main Board Replacement, Lower Half Casing: 步骤 2 中的图像 1,3 Main Board Replacement, Lower Half Casing: 步骤 2 中的图像 2,3 Main Board Replacement, Lower Half Casing: 步骤 2 中的图像 3,3
      • Remove these four 9 mm screws from the plastic casing; you will need a Phillips #2 driver to do this.

      • Remove the flanged 9 mm screw from the counterweight; you will need a Phillips #2 driver to do this.

      • Lift and remove the counterweight.

      询问修复机器人

      添加评论

    2. Main Board Replacement: 步骤 3 中的图像 1,3 Main Board Replacement: 步骤 3 中的图像 2,3 Main Board Replacement: 步骤 3 中的图像 3,3
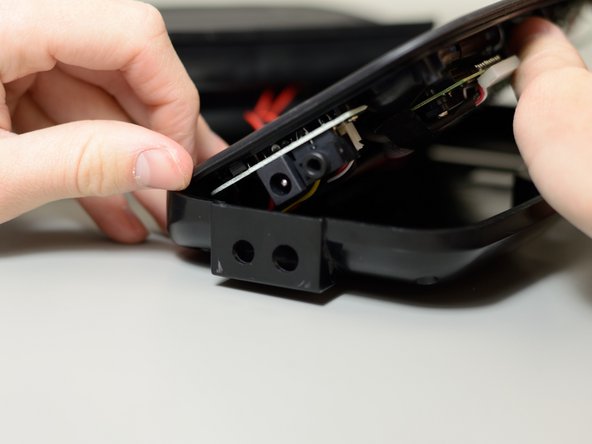
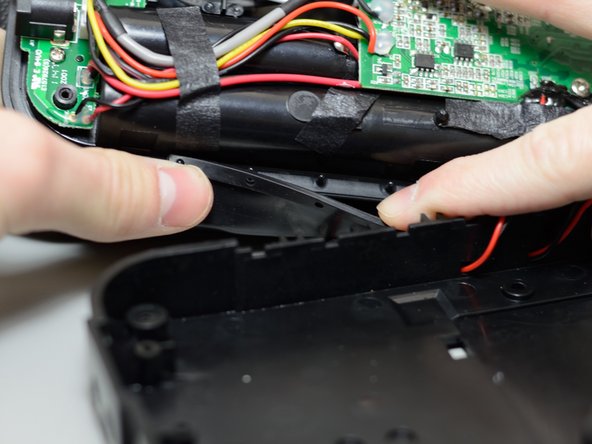
      • Lift and remove the plastic casing.

      • Note: It is best to lift the casing starting from the side without the protruding 3.5mm audio port and power port.

      • Reminder: During this process, a rubber cover will likely be dislodged. Make sure to re-seat this cover on the small pegs before putting the plastic casing back on.

      询问修复机器人

      添加评论

    1. Main Board Replacement, Preliminary Main Board: 步骤 4 中的图像 1,2 Main Board Replacement, Preliminary Main Board: 步骤 4 中的图像 2,2
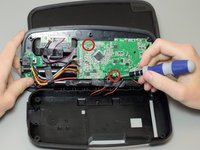
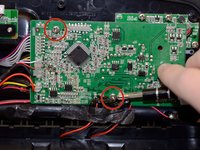
      • Remove the two 9 mm screws that hold the main printed circuit board onto the rest of the iP37; you will need a Phillips #2 driver to do this.

      询问修复机器人

      添加评论

    2. Main Board Replacement: 步骤 5 中的图像 1,1
      • Peel away the black tape covering the red wires that connect to the PCB.

      询问修复机器人

      添加评论

    3. Main Board Replacement: 步骤 6 中的图像 1,1
      • There is ribbon wiring under this PCB. Be careful not to damage it while removing the PCB.

      • Slowly lift the PCB away from the rest of the device

      • Remove the ribbon by first removing the brown insert piece from the connector on the button board

      • Pull the ribbon out of the connector on the button board by the blue tab.

      询问修复机器人

      添加评论

    4. Main Board Replacement: 步骤 7 中的图像 1,1
      • Carefully disconnect the white 11-pin connector from the main board.

      • Pull firmly on the connector and use a screwdriver to pry it slightly if necessary.

      询问修复机器人

      添加评论

    1. Main Board Replacement, Main Board: 步骤 8 中的图像 1,1
      • Peel away the tape holding down the wires between the main board and the DC power and 3.5 mm audio jack board.

      询问修复机器人

      添加评论

    2. Main Board Replacement: 步骤 9 中的图像 1,1
      • Remove the two 3-pin connectors from the DC power and 3.5 mm audio jack board.

      询问修复机器人

      添加评论

    3. Main Board Replacement: 步骤 10 中的图像 1,1
      • Remove the black tape holding down the four wires connecting the main board to the upper half of the device.

      询问修复机器人

      添加评论

    4. Main Board Replacement: 步骤 11 中的图像 1,1
      • Carefully peel away the black melted plastic that covers the connection points from the four wires to the main board.

      • Make sure not to pull any of the wires out. This will make soldering them back on later more difficult. To avoid this, it may be easier to peel the melted plastic away in small chunks.

      询问修复机器人

      添加评论

    5. Main Board Replacement: 步骤 12 中的图像 1,1
      • Desolder the two red and two black wires from the main board, which will completely free the main board from the rest of the assembly.

      • You can refer to iFixit's guide or this informative video for more information on soldering.

      询问修复机器人

      添加评论

结论

To reassemble your device, follow these instructions in reverse order.

取消:我没有完成这个指南。

团队

Cal Poly, Team 11-50, Amido Spring 2014 Cal Poly, Team 11-50, Amido Spring 2014 的会员

CPSU-AMIDO-S14S11G50

4 名成员

创作了26篇指南

0指南评论

添加评论

浏览统计数据:

过去 24 小时: 1

过去 7 天: 4

过去 30 天: 20

总计 953