跳转到主内容
Mac Pro Late 2013 Fan Assembly Replacement

Mac Pro Late 2013 Fan Assembly Replacement

Andrew Optimus Goldheart

Andrew Optimus Goldheart4 其他贡献者

最后更新于 May 7, 2024

没有估计
中等
仅作为前提条件
本指南仅用作其他指南的先决条件。不能单独使用。

Prereq only.

你所需要的

工具

查看更多...

  1. Mac Pro Late 2013 Fan Assembly Replacement, Fan Assembly: 步骤 1 中的图像 1,3 Mac Pro Late 2013 Fan Assembly Replacement, Fan Assembly: 步骤 1 中的图像 2,3 Mac Pro Late 2013 Fan Assembly Replacement, Fan Assembly: 步骤 1 中的图像 3,3
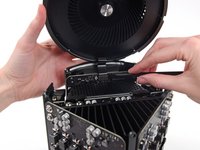
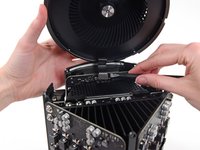
    • Remove five 5.1 mm T10 Torx screws from around the outer perimeter of the fan assembly.

  2. Mac Pro Late 2013 Fan Assembly Replacement: 步骤 2 中的图像 1,2 Mac Pro Late 2013 Fan Assembly Replacement: 步骤 2 中的图像 2,2
    • The fan assembly is attached to the rest of the computer by two cables on the IO board side.

    • Tilt the assembly up away from the IO board.

    • Do not try to remove the fan assembly yet, as it is still attached by two cables.

  3. Mac Pro Late 2013 Fan Assembly Replacement: 步骤 3 中的图像 1,1
    • While supporting the fan assembly with one hand, loosen the two T8 captive screws in the fan cable bracket.

    • These screws are captive in the Mac Pro. Do not try to remove these screws from your Mac Pro.

  4. Mac Pro Late 2013 Fan Assembly Replacement: 步骤 4 中的图像 1,1
    在这个步骤中使用的工具:
    Tweezers
    $4.99
    • Use a pair of tweezers to pull the fan cable bracket away from the fan assembly.

  5. Mac Pro Late 2013 Fan Assembly Replacement: 步骤 5 中的图像 1,2 Mac Pro Late 2013 Fan Assembly Replacement: 步骤 5 中的图像 2,2
    • Use the flat end of a spudger to disconnect the fan assembly ribbon cable from the IO board.

  6. Mac Pro Late 2013 Fan Assembly Replacement: 步骤 6 中的图像 1,1
    • Disconnect the fan assembly antenna cable from the IO board.

    • Remove the fan assembly from the Mac Pro.

结论

To reassemble your device, follow these instructions in reverse order.

团队

iFixit iFixit 的会员

Staff

121 名成员

创作了19,845篇指南

0指南评论

添加评论

浏览统计数据:

过去 24 小时: 0

过去 7 天: 2

过去 30 天: 2

总计 127