跳转到主内容

Logitech Craft Battery Replacement

你所需要的

  1. Logitech Craft Battery Replacement, Turn off the keyboard: 步骤 1 中的图像 1,1
    • Before you begin, flip the keyboard's power switch into the OFF position.

  2. Logitech Craft Battery Replacement, Remove the plastic foot: 步骤 2 中的图像 1,2 Logitech Craft Battery Replacement, Remove the plastic foot: 步骤 2 中的图像 2,2
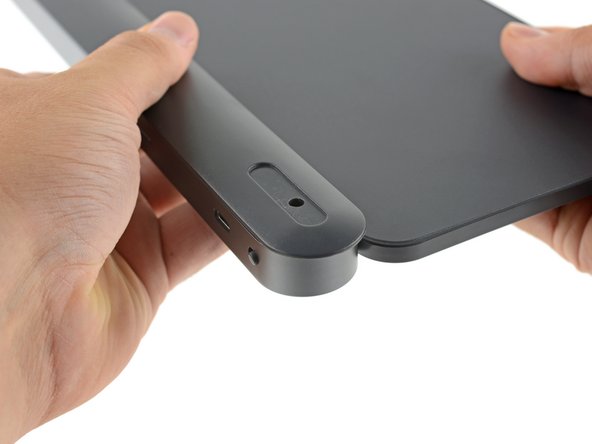
    • Flip the keyboard over, laying the it key-side down onto a clean work surface.

    • The dial will prevent the keyboard from laying perfectly flat. If you need to, lay the keyboard on a soft towel to prevent wobble.

    • Heat an iOpener and lay it on the left rear plastic foot for about two minutes.

    • Alternatively, a hair dryer or a heat gun may also be used, but be careful not to overheat the keyboard.

  3. Logitech Craft Battery Replacement, Remove the foot pad: 步骤 3 中的图像 1,3 Logitech Craft Battery Replacement, Remove the foot pad: 步骤 3 中的图像 2,3 Logitech Craft Battery Replacement, Remove the foot pad: 步骤 3 中的图像 3,3
    • Only one foot (the one next to the power switch) has a hidden screw underneath—you don't need to remove both feet.

    • Insert the pointed end of a spudger at the edge of the foot.

    • Push the spudger underneath the foot and pry up to release its adhesive.

    • The foot should come away from the keyboard without much force. If it feels stuck, apply more heat and try again.

    • Once you can grip the foot with your fingers, peel it up and away from the keyboard to remove it.

  4. Logitech Craft Battery Replacement, Remove the screw securing the bottom cover: 步骤 4 中的图像 1,1
    • Use a Phillips screwdriver to remove the 4.7 mm screw securing the bottom cover.

  5. Logitech Craft Battery Replacement, Unlock the bottom cover: 步骤 5 中的图像 1,2 Logitech Craft Battery Replacement, Unlock the bottom cover: 步骤 5 中的图像 2,2
    • The bottom cover is held in place by slotted plastic clips along the entire length of the keyboard.

    • Don't attempt to force the cover off until all clips have disengaged. If done correctly, the bottom cover will come away with little to no force.

    • Hold the keyboard upside down.

    • Grip the bottom cover and slide it towards the ON/OFF switch to unlock it from the rest of the device.

  6. Logitech Craft Battery Replacement, Slide and remove the bottom cover: 步骤 6 中的图像 1,3 Logitech Craft Battery Replacement, Slide and remove the bottom cover: 步骤 6 中的图像 2,3 Logitech Craft Battery Replacement, Slide and remove the bottom cover: 步骤 6 中的图像 3,3
    • Lay the keyboard back down onto your work surface.

    • Lightly push down on the bottom cover and slide it towards the ON/OFF switch.

    • Remove the bottom cover.

    • During reassembly, make sure the bottom cover sits flush along the entire length of the keyboard. All clips need to lock back in place.

  7. Logitech Craft Battery Replacement, Remove the foam pieces: 步骤 7 中的图像 1,3 Logitech Craft Battery Replacement, Remove the foam pieces: 步骤 7 中的图像 2,3 Logitech Craft Battery Replacement, Remove the foam pieces: 步骤 7 中的图像 3,3
    在这个步骤中使用的工具:
    Tweezers
    $4.99
    购买
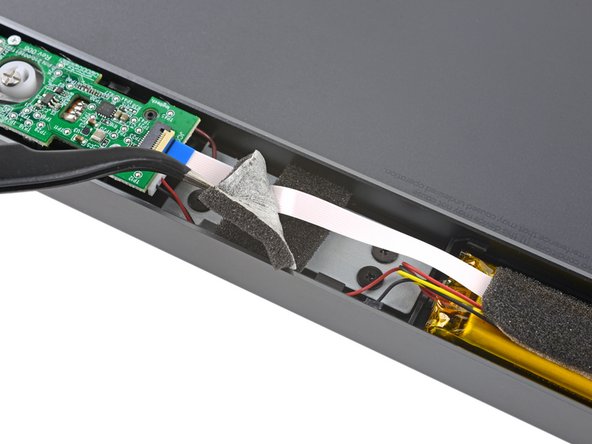
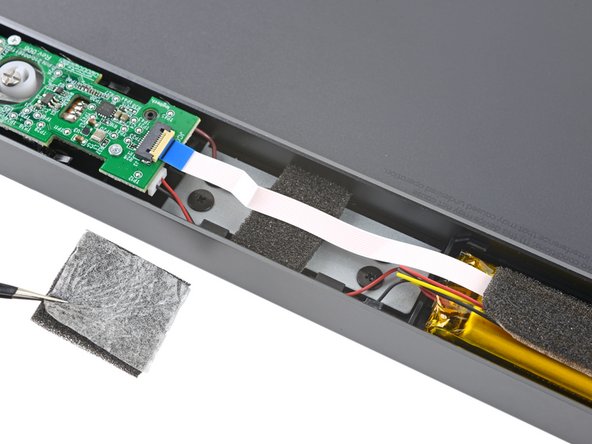
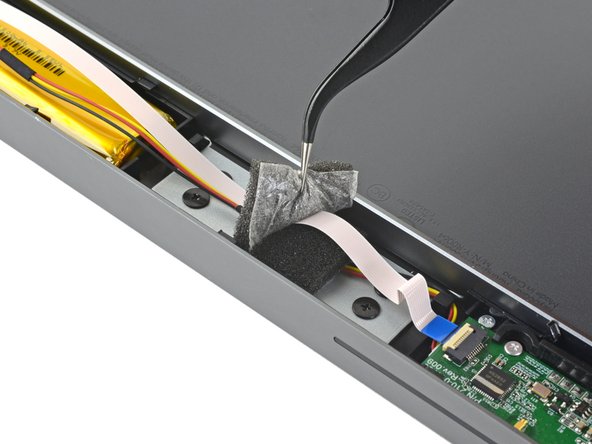
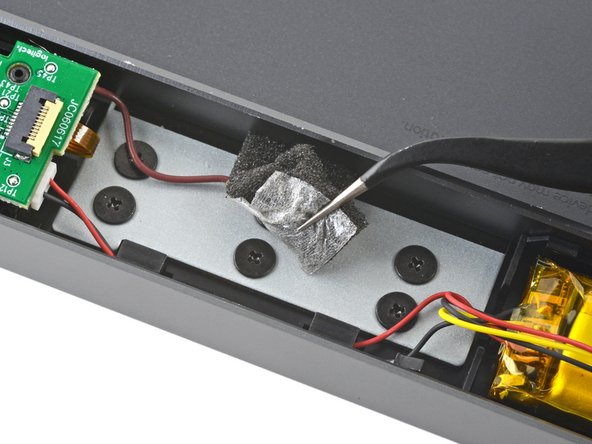
    • Various pieces of foam protect the battery wires and the interconnect ribbon cable. They'll need to be removed in order to access the battery.

    • Use a pair of tweezers to peel up and remove the first piece of foam covering the interconnect cable.

    • The foam pads are all secured with light adhesive.

    • Try your best to not rip these foam pads as you remove them, as ideally they're reused during reassembly.

  8. Logitech Craft Battery Replacement: 步骤 8 中的图像 1,2 Logitech Craft Battery Replacement: 步骤 8 中的图像 2,2
    • Remove the two remaining topmost pieces of foam from the keyboard.

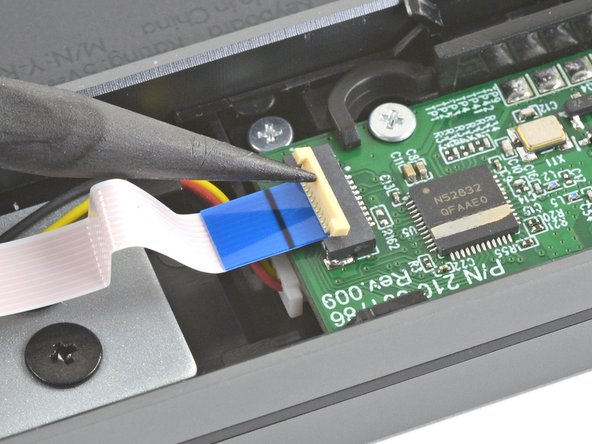
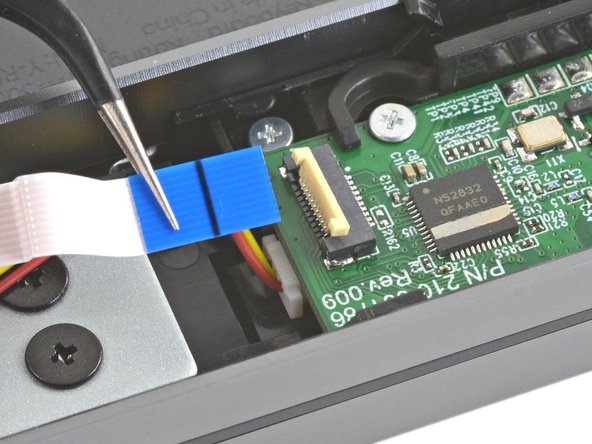
  9. Logitech Craft Battery Replacement, Remove the interconnect cable: 步骤 9 中的图像 1,3 Logitech Craft Battery Replacement, Remove the interconnect cable: 步骤 9 中的图像 2,3 Logitech Craft Battery Replacement, Remove the interconnect cable: 步骤 9 中的图像 3,3
    • Use the pointed end of a spudger to lift up the small locking flap on the interconnect cable's ZIF connector.

    • Use a pair of tweezers to slide the interconnect cable out of its connector.

    • Try to grip the cable by the blue plastic, not by the cable itself.

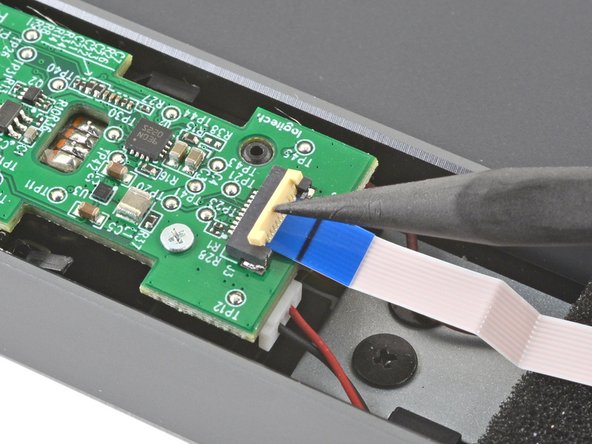
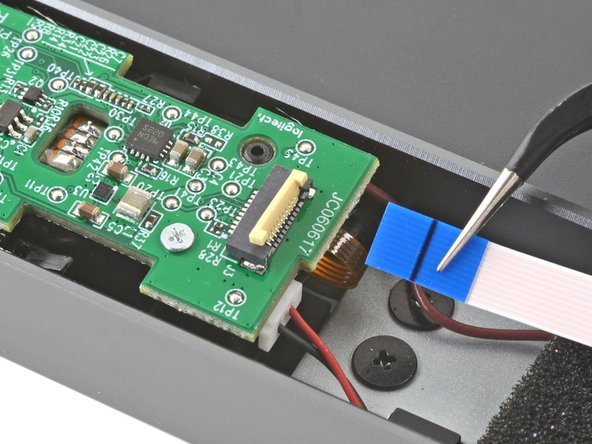
  10. Logitech Craft Battery Replacement: 步骤 10 中的图像 1,3 Logitech Craft Battery Replacement: 步骤 10 中的图像 2,3 Logitech Craft Battery Replacement: 步骤 10 中的图像 3,3
    • Use the pointed end of a spudger to lift up the small locking flap on the opposite end of the interconnect cable.

    • Use a pair of tweezers to slide the interconnect cable out of its connector.

    • Try to grip the cable by the blue plastic, not by the cable itself.

    • Remove the interconnect cable.

  11. Logitech Craft Battery Replacement, Remove the rest of the foam: 步骤 11 中的图像 1,2 Logitech Craft Battery Replacement, Remove the rest of the foam: 步骤 11 中的图像 2,2
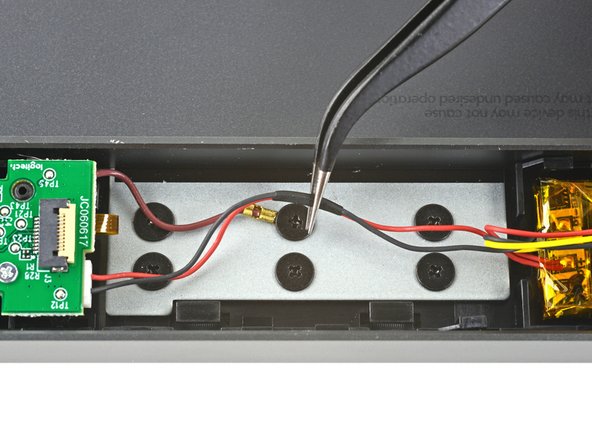
    • Use a pair of tweezers to remove the two remaining pieces of foam securing the battery wires.

  12. Logitech Craft Battery Replacement, De-route the battery wires: 步骤 12 中的图像 1,3 Logitech Craft Battery Replacement, De-route the battery wires: 步骤 12 中的图像 2,3 Logitech Craft Battery Replacement, De-route the battery wires: 步骤 12 中的图像 3,3
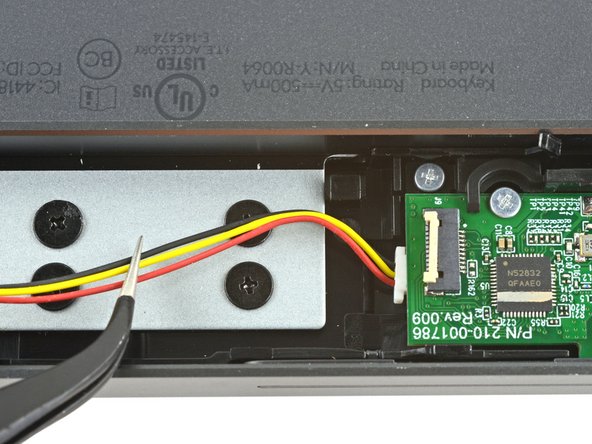
    • Use a pair of tweezers to slide the battery wires out from underneath their plastic cable routing clips, on either side of the battery.

  13. Logitech Craft Battery Replacement, Disconnect both battery connectors: 步骤 13 中的图像 1,2 Logitech Craft Battery Replacement, Disconnect both battery connectors: 步骤 13 中的图像 2,2
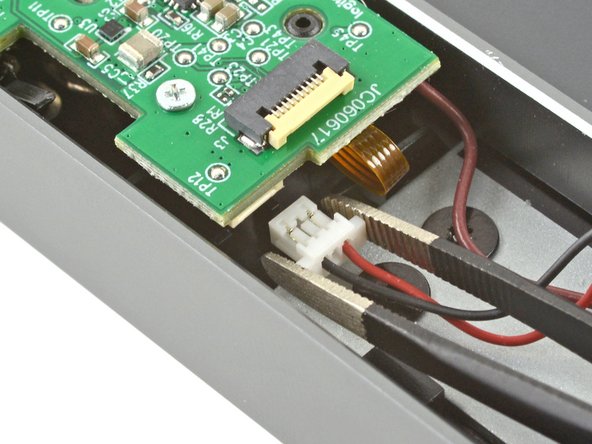
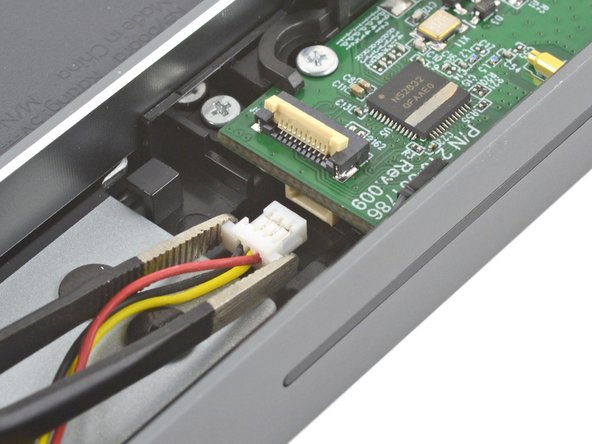
    • Use a pair of blunt tweezers to grip the edges of the left battery cable connector.

    • Pull the connector away from the left daughterboard to disconnect it.

    • Always pull cables by their connectors and not the wires themselves.

    • This may take some force. If you need to, use the tweezers to "walk" the connector side to side.

  14. Logitech Craft Battery Replacement: 步骤 14 中的图像 1,2 Logitech Craft Battery Replacement: 步骤 14 中的图像 2,2
    • Use the pair of blunt tweezers to grip the edges of the right battery cable connector.

    • Pull the connector away from the right daughterboard to disconnect it.

    • Always pull cables by their connectors and not the wires themselves.

    • This may take some force. If you need to, use the tweezers to "walk" the connector out, alternating pulling from side to side.

    • During reassembly, note that the battery connector that goes into the right board has three battery wires, and the left has two.

  15. Logitech Craft Battery Replacement, Remove the battery: 步骤 15 中的图像 1,3 Logitech Craft Battery Replacement, Remove the battery: 步骤 15 中的图像 2,3 Logitech Craft Battery Replacement, Remove the battery: 步骤 15 中的图像 3,3
    • Insert the flat edge of a spudger underneath one short edge of the battery.

    • Push the spudger underneath the battery, separating it from the adhesive holding it to the keyboard.

    • Make sure you push underneath the battery and not into it. Don't bend or deform the battery.

    • Remove the battery.

    • To install a replacement battery:

    • Remove any leftover adhesive from the battery well.

    • Apply double sided tape or pre-cut adhesive to secure the new battery.

结论

To reassemble your device, follow the above steps in reverse order.

Take your e-waste to an R2 or e-Stewards certified recycler.

Repair didn’t go as planned? Check out our Answers community for troubleshooting help.

8等其他人完成本指南。

Carsten Frauenheim

于03/10/20注册

115,421 声望

创作了339篇指南

团队

iFixit iFixit 的会员

Staff

136 名成员

创作了17,439篇指南

一条评论

fantastic instructions, where can I get a replacement battery?

Angel L Velazquez - 回复

添加评论

浏览统计数据:

过去 24 小时: 5

过去 7 天: 45

过去 30 天: 221

总计 6,338