
Lenovo ThinkPad Yoga 370 RAM Replacement

简介
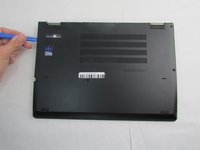
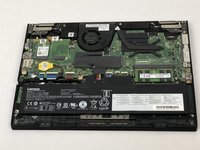
转到步骤 1For the Lenovo ThinkPad Yoga 370 (Model Number: 20JH002AUS), the Random Access Memory (RAM) is the memory module in the device that stores information. The RAM temporarily stores data and is the working memory of a computer. Oftentimes, the RAM can get overloaded and your device may experience various symptoms. These symptoms include but are not limited to: blue screen of death (BSoD), random freezing, slow performance, applications not loading, etc.
If you are looking to upgrade your RAM or replace faulty RAM sticks, this guide will show the process of replacing those components.


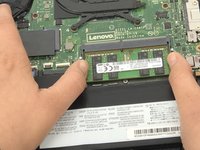

To reassemble your device, follow these instructions in reverse order.
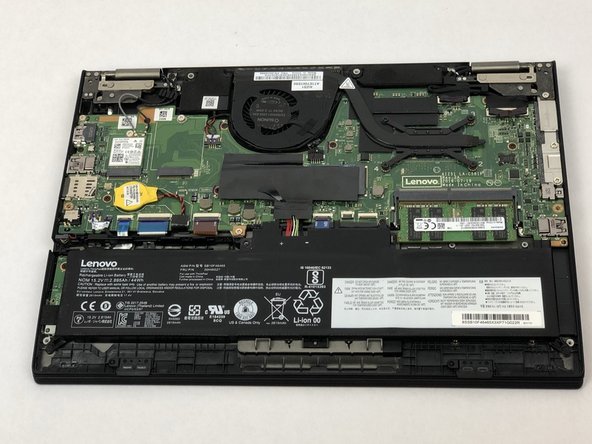
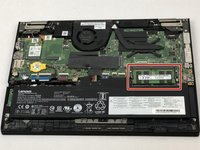
Note: Due to the similarity of the devices, several of the pictures were used from the Lenovo ThinkPad Yoga 260 Battery Replacement Guide to show the specific components that were missing in the Yoga 370.
To reassemble your device, follow these instructions in reverse order.
Note: Due to the similarity of the devices, several of the pictures were used from the Lenovo ThinkPad Yoga 260 Battery Replacement Guide to show the specific components that were missing in the Yoga 370.
4等其他人完成本指南。

团队

Embry-Riddle Aeronautical University, Team S12-G6, Lamothe Fall 2019 Embry-Riddle Aeronautical University, Team S12-G6, Lamothe Fall 2019 的会员
ERAU-LAMOTHE-F19S12G6
3 名成员
创作了5篇指南