跳转到主内容
加入维修社区 - 创建账户

Lenovo ThinkPad T560 Fan Replacement

你所需要的

    1. Lenovo ThinkPad T560 Fan Replacement, Back Panel: 步骤 1 中的图像 1,1
      • Before you begin this guide, make sure to disable the internal battery, power down the device and disconnect from any external power sources.

      • The external battery should be removed prior to back panel disassembly however this device doesn't have one so we aren't able to show the process.

      • Using the Phillips #0 screwdriver, remove the eight 7 mm screws holding the back panel to the T560.

      添加评论

    2. Lenovo ThinkPad T560 Fan Replacement: 步骤 2 中的图像 1,1
      • Use the iFixit opening tool to pry the back panel off your T560.

      • Work your way around the perimeter of the device to undo the clips and detach the back panel.

      询问修复机器人

      添加评论

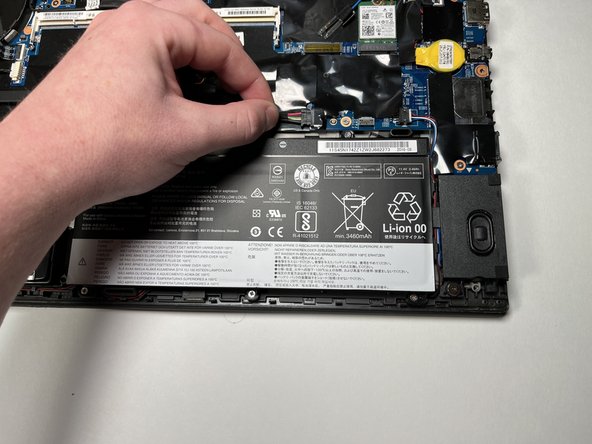
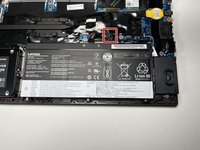
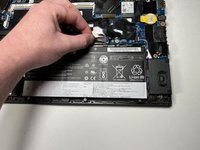
    1. Lenovo ThinkPad T560 Fan Replacement, Battery: 步骤 3 中的图像 1,2 Lenovo ThinkPad T560 Fan Replacement, Battery: 步骤 3 中的图像 2,2
      • Disconnect the battery connector from the motherboard by pulling it out of the port.

      询问修复机器人

      添加评论

    2. Lenovo ThinkPad T560 Fan Replacement: 步骤 4 中的图像 1,1
      • Using the Phillips #0 screwdriver, remove the five 3.5 mm screws securing the battery.

      • Remove the battery.

      询问修复机器人

      添加评论

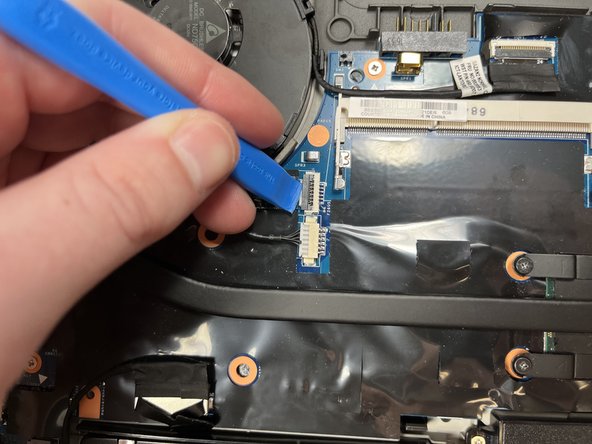
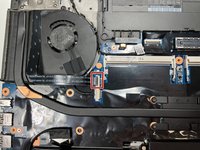
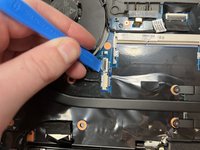
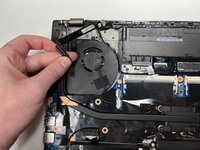
    1. Lenovo ThinkPad T560 Fan Replacement, Fan: 步骤 5 中的图像 1,3 Lenovo ThinkPad T560 Fan Replacement, Fan: 步骤 5 中的图像 2,3 Lenovo ThinkPad T560 Fan Replacement, Fan: 步骤 5 中的图像 3,3
      • Using the iFixit opening tool, unlatch the power button's connection to the motherboard.

      • Remove the ribbon cable from the connector.

      询问修复机器人

      添加评论

    2. Lenovo ThinkPad T560 Fan Replacement: 步骤 6 中的图像 1,1
      • Unplug the fan from the motherboard.

      询问修复机器人

      添加评论

    3. Lenovo ThinkPad T560 Fan Replacement: 步骤 7 中的图像 1,1
      • Using the Phillips #0 screwdriver, remove the four 3.5 mm screws securing the heatsink.

      询问修复机器人

      添加评论

    4. Lenovo ThinkPad T560 Fan Replacement: 步骤 8 中的图像 1,1
      • Using the Phillips #0 screwdriver, unscrew the 3.5mm screw securing the fan to the case.

      • Remove the fan and conjoined heatsink.

      询问修复机器人

      添加评论

结论

To reassemble your device, follow these instructions in reverse order.

取消:我没有完成这个指南。

团队

Clemson, Team 1-3, Hunter Spring 2022 Clemson, Team 1-3, Hunter Spring 2022 的会员

CLEM-HUNTER-S22S1G3

5 名成员

创作了44篇指南

0指南评论

添加评论

浏览统计数据:

过去 24 小时: 2

过去 7 天: 14

过去 30 天: 50

总计 1,750