
LG G Pad 8.3 Battery Replacement
简介
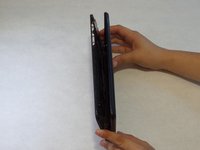
转到步骤 1If your LG G Pad 8.3 battery isn't working, it may be time to replace it. This guide will show you how to replace the battery.


-
-
With the tablet face down, pull the SD card slot cover out.
-
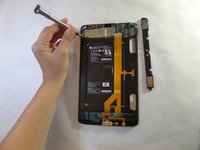
Using a Phillips #000 screwdriver, remove the 3mm screw located in the SD card slot.
-
-
-
在这个步骤中使用的工具:Magnetic Project Mat$19.95
-
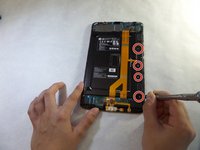
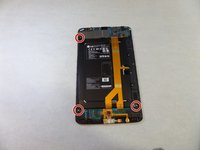
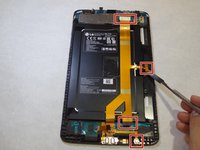
Remove the four 3 mm Phillips #000 screws that are attached to the speaker.
-


To reassemble your device, follow these instructions in reverse order.
To reassemble your device, follow these instructions in reverse order.
18等其他人完成本指南。
团队

CSU Fullerton, Team 1-6, Bruce Fall 2015 CSU Fullerton, Team 1-6, Bruce Fall 2015 的会员
CSUF-BRUCE-F15S1G6
4 名成员
创作了14篇指南
9条评论
Every teardown I can find on this tablet has that darn screw in the sd card slot, but mine does not!! Does ANYBODY have teardown for mine? I can send pics, it's Verizon Gpad 8.3 LTE, slot holds sd and sim but NO screw. Son spilled water on it so screen is all dark and haptic stays on, I'd like to attempt the rice trick if I can open it.
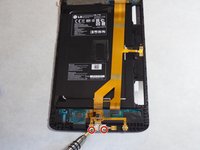
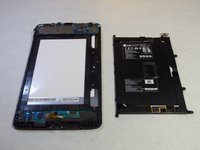
The other models have a sponge adhesive on the back of the battery.
Completely disregard the first screw.
Wesley - Me too. I have no idea why Android released two different models with the same freaking model name. I thought they had more common sense than that. If anyone has the teardown for the new model, holler.
sorry this teardown is not for the 8.3