
简介
转到步骤 1Use this guide to replace the loudspeaker in your Huawei Mate 8.


-
-
-
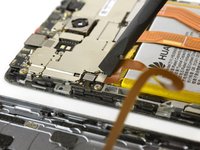
Remove the liquid indicator sticker.
-
Remove the Phillips #00 screw that holds down the metal shield.
-
Use a spudger to remove the metal shield.
-
-
-
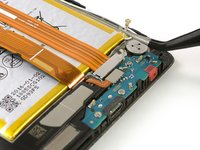
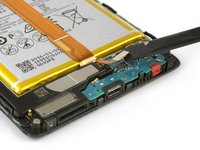
Remove the two Phillips #00 screws.
-
Use the flat end a spudger to disconnect the loudspeaker flex connector.
-
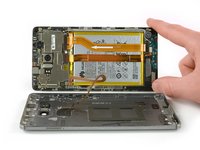
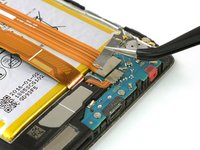
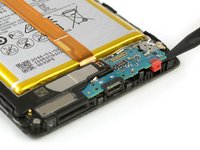
Use the pointy end of a spudger to pry out the daughterboard.
-
Remove the daughterboard.
-
-
-
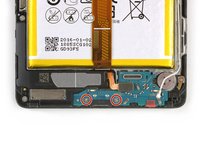
Remove the two Phillips #00 screws.
-
Use the tip of a spudger on the left side of the loudspeaker to pry it out.
-
Remove the loudspeaker.
-


To reassemble your device, follow these instructions in reverse order.
To reassemble your device, follow these instructions in reverse order.
4等其他人完成本指南。