跳转到主内容

Huawei Mate 10 Back Cover Replacement

你所需要的

  1. Huawei Mate 10 Back Cover Replacement, Remove the back cover: 步骤 1 中的图像 1,3 Huawei Mate 10 Back Cover Replacement, Remove the back cover: 步骤 1 中的图像 2,3 Huawei Mate 10 Back Cover Replacement, Remove the back cover: 步骤 1 中的图像 3,3
    • Heat an iOpener and apply it to the bottom edge of the phone for two minutes. Re-heat the iOpener as needed.

    • A hair dryer, heat gun, or hot plate may also be used, but be careful not to overheat the phone.

    • While you wait, note the location of the adhesive holding the back cover in place.

  2. Huawei Mate 10 Back Cover Replacement: 步骤 2 中的图像 1,3 Huawei Mate 10 Back Cover Replacement: 步骤 2 中的图像 2,3 Huawei Mate 10 Back Cover Replacement: 步骤 2 中的图像 3,3
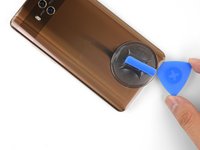
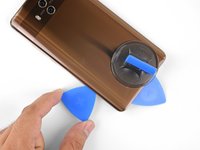
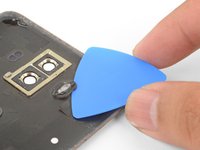
    • Place a suction cup near the bottom edge of the back cover, on the right side (opposite the speaker grille) of the USB-C charging port, above the microphone hole.

    • If your back cover is badly cracked, covering it with a layer of clear packing tape may allow the suction cup to adhere. If all else fails, you can superglue the suction cup to the back cover.

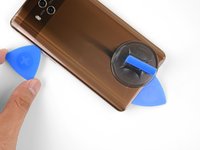
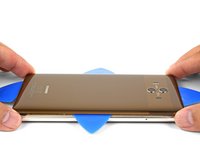
    • Pull on the suction cup with strong, steady force to create a gap.

    • Due to the adhesive's strength, this is very difficult and may take multiple attempts. If you can't create a gap, re-apply heat and try again.

    • Insert the point of an opening pick into the gap.

  3. Huawei Mate 10 Back Cover Replacement: 步骤 3 中的图像 1,3 Huawei Mate 10 Back Cover Replacement: 步骤 3 中的图像 2,3 Huawei Mate 10 Back Cover Replacement: 步骤 3 中的图像 3,3
    • Slide the pick along the bottom edge and around the bottom-left corner, slicing through the adhesive.

    • If the adhesive feels tacky and difficult to slice, re-apply heat to the edge and try again.

    • Leave an opening pick in the seam to prevent the edge from re-sealing.

  4. Huawei Mate 10 Back Cover Replacement: 步骤 4 中的图像 1,3 Huawei Mate 10 Back Cover Replacement: 步骤 4 中的图像 2,3 Huawei Mate 10 Back Cover Replacement: 步骤 4 中的图像 3,3
    • Apply a heated iOpener to the left edge of the phone.

    • Use an opening pick to slice through the adhesive on the left edge of the phone.

    • The adhesive is very thick in some areas. Sustained exposure to heat will help weaken the stubborn adhesive. Take your time, and apply heat liberally.

  5. Huawei Mate 10 Back Cover Replacement: 步骤 5 中的图像 1,2 Huawei Mate 10 Back Cover Replacement: 步骤 5 中的图像 2,2
    • Continue heating and slicing through the remaining edges, leaving opening picks in the seams to prevent the adhesive from re-sealing.

  6. Huawei Mate 10 Back Cover Replacement: 步骤 6 中的图像 1,3 Huawei Mate 10 Back Cover Replacement: 步骤 6 中的图像 2,3 Huawei Mate 10 Back Cover Replacement: 步骤 6 中的图像 3,3
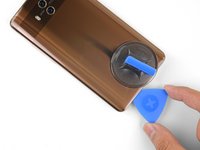
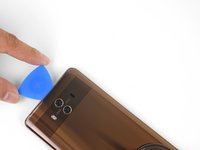
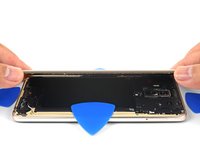
    • After you cut through the adhesive around the entire perimeter of the back cover, begin to lift it away from the phone.

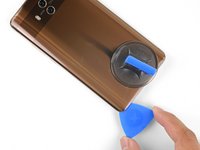
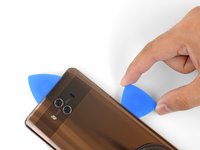
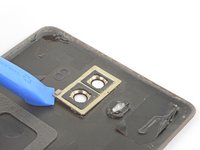
    • Use an opening pick to slice any remaining adhesive.

    • Remove the back cover.

    • During reassembly, this is a good point to power on your phone and test all functions before sealing it up. Be sure to power your phone back down completely before you continue working.

  7. Huawei Mate 10 Back Cover Replacement, Prep the phone for a new back cover: 步骤 7 中的图像 1,2 Huawei Mate 10 Back Cover Replacement, Prep the phone for a new back cover: 步骤 7 中的图像 2,2
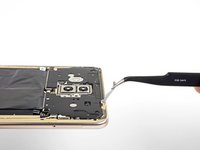
    • Before you install a replacement back cover, be sure to remove all traces of perimeter adhesive from the phone frame.

    • If you are re-using the back cover, carefully remove all traces of adhesive from the back cover.

    • The glass back cover is fragile and prone to cracking. Don't apply uneven pressure to the back cover as you clean.

    • You may pull up chunks of the cover's color coating as you remove the adhesive. To reduce the chances of this occurring, apply heat or high concentration isopropyl alcohol to the adhesive to weaken it.

  8. Huawei Mate 10 Back Cover Replacement: 步骤 8 中的图像 1,2 Huawei Mate 10 Back Cover Replacement: 步骤 8 中的图像 2,2
    • If your replacement back cover did not come with a flash diffuser or camera bezel, you will need to transfer them from your old cover to the new one.

    • Apply a heated iOpener directly over the bezels for a minute.

    • Use an opening pick to slice around the flash diffuser to loosen the adhesive.

    • The flash diffuser is made of plastic and cracks easily. Be sure to slice around the flash completely before you pry it off.

    • Use an opening tool to pry up and remove the camera bezel.

    • Transfer the parts to your replacement cover.

结论

To reassemble your device, follow these instructions in reverse order.

Repair didn’t go as planned? Try some basic troubleshooting, or ask our Mate 10 Answers community for help.

3等其他人完成本指南。

Arthur Shi

于01/03/18注册

253,295 声望

创作了526篇指南

团队

iFixit iFixit 的会员

Staff

135 名成员

创作了17,163篇指南

0条评论

添加评论

浏览统计数据:

过去 24 小时: 3

过去 7 天: 18

过去 30 天: 72

总计 4,766