简介
Use this guide to replace the interconnect cables on your Samsung Galaxy S21 Ultra.
This guide was performed on the SM-G998B/DS (international) model. Other models have an additional antenna cable sitting in the left edge of the midframe.
Use this guide to remove the interconnect cables on a Samsung Galaxy S21 Ultra.
你所需要的
-
-
Prepare an iOpener and apply it to the back cover for at least three minutes to loosen the adhesive underneath.
-
-
-
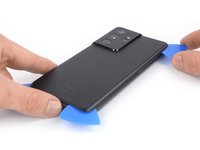
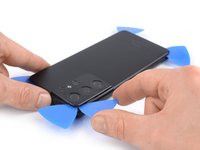
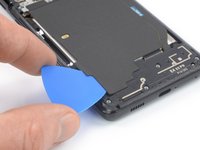
Secure a suction handle to the bottom edge of the back cover, as close to the edge as possible.
-
Lift the back cover with the suction handle to create a small gap between the back cover and the frame.
-
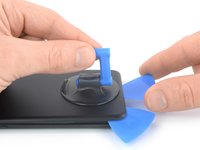
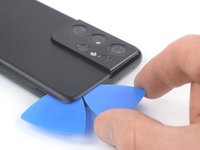
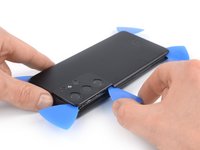
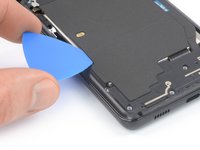
Insert an opening pick into the gap you created.
-
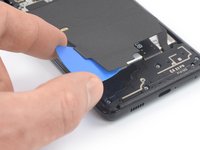
Slide the opening pick to the bottom left corner to slice the adhesive.
-
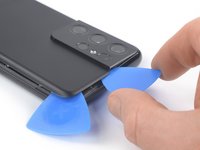
Leave the opening pick in place to prevent the adhesive from resealing.
-
-
-
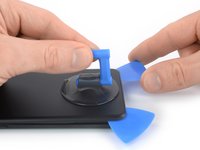
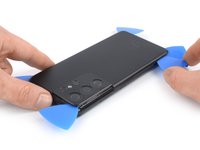
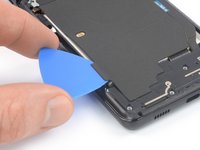
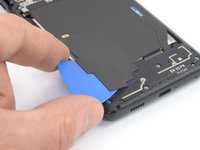
Insert a second opening pick at the bottom edge of your phone.
-
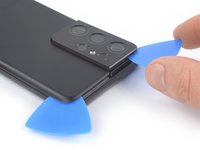
Slide the opening pick to the bottom right corner to slice the adhesive.
-
Leave the opening picks in place to prevent the adhesive from resealing.
-
-
在这个步骤中使用的工具:Tweezers$4.99
-
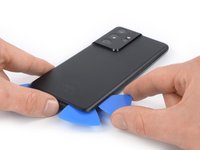
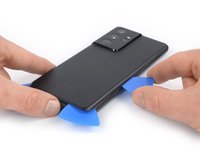
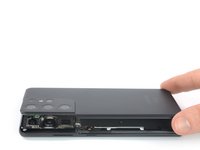
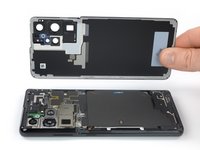
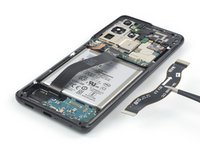
Remove the back cover.
-
This is a good point to power on your phone and test all functions before sealing it up. Be sure to power your phone back down completely before you continue working.
-
Remove any adhesive chunks with a pair of tweezers or your fingers.
-
Use some high concentration (over 90%) isopropyl alcohol to wipe away any adhesive residue.
-
If you're using custom-cut adhesives, follow this guide.
-
If you're using double-sided tape, follow this guide.
-
-
-
-
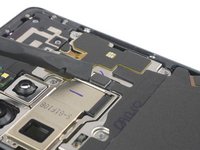
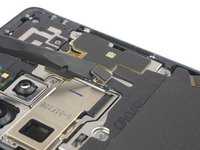
Insert an opening pick underneath the left bottom end of the NFC antenna and charging coil assembly.
-
Carefully slide the opening pick along the bottom left edge of the assembly to separate it from the battery.
-
-
-
Use a spudger to disconnect the charging coil by prying the connector straight up from its socket.
-
-
-
Use a spudger to disconnect the NFC antenna by prying the connector straight up from its socket.
-
-
-
Use a Phillips screwdriver to remove the five 3.9 mm-long screws securing the NFC antenna and charging coil assembly.
-
-
在这个步骤中使用的工具:Tweezers$4.99
-
Use a pair of tweezers or your fingers to carefully remove the NFC antenna and charging coil assembly.
-
-
-
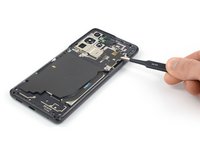
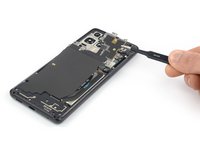
Use a spudger to disconnect the battery cable by prying the connector straight up from its socket.
-
-
-
Use a Phillips screwdriver to remove the four 3.9 mm-long screws securing the loudspeaker assembly.
-
-
-
Insert a spudger into the gap between the top edge of the loudspeaker assembly and the midframe.
-
Use your spudger to pry up the loudspeaker assembly by tilting it downwards.
-
-
-
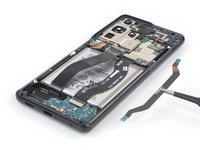
Use a spudger to disconnect the display flex cable by prying the connector straight up from its socket.
-
-
-
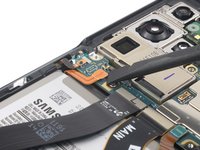
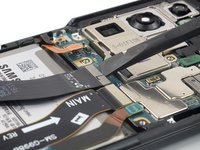
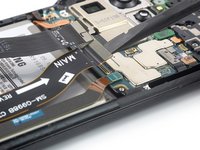
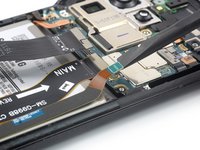
Use a spudger to disconnect the main and interconnect flex cables from the motherboard by prying their upper connectors straight up from their sockets.
-
-
在这个步骤中使用的工具:Tweezers$4.99
-
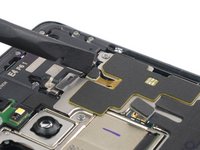
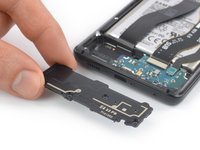
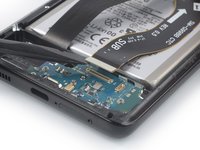
Use a spudger to disconnect the interconnect flex cable from the daughterboard by prying its bottom connector straight up from its socket.
-
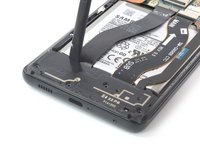
Use your fingers or a pair of tweezers to carefully remove the interconnect flex cable.
-
-
-
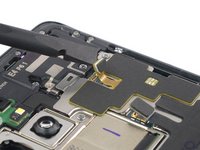
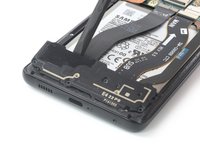
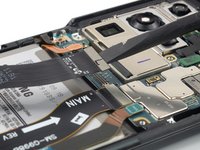
Use a spudger to disconnect the main flex cable from the daughterboard by prying its bottom connector straight up from its socket.
-
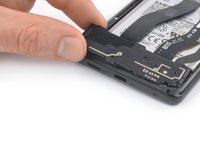
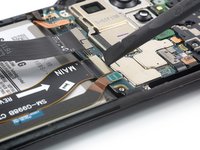
Use your fingers or a pair of tweezers to carefully remove the main flex cable.
-


If possible, turn on your device and test your repair before installing new adhesive and resealing.
Compare your new replacement part to the original part—you may need to transfer remaining components or remove adhesive backings from the new part before installing.
To reassemble your device, follow these instructions in reverse order.
After you've completed the repair, follow this guide to test your repair.
Take your e-waste to an R2 or e-Stewards certified recycler.
Repair didn’t go as planned? Try some basic troubleshooting, or ask our Answers community for help.


2条评论
Hi,
One month ago I dropped my phone in pool and I took it to the service center where they have dried out the phone. Everything was working fine but later only I was able to find out that the primary microphone is not working and also sim doesn't get detect. So couple of times I did resetting the phone pressing the volume down and power button and that fixed the SIM related issue. After couple of weeks again there was an error saying SIM can't be detected and I tried the same solution , after several attempts it detected again. Then again after two days the issue pops up once again. So I was able to find out that primary microphone and SIM card slot is in the same daughter board and thought of replacing it by myself. I got the new board and replaced it yesterday and still my microphone is not working. What would be the solution ? Is there anything I need to check/replace further like flex cables and all ? Please advise. Appreciate your help.
Thanks
Hola quería saber el nombre de esos 3 cables que lleva detrás ?? Ya que al mío lo lleve a reparar y me los robaron.