跳转到主内容
加入维修社区 - 创建账户

Hover-1 Charger Battery Replacement

你所需要的

    1. Hover-1 Charger Battery Replacement, Battery: 步骤 1 中的图像 1,2 Hover-1 Charger Battery Replacement, Battery: 步骤 1 中的图像 2,2
      • Flip the hoverboard over so that the warning label is facing up.

      • Remove the twelve 12 mm screws with a Phillips #2 screwdriver.

      • Remove the four 10 mm screws with a Phillips #2 screwdriver.

      • The screws nearest to the wheels may be hard to access. Be sure to use a long, thin screwdriver.

      添加评论

    2. Hover-1 Charger Battery Replacement: 步骤 2 中的图像 1,1
      • Pull the right cover away from the hoverboard to expose the battery.

      询问修复机器人

      添加评论

    3. Hover-1 Charger Battery Replacement: 步骤 3 中的图像 1,2 Hover-1 Charger Battery Replacement: 步骤 3 中的图像 2,2
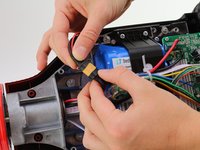
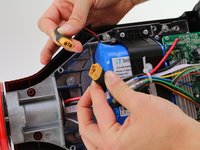
      • Unplug the battery by disconnecting the two pronged black and yellow cable.

      询问修复机器人

      添加评论

    4. Hover-1 Charger Battery Replacement: 步骤 4 中的图像 1,1
      • Pull the left cover away from the hoverboard.

      添加评论

    5. Hover-1 Charger Battery Replacement: 步骤 5 中的图像 1,2 Hover-1 Charger Battery Replacement: 步骤 5 中的图像 2,2
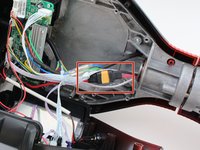
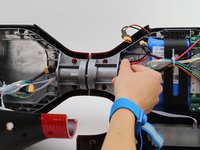
      • Disconnect the two pronged black and yellow cable.

      • Thread the cable through the middle cylinder of the hoverboard.

      询问修复机器人

      添加评论

    6. Hover-1 Charger Battery Replacement: 步骤 6 中的图像 1,2 Hover-1 Charger Battery Replacement: 步骤 6 中的图像 2,2
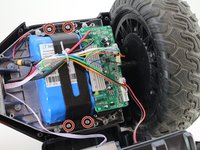
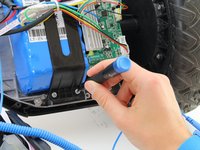
      • Unscrew the four 10mm screws that are holding the battery casing in place. Use a Phillips #2 screwdriver.

      • If there is a zip-tie connecting the wires together, carefully cut it with a wire cutters.

      询问修复机器人

      添加评论

    7. Hover-1 Charger Battery Replacement: 步骤 7 中的图像 1,3 Hover-1 Charger Battery Replacement: 步骤 7 中的图像 2,3 Hover-1 Charger Battery Replacement: 步骤 7 中的图像 3,3
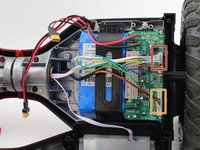
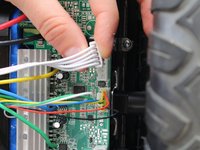
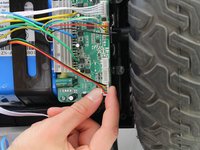
      • On the battery side, unplug the white five pin connector on the circuitboard.

      • Unplug the black, yellow, green and red connector on the circuitboard.

      询问修复机器人

      添加评论

    8. Hover-1 Charger Battery Replacement: 步骤 8 中的图像 1,1
      • Move all the loose cables to the side. Pull the battery casing away from the battery.

      询问修复机器人

      添加评论

    9. Hover-1 Charger Battery Replacement: 步骤 9 中的图像 1,1
      • Use the opening tool to remove the battery from the metal casing.

      • The battery is stuck to the metal casing with strong adhesive; do not be afraid to apply a strong force with the opening tool.

      询问修复机器人

      添加评论

    10. Hover-1 Charger Battery Replacement: 步骤 10 中的图像 1,1
      • Remove the battery.

      询问修复机器人

      添加评论

结论

To reassemble your device, follow these instructions in reverse order.

取消:我没有完成这个指南。

3等其他人完成本指南。

团队

Cal Poly, Team S12-G1, Regan Fall 2019 Cal Poly, Team S12-G1, Regan Fall 2019 的会员

CPSU-REGAN-F19S12G1

4 名成员

创作了6篇指南

1指南评论

Can I replace my battery 25.2v to a 36v.

Airie Green - 回复 分享

添加评论

浏览统计数据:

过去 24 小时: 1

过去 7 天: 17

过去 30 天: 75

总计 10,572