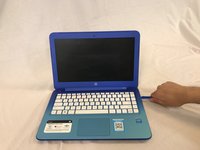
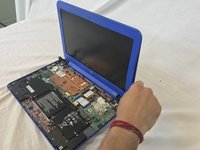
跳转到主内容
加入维修社区 - 创建账户

HP Stream 13-c010nr Display Replacement

你所需要的

  1. HP Stream 13-c010nr Display Replacement, laptop: 步骤 1 中的图像 1,1
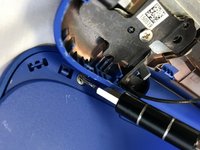
    • Remove the five rubber feet from the bottom of the laptop with a plastic opening tool.

    询问修复机器人

    添加评论

  2. HP Stream 13-c010nr Display Replacement: 步骤 2 中的图像 1,2 HP Stream 13-c010nr Display Replacement: 步骤 2 中的图像 2,2
    • Remove the thirteen 5mm Phillips #0 screws from the bottom case.

    询问修复机器人

    添加评论

  3. HP Stream 13-c010nr Display Replacement: 步骤 3 中的图像 1,2 HP Stream 13-c010nr Display Replacement: 步骤 3 中的图像 2,2
    • Flip the laptop over and open it up.

    • Wedge a plastic opening tool between the keyboard and bottom case, pry upwards to separate the two pieces.

    • Lift up the keyboard.

    • Ribbon cables still connect the two pieces.

    询问修复机器人

    添加评论

  4. HP Stream 13-c010nr Display Replacement: 步骤 4 中的图像 1,1
    • Use a spudger to flip up the retaining flaps on the keyboard ribbon cable ZIF sockets.

    • Pull up the ribbon cables from their sockets.

    询问修复机器人

    添加评论

  5. HP Stream 13-c010nr Display Replacement, Display: 步骤 5 中的图像 1,1
    • Remove the screw covers from the bottom corner edges of the screen.

    询问修复机器人

    添加评论

  6. HP Stream 13-c010nr Display Replacement: 步骤 6 中的图像 1,2 HP Stream 13-c010nr Display Replacement: 步骤 6 中的图像 2,2
    • Remove the two 5mm Phillips #0 screws from the screen bezel.

    询问修复机器人

    添加评论

  7. HP Stream 13-c010nr Display Replacement: 步骤 7 中的图像 1,2 HP Stream 13-c010nr Display Replacement: 步骤 7 中的图像 2,2
    • Wedge the plastic opening tool between the frame of the screen and the casing of the laptop.

    • Pry upwards on the plastic opening tool to separate the bezel from the display.

    询问修复机器人

    添加评论

  8. HP Stream 13-c010nr Display Replacement: 步骤 8 中的图像 1,1
    • Remove the four 3mm Phillips #0 screws from the screen.

    询问修复机器人

    添加评论

  9. HP Stream 13-c010nr Display Replacement: 步骤 9 中的图像 1,1
    • Use a spudger to flip up the retaining flap on the screen ribbon cable ZIF socket.

    • Pull the ribbon cable out of the ZIF socket.

    • Remove the screen.

    询问修复机器人

    添加评论

结论

To reassemble your device, follow these instructions in reverse order.

取消:我没有完成这个指南。

团队

USF Tampa, Team S1-G3, Cagle Spring 2018 USF Tampa, Team S1-G3, Cagle Spring 2018 的会员

USFT-CAGLE-S18S1G3

4 名成员

创作了12篇指南

0指南评论

添加评论

浏览统计数据:

过去 24 小时: 0

过去 7 天: 3

过去 30 天: 27

总计 1,032