跳转到主内容

HP Officejet Pro 8620 CMOS Battery Replacement

你所需要的

  1. HP Officejet Pro 8620 CMOS Battery Replacement, Left Panel: 步骤 1 中的图像 1,3 HP Officejet Pro 8620 CMOS Battery Replacement, Left Panel: 步骤 1 中的图像 2,3 HP Officejet Pro 8620 CMOS Battery Replacement, Left Panel: 步骤 1 中的图像 3,3
    • Turn off the printer and remove the power cable.

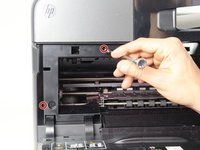
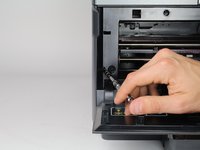
    • Remove two 13mm T9 screws using a T9-Torx screwdriver. Turn counterclockwise until the screws are released.

  2. HP Officejet Pro 8620 CMOS Battery Replacement: 步骤 2 中的图像 1,2 HP Officejet Pro 8620 CMOS Battery Replacement: 步骤 2 中的图像 2,2
    • Open the front door by placing your finger on the indented groove on the left side of the printer and pulling down

    • This will give you access to the two T9-TORX 13mm screws that need to be removed to release the panel.

  3. HP Officejet Pro 8620 CMOS Battery Replacement: 步骤 3 中的图像 1,2 HP Officejet Pro 8620 CMOS Battery Replacement: 步骤 3 中的图像 2,2
    • Remove the two 13mm screws with a T9-TORX screwdriver by turning counter-clockwise (left).

  4. HP Officejet Pro 8620 CMOS Battery Replacement: 步骤 4 中的图像 1,3 HP Officejet Pro 8620 CMOS Battery Replacement: 步骤 4 中的图像 2,3 HP Officejet Pro 8620 CMOS Battery Replacement: 步骤 4 中的图像 3,3
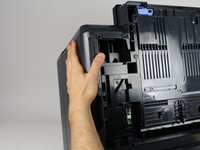
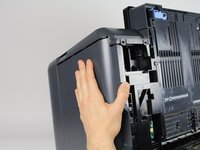
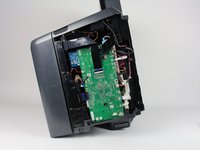
    • Gently remove the left side panel by placing your palm flat against the surface and pulling down.

  5. HP Officejet Pro 8620 CMOS Battery Replacement, CMOS Battery: 步骤 5 中的图像 1,1
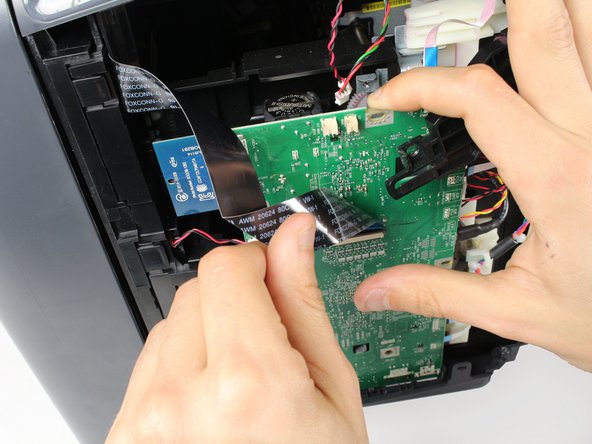
    • Gently bend the black ribbon cable by using your left hand.

    • Remove the 8mm T9-Torx screw under the black plastic cover by turning counter clockwise.

  6. HP Officejet Pro 8620 CMOS Battery Replacement: 步骤 6 中的图像 1,2 HP Officejet Pro 8620 CMOS Battery Replacement: 步骤 6 中的图像 2,2
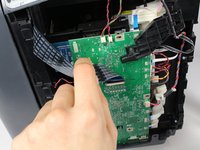
    • Gently move the black plastic cover to the side by using your right hand.

    • Place one finger behind the top of the motherboard where you removed the previous screw.

    • Gently pull the motherboard towards you by about an inch by using your right hand's finger.

  7. HP Officejet Pro 8620 CMOS Battery Replacement: 步骤 7 中的图像 1,1
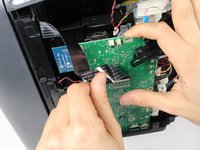
    • Gently remove the CMOS battery by using a finger from your left hand, while holding the motherboard with your right hand.

结论

To reassemble your device, follow these instructions in reverse order.

5等其他人完成本指南。

Michael

于01/24/18注册

331 声望

撰写一个指南

团队

Cal Poly, Team S19-G2, Livingston Winter 2018 Cal Poly, Team S19-G2, Livingston Winter 2018 的会员

CPSU-LIVINGSTON-W18S19G2

3 名成员

创作了8篇指南

3条评论

I removed the lithium CMOS 3 volt battery, connected 2 wires at +(red) and - (black). Open a hole at plastic cover, and now I’m using 2 AA in serial, in a holder externally. To refill the cartridges , first open the cover till carriage stops in the middle. Second disconnect the 120 V power cable. Third remove the external CMOS 2 AA batteries, from the holder . Forth remove ink cartridges, refill and install them in the carriage. Insert exterior CMOS 2 AA batteries in the holder, Connect the power cable and you are good to go.

Arbaches Glaukus - 回复

I removed all the board fasteners to be sure. That small metal hook down below your right thumb. Be careful there no to damage the board. 10 minutes and done!

servehimdaily - 回复

Apparently the screws are T10 not T9. T9 works but you'll slightly damage the screw.

dbovey - 回复

添加评论

浏览统计数据:

过去 24 小时: 4

过去 7 天: 27

过去 30 天: 168

总计 11,251