跳转到主内容
HP Envy M6-1205DX RAM Replacement

HP Envy M6-1205DX RAM Replacement

Ryan Hatton

Ryan Hatton5 其他贡献者

最后更新于 January 5, 2021

5 - 10 分钟
简单

If you are experiencing an issue with your RAM on a Hp Envy M6-1205DX, this guide can assist you in replacing your RAM. RAM is an important part of a PC as it allows for communication between a PCs hard drive and processor. The corruption of RAM can stem from many different issues including abrupt system rebooting and excessive heat. RAM that does not work properly can slow a computer's performance down or cause a computer to not function correctly. Should this happen to your computer, the steps to replacing it are easy to follow for beginners.

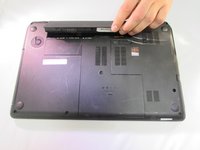
Before beginning the guide, turn off your computer and disconnect from the power cable and either disconnect or remove the battery.

你所需要的

工具

  1. HP Envy M6-1205DX RAM Replacement, Battery: 步骤 1 中的图像 1,1
    • Lay the device face down to begin.

  2. HP Envy M6-1205DX RAM Replacement: 步骤 2 中的图像 1,1
    • Slide the release mechanism to the left to release the battery.

  3. HP Envy M6-1205DX RAM Replacement: 步骤 3 中的图像 1,2 HP Envy M6-1205DX RAM Replacement: 步骤 3 中的图像 2,2
    • Remove the battery.

  4. HP Envy M6-1205DX RAM Replacement, Back Panel: 步骤 4 中的图像 1,1
    • Using a Phillips #1 screwdriver, remove the 8.6 mm screw.

  5. HP Envy M6-1205DX RAM Replacement: 步骤 5 中的图像 1,1
    • Slide the center panel down to remove it.

  6. HP Envy M6-1205DX RAM Replacement, RAM: 步骤 6 中的图像 1,1
    • To release the RAM push out on the two release mechanisms holding it down.

  7. HP Envy M6-1205DX RAM Replacement: 步骤 7 中的图像 1,1
    • Lift gently up on the RAM to position it for removal.

  8. HP Envy M6-1205DX RAM Replacement: 步骤 8 中的图像 1,1
    • Gently pull the RAM out of its slot.

  9. HP Envy M6-1205DX RAM Replacement: 步骤 9 中的图像 1,1
    • Upon removing the first stick of RAM you will find a second RAM stick located beneath it.

    • Release the second RAM stick by pushing the two release mechanisms outward.

    • Pull the RAM stick out.

结论

To reassemble your device, follow these instructions in reverse order.

Ryan Hatton

于11/16/19注册

634 声望

创作了5篇指南

团队

IUPUI, Team S2-G2, Wilson Fall 2019 IUPUI, Team S2-G2, Wilson Fall 2019 的会员

IUPUI-WILSON-F19S2G2

4 名成员

创作了5篇指南

0指南评论

添加评论

浏览统计数据:

过去 24 小时: 0

过去 7 天: 1

过去 30 天: 2

总计 273