跳转到主内容
Gateway Solo 1200  RAM Replacement

Gateway Solo 1200 RAM Replacement

Addison

Addison4 其他贡献者

最后更新于 October 17, 2020

5 - 10 分钟
简单

Follow this replacement guide to replace or upgrade your RAM stick.

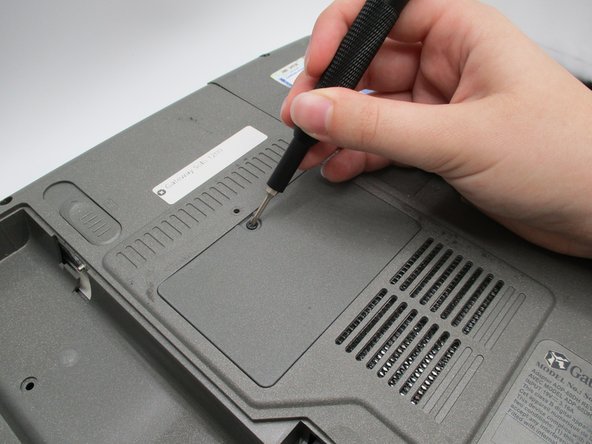
Adding memory is one of the easiest ways to boost your Gateway Solo 1200’s performance. To find how much RAM your computer has, go to the device specifications in your PC’s settings. This will not only tell you how much RAM your computer has but also how much RAM it can support for possible upgrades.

你所需要的

工具

  1. Gateway Solo 1200  RAM Replacement, Battery: 步骤 1 中的图像 1,3 Gateway Solo 1200  RAM Replacement, Battery: 步骤 1 中的图像 2,3 Gateway Solo 1200  RAM Replacement, Battery: 步骤 1 中的图像 3,3
    • Turn off your laptop and disconnect it from AC Adapter before use.

    • Locate the battery latch on the bottom of the laptop.

    • Release the latch by pressing it with your thumb and sliding it to the right.

    • Slide the battery out of its compartment.

    • Discharge your laptop by pushing the power button after removing the battery.

  2. Gateway Solo 1200  RAM Replacement, RAM: 步骤 2 中的图像 1,1
    • Locate the RAM compartment on the underside of the laptop near the center.

  3. Gateway Solo 1200  RAM Replacement: 步骤 3 中的图像 1,2 Gateway Solo 1200  RAM Replacement: 步骤 3 中的图像 2,2
    • Open the RAM compartment by unscrewing the 2 mm screw with a Phillips #0 screwdriver.

    • Once unscrewed, lift off the compartment cover.

  4. Gateway Solo 1200  RAM Replacement: 步骤 4 中的图像 1,1
    • Press the silver retention levers on either side of the RAM away from the center of the RAM.

    • The RAM stick will pop up after the retention levers are released.

  5. Gateway Solo 1200  RAM Replacement: 步骤 5 中的图像 1,1
    • Pull the RAM stick out of its socket.

结论

To reassemble your device, follow these instructions in reverse order.

5等其他人完成本指南。

Addison

于08/30/19注册

3,024 声望

创作了17篇指南

0条评论

添加评论

浏览统计数据:

过去 24 小时: 0

过去 7 天: 2

过去 30 天: 21

总计 826