跳转到主内容

Fitbit Blaze Motherboard Replacement

你所需要的

  1. Fitbit Blaze Motherboard Replacement, Wristband: 步骤 1 中的图像 1,2 Fitbit Blaze Motherboard Replacement, Wristband: 步骤 1 中的图像 2,2
    • Locate the front LCD screen on your device.

    • Fitbit logo should appear in the bottom center of the screen.

  2. Fitbit Blaze Motherboard Replacement: 步骤 2 中的图像 1,1
    • Push the screen out through the back of the metal ring enclosure.

    • Use a small amount of force on screen to prevent damage. Use other hand to catch screen.

  3. Fitbit Blaze Motherboard Replacement: 步骤 3 中的图像 1,3 Fitbit Blaze Motherboard Replacement: 步骤 3 中的图像 2,3 Fitbit Blaze Motherboard Replacement: 步骤 3 中的图像 3,3
    • Locate the metal pin behind the wristband located on the edge of metal ring.

    • Insert the pointed end of the metal spudger into the pin hold and push it into the blue rectangle enclosure.

    • Use a small amount of force to avoid damaging the pins.

    • Remove wristband.

  4. Fitbit Blaze Motherboard Replacement, Display Frame: 步骤 4 中的图像 1,3 Fitbit Blaze Motherboard Replacement, Display Frame: 步骤 4 中的图像 2,3 Fitbit Blaze Motherboard Replacement, Display Frame: 步骤 4 中的图像 3,3
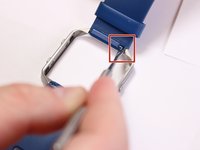
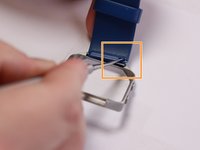
    • Locate the pin behind the second wristband located on the edge of metal ring.

    • Insert the pointed end of the metal spudger into the pin hold and push it into opposite direction.
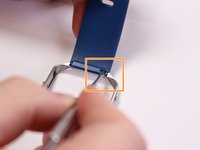
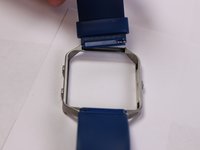
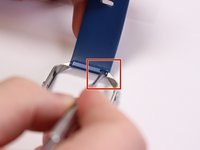
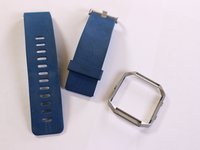
    • Use a small amount of force to avoid damaging the pins.

    • Remove wristband.

  5. Fitbit Blaze Motherboard Replacement, Motherboard: 步骤 5 中的图像 1,3 Fitbit Blaze Motherboard Replacement, Motherboard: 步骤 5 中的图像 2,3 Fitbit Blaze Motherboard Replacement, Motherboard: 步骤 5 中的图像 3,3
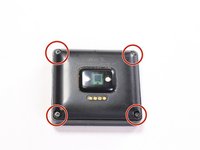
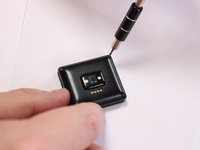
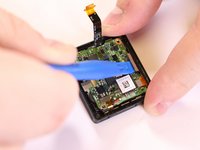
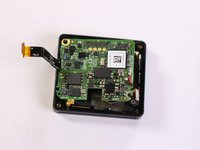
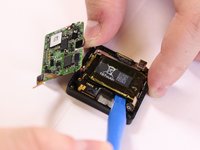
    • Place device screen face down and locate the four screws attaching the back cover.

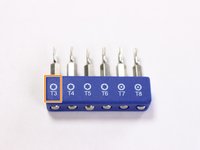
    • Use a T3 torx head or T3 torx screwdriver to remove the four screws.

  6. Fitbit Blaze Motherboard Replacement: 步骤 6 中的图像 1,3 Fitbit Blaze Motherboard Replacement: 步骤 6 中的图像 2,3 Fitbit Blaze Motherboard Replacement: 步骤 6 中的图像 3,3
    • Grab the back, lift and open like a book to expose the motherboard. Locate the ribbon connector on the left.

    • Use a plastic spudger tool on the ribbon connected from the heart rate monitor to the motherboard.

    • Insert and lift the plastic connector to release the ribbon.

    • Only a small force when lifting the plastic connector is needed to avoid damage.

  7. Fitbit Blaze Motherboard Replacement: 步骤 7 中的图像 1,3 Fitbit Blaze Motherboard Replacement: 步骤 7 中的图像 2,3 Fitbit Blaze Motherboard Replacement: 步骤 7 中的图像 3,3
    • Separate the back and set aside, locate the three screws attaching the motherboard.

    • Use a PH000 head or a PH000 screwdriver to remove the three screws.

  8. Fitbit Blaze Motherboard Replacement: 步骤 8 中的图像 1,3 Fitbit Blaze Motherboard Replacement: 步骤 8 中的图像 2,3 Fitbit Blaze Motherboard Replacement: 步骤 8 中的图像 3,3
    • Use a plastic spudger tool on the ribbons connected to the motherboard.

    • Insert the tool under the ribbon and lift to release the connection.

    • Only a small force when lifting the plastic connector is needed to avoid damage.

  9. Fitbit Blaze Motherboard Replacement: 步骤 9 中的图像 1,3 Fitbit Blaze Motherboard Replacement: 步骤 9 中的图像 2,3 Fitbit Blaze Motherboard Replacement: 步骤 9 中的图像 3,3
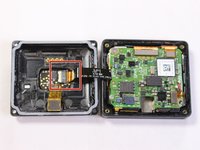
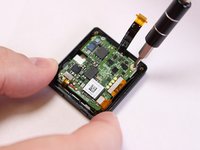
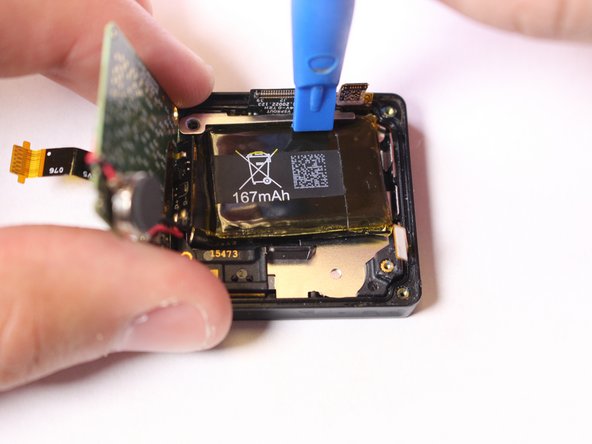
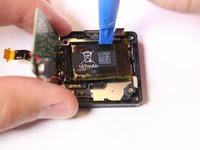
    • Lift and push the motherboard to the side to uncover the 167mAh battery.

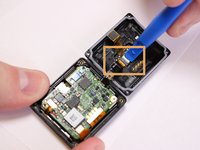
    • Use a plastic spudger tool to pry out the battery from its adhesive plastic underneath.

    • Lift up and pull downward to remove battery. Switch to the top portion of the battery and push downward to pry out battery.

  10. Fitbit Blaze Motherboard Replacement: 步骤 10 中的图像 1,2 Fitbit Blaze Motherboard Replacement: 步骤 10 中的图像 2,2
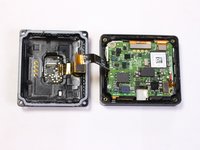
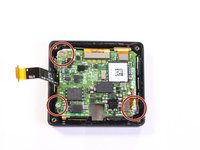
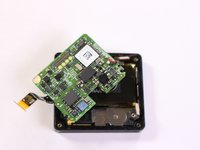
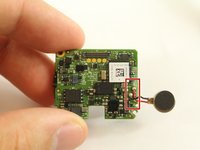
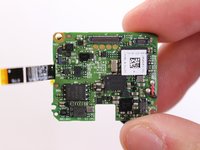
    • Flip the motherboard to located the metal pins from the battery soldered to the board.

    • Desolder the connection to remove the battery component.

    • Follow this guide on how to solder and desolder connectors Soldering Guide

    • Excessive heat will damage the components, so do not apply the soldering iron to the component for long amounts of time.

  11. Fitbit Blaze Motherboard Replacement: 步骤 11 中的图像 1,3 Fitbit Blaze Motherboard Replacement: 步骤 11 中的图像 2,3 Fitbit Blaze Motherboard Replacement: 步骤 11 中的图像 3,3
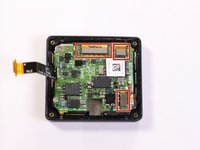
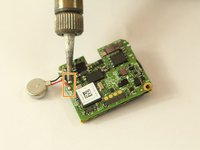
    • Flip the motherboard back to the front to locate the metal pins from the vibration motor soldered to the board.

    • Desolder the connection to remove the motor component.

    • Follow this guide on how to solder and desolder connectors Soldering Guide

    • Excessive heat will damage the components, so do not apply the soldering iron to the component for long amounts of time.

结论

To reassemble your device, follow these instructions in reverse order. This replacement requires resoldering the battery and vibration motor onto the motherboard.

2等其他人完成本指南。

Adrian Borrego

于02/20/17注册

2,242 声望

创作了5篇指南

团队

USF Tampa, Team S3-G3, Sullivan Spring 2017 USF Tampa, Team S3-G3, Sullivan Spring 2017 的会员

USFT-SULLIVAN-S17S3G3

4 名成员

创作了15篇指南

4条评论

Great guide, thank you!

Jacob Gilbert - 回复

the question is where do you buy the motherboard or the battery ??

amir ibrahim - 回复

That's a great procedure.  have you tried to replace the LCD screen.  I have cracked my screen and purchased one off ebay.  Not sure how to separate the LCD screen assembly (screen frame and LCD screen) to replace just the screen.  Any advice would be welcomed. :)

David Pearson - 回复

the fitbib blaze screen is glued on with an adhesive .. It can  be separated from middle portion by applying heat to the screen like you do if it was an iPhone 3 or 4…I used a hair dryer… be sure to apply heat evenly and keep it moving in a circle around the screen… ujntil you can push the screen apart from the back… DO NOT USE A LOT OF HEAT……It will seperat with just a little heat… sneak up on it…..

                                                                                                                                                                                                                                                                           ljs

larry smiley -

添加评论

浏览统计数据:

过去 24 小时: 0

过去 7 天: 2

过去 30 天: 16

总计 8,047