跳转到主内容
Dell Inspiron 7573 2-in-1 Memory Modules (RAM) Replacement

Dell Inspiron 7573 2-in-1 Memory Modules (RAM) Replacement

Brady Kennedy

Brady Kennedy2 其他贡献者

最后更新于 January 3, 2022

30分钟
中等

This guide will walk you through how the replace the memory modules (also known as RAM chips/cards) on your Dell Inspiron 7573 2-in-1 computer. The RAM (Random Access Memory) is responsible for the short term storage of data that needs to be accessed quickly by your computer. If you are experiencing frequent crashes, slow performance, or trouble during startup, replacing or upgrading your RAM may alleviate these issues.

你所需要的

工具

查看更多...

  1. Dell Inspiron 7573 2-in-1 Memory Modules (RAM) Replacement, Battery: 步骤 1 中的图像 1,2 Dell Inspiron 7573 2-in-1 Memory Modules (RAM) Replacement, Battery: 步骤 1 中的图像 2,2
    • Make sure computer is off before you begin.

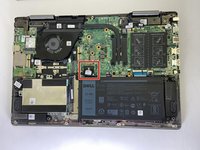
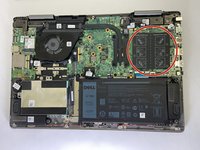
    • Remove the four 5 mm screws from the bottom edge of the laptop using a Phillips #00 screwdriver.

    • Loosen the remaining six captive screws from the bottom cover with a Phillips #00 screwdriver.

  2. Dell Inspiron 7573 2-in-1 Memory Modules (RAM) Replacement: 步骤 2 中的图像 1,3 Dell Inspiron 7573 2-in-1 Memory Modules (RAM) Replacement: 步骤 2 中的图像 2,3 Dell Inspiron 7573 2-in-1 Memory Modules (RAM) Replacement: 步骤 2 中的图像 3,3
    • Using a spudger, pry off the bottom cover by gently prying from corner to corner in order to disengage the plastic clips.

    • Lift off the bottom cover.

    • After the base cover is removed, your laptop should look similar as depicted in the images provided.

  3. Dell Inspiron 7573 2-in-1 Memory Modules (RAM) Replacement: 步骤 3 中的图像 1,1
    • Remove the four 3 mm screws holding the battery in place with a Phillips #00 screwdriver.

  4. Dell Inspiron 7573 2-in-1 Memory Modules (RAM) Replacement: 步骤 4 中的图像 1,3 Dell Inspiron 7573 2-in-1 Memory Modules (RAM) Replacement: 步骤 4 中的图像 2,3 Dell Inspiron 7573 2-in-1 Memory Modules (RAM) Replacement: 步骤 4 中的图像 3,3
    • Using the pull tab, disconnect the battery cable from the system board.

    • Lift the battery out from the laptop case.

  5. Dell Inspiron 7573 2-in-1 Memory Modules (RAM) Replacement, Memory Modules: 步骤 5 中的图像 1,2 Dell Inspiron 7573 2-in-1 Memory Modules (RAM) Replacement, Memory Modules: 步骤 5 中的图像 2,2
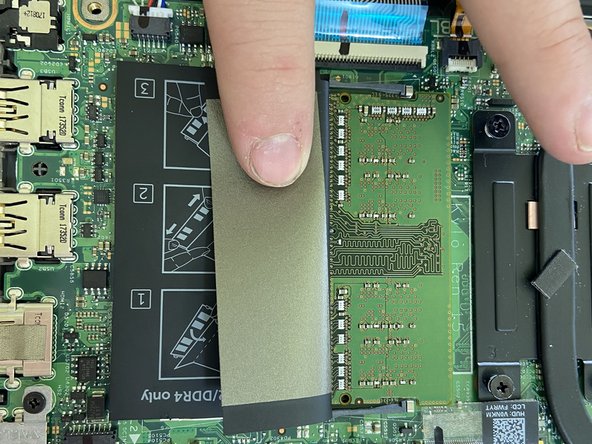
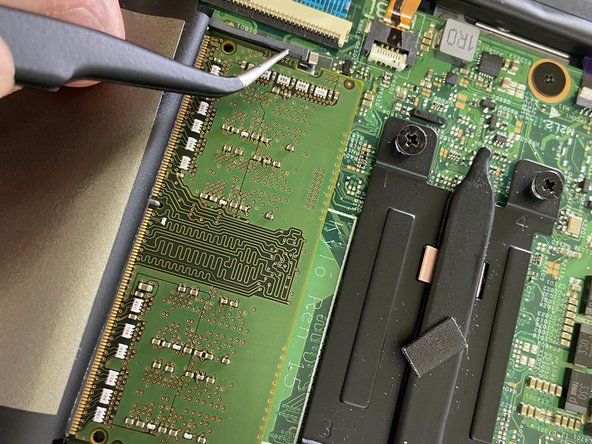
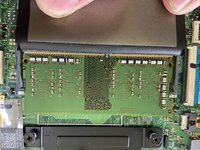
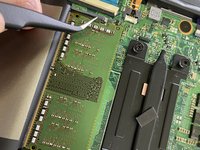
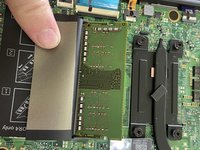
    • Peel back the mylar coverings on the RAM chips on the right side of the system board.

  6. Dell Inspiron 7573 2-in-1 Memory Modules (RAM) Replacement: 步骤 6 中的图像 1,3 Dell Inspiron 7573 2-in-1 Memory Modules (RAM) Replacement: 步骤 6 中的图像 2,3 Dell Inspiron 7573 2-in-1 Memory Modules (RAM) Replacement: 步骤 6 中的图像 3,3
    • Push outward on the two gray tabs on either side of the RAM module.

    • These tabs hold down the RAM modules, which should pop up when disengaged.

    • Gently pull the memory module out of its slot.

    • Be sure to only touch the edges of the RAM module, as the oil from your fingers can damage the components on the face.

  7. Dell Inspiron 7573 2-in-1 Memory Modules (RAM) Replacement: 步骤 7 中的图像 1,1
    • With the new memory module, line up the notch on the memory with the tab on the module slot.

    • Insert the memory module at an angle.

    • Push down on the module until the locking tabs on either side click into place.

    • If there is no click, reinsert the module.

  8. Dell Inspiron 7573 2-in-1 Memory Modules (RAM) Replacement: 步骤 8 中的图像 1,1
    • Repeat steps 5-7 for the other memory module.

    • In this laptop, one set of tabs was gray plastic and the other was metallic.

    • When pushing down on the memory modules, make sure you hear a click.

结论

To reassemble your device, follow these instructions in reverse order.

另外一个人完成了本指南。

Brady Kennedy

于09/27/21注册

109 声望

撰写一个指南

团队

Casper College, Team 1-2, Lareau Fall 2021 Casper College, Team 1-2, Lareau Fall 2021 的会员

CASC-LAREAU-F21S1G2

3 名成员

创作了4篇指南

0条评论

添加评论

浏览统计数据:

过去 24 小时: 0

过去 7 天: 7

过去 30 天: 13

总计 296