跳转到主内容
Dell Inspiron 3148 CMOS Battery Replacement

Dell Inspiron 3148 CMOS Battery Replacement

Christopher Gravelle

Christopher Gravelle2 其他贡献者

最后更新于 May 7, 2024

10 - 15 分钟
中等
动态照片拍摄

Is your computer constantly resetting the time and date? Consider using this guide to replace the CMOS battery in your device.

你所需要的

工具

查看更多...

  1. Dell Inspiron 3148 CMOS Battery Replacement, Back Panel: 步骤 1 中的图像 1,2 Dell Inspiron 3148 CMOS Battery Replacement, Back Panel: 步骤 1 中的图像 2,2
    • Ensure the device is powered off and unplugged. Close the device and orient it face up, with the hinges further away from you.

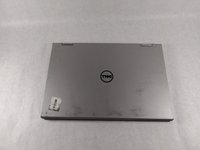
    • Flip the device over so the backside is facing you.

  2. Dell Inspiron 3148 CMOS Battery Replacement: 步骤 2 中的图像 1,1
    • Using the Phillips #1 screwdriver, remove all nine 7mm screws.

  3. Dell Inspiron 3148 CMOS Battery Replacement: 步骤 3 中的图像 1,2 Dell Inspiron 3148 CMOS Battery Replacement: 步骤 3 中的图像 2,2
    • Using the plastic opening tool, pull the back panel upward. Move the opening tool along the edge of the device and lift the panel off of your device.

    • Be aware, the back panel is kept in place by magnetic clips. They will offer some resistance, but continue to gently leverage upwards.

  4. Dell Inspiron 3148 CMOS Battery Replacement, CMOS Battery: 步骤 4 中的图像 1,3 Dell Inspiron 3148 CMOS Battery Replacement, CMOS Battery: 步骤 4 中的图像 2,3 Dell Inspiron 3148 CMOS Battery Replacement, CMOS Battery: 步骤 4 中的图像 3,3
    在这个步骤中使用的工具:
    Tweezers
    $4.99
    • Using a pair of tweezers, lift the exposed edge of the CMOS battery upward.

    • Once the CMOS battery has been loosened, remove it from the device.

结论

To reassemble your device, follow these instructions in reverse order.

另外一个人完成了本指南。

团队

UMass Dartmouth, Team S1-G2, Simcock Fall 2018 UMass Dartmouth, Team S1-G2, Simcock Fall 2018 的会员

UMASSD-SIMCOCK-F18S1G2

3 名成员

创作了7篇指南

0条评论

添加评论

浏览统计数据:

过去 24 小时: 3

过去 7 天: 4

过去 30 天: 19

总计 311