跳转到主内容
Dell Inspiron 17" 7786 2-in-1 Motherboard Replacement

Dell Inspiron 17" 7786 2-in-1 Motherboard Replacement

Antonio Franco

Antonio Franco 另一个贡献者

最后更新于 December 28, 2022

10分钟
中等
更好的介绍

This system board is packed with NVIDIA Geforce MX150 and an Intel i5 or i7 Processor! Unfortunately it is not possible to remove these components from the system board.

你所需要的

工具

查看更多...

  1. Dell Inspiron 17" 7786 2-in-1 Motherboard Replacement, Base Cover: 步骤 1 中的图像 1,2 Dell Inspiron 17" 7786 2-in-1 Motherboard Replacement, Base Cover: 步骤 1 中的图像 2,2
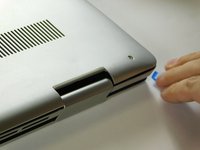
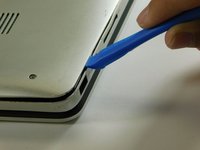
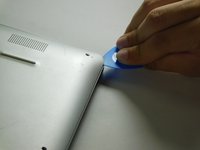
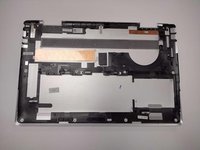
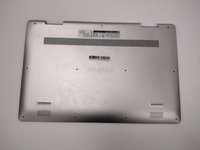
    • Remove the eight M2 5mm screws that secure the base cover using a Phillips #0 screwdriver.

  2. Dell Inspiron 17" 7786 2-in-1 Motherboard Replacement: 步骤 2 中的图像 1,2 Dell Inspiron 17" 7786 2-in-1 Motherboard Replacement: 步骤 2 中的图像 2,2
    • Loosen the three captive screws that secure the base closer to the hinges.

    • Do not attempt to remove the three captive screws! You need only to loosen them. They're supposed to stay on the base cover.

  3. Dell Inspiron 17" 7786 2-in-1 Motherboard Replacement: 步骤 3 中的图像 1,3 Dell Inspiron 17" 7786 2-in-1 Motherboard Replacement: 步骤 3 中的图像 2,3 Dell Inspiron 17" 7786 2-in-1 Motherboard Replacement: 步骤 3 中的图像 3,3
    • Carefully pry the base cover using an iFixit opening tool in the crevice near the hinges. Guide the pick along the edges and slightly lift upwards as you go along.

    • Do not start from the speaker end of the edges when opening, or you may cause further damage to your device!

  4. Dell Inspiron 17" 7786 2-in-1 Motherboard Replacement: 步骤 4 中的图像 1,3 Dell Inspiron 17" 7786 2-in-1 Motherboard Replacement: 步骤 4 中的图像 2,3 Dell Inspiron 17" 7786 2-in-1 Motherboard Replacement: 步骤 4 中的图像 3,3
    • Carefully remove the base cover from the laptop.

  5. Dell Inspiron 17" 7786 2-in-1 Motherboard Replacement, Memory Modules (RAM): 步骤 5 中的图像 1,1
    • Lift the cover to gain access to the memory module.

  6. Dell Inspiron 17" 7786 2-in-1 Motherboard Replacement: 步骤 6 中的图像 1,2 Dell Inspiron 17" 7786 2-in-1 Motherboard Replacement: 步骤 6 中的图像 2,2
    • Carefully open the securing clips on the end of each memory module slot until the module stick sticks up.

  7. Dell Inspiron 17" 7786 2-in-1 Motherboard Replacement: 步骤 7 中的图像 1,3 Dell Inspiron 17" 7786 2-in-1 Motherboard Replacement: 步骤 7 中的图像 2,3 Dell Inspiron 17" 7786 2-in-1 Motherboard Replacement: 步骤 7 中的图像 3,3
    • Remove the memory module by sliding it out of the slot.

  8. Dell Inspiron 17" 7786 2-in-1 Motherboard Replacement, Wireless Card (NIC): 步骤 8 中的图像 1,3 Dell Inspiron 17" 7786 2-in-1 Motherboard Replacement, Wireless Card (NIC): 步骤 8 中的图像 2,3 Dell Inspiron 17" 7786 2-in-1 Motherboard Replacement, Wireless Card (NIC): 步骤 8 中的图像 3,3
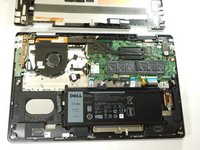
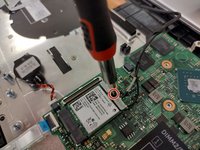
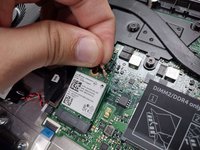
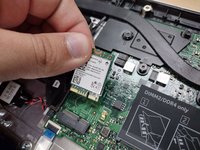
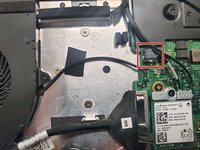
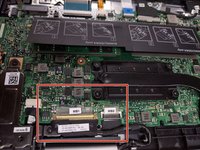
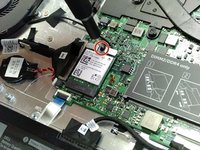
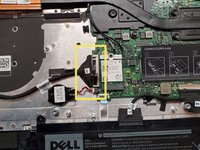
    • Remove the screw holding down the small bracket for the wireless card using a Phillips #0 screwdriver.

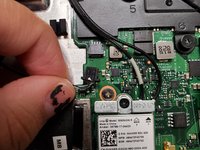
    • Remove the black wired connection from the port over the black triangle.

    • Remove the wire with the white marking from the port above the white triangle.

    • Pull the Wi-Fi card out of its slot.

  9. Dell Inspiron 17" 7786 2-in-1 Motherboard Replacement, Fan: 步骤 9 中的图像 1,2 Dell Inspiron 17" 7786 2-in-1 Motherboard Replacement, Fan: 步骤 9 中的图像 2,2
    • Gently remove the I/O cable.

  10. Dell Inspiron 17" 7786 2-in-1 Motherboard Replacement: 步骤 10 中的图像 1,2 Dell Inspiron 17" 7786 2-in-1 Motherboard Replacement: 步骤 10 中的图像 2,2
    • Remove the fan cable from the motherboard.

  11. Dell Inspiron 17" 7786 2-in-1 Motherboard Replacement: 步骤 11 中的图像 1,1
    • Remove two 3 mm screws that secure the fan using a Phillips #0 screwdriver.

  12. Dell Inspiron 17" 7786 2-in-1 Motherboard Replacement: 步骤 12 中的图像 1,2 Dell Inspiron 17" 7786 2-in-1 Motherboard Replacement: 步骤 12 中的图像 2,2
    • There is a little piece of tape/sticker on the fan that connects it to the heat sink. Gently remove this.

    • Lift the fan off the palm rest assembly.

  13. Dell Inspiron 17" 7786 2-in-1 Motherboard Replacement, Heatsink: 步骤 13 中的图像 1,2 Dell Inspiron 17" 7786 2-in-1 Motherboard Replacement, Heatsink: 步骤 13 中的图像 2,2
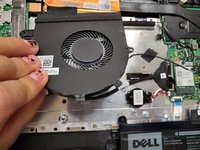
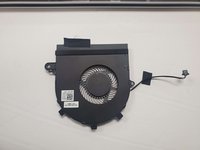
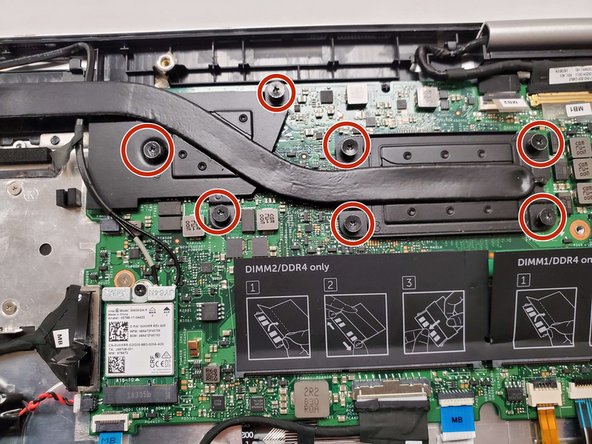
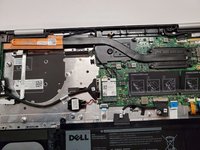
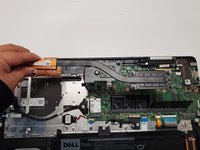
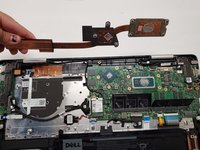
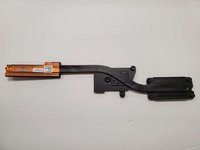
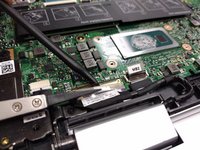
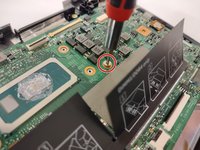
    • Loosen seven 3 mm captive screws securing the heatsink to the motherboard using a Phillips #0 screwdriver.

  14. Dell Inspiron 17" 7786 2-in-1 Motherboard Replacement: 步骤 14 中的图像 1,3 Dell Inspiron 17" 7786 2-in-1 Motherboard Replacement: 步骤 14 中的图像 2,3 Dell Inspiron 17" 7786 2-in-1 Motherboard Replacement: 步骤 14 中的图像 3,3
    • Lift the heatsink off the motherboard.

  15. Dell Inspiron 17" 7786 2-in-1 Motherboard Replacement, Display Assembly: 步骤 15 中的图像 1,2 Dell Inspiron 17" 7786 2-in-1 Motherboard Replacement, Display Assembly: 步骤 15 中的图像 2,2
    • Ensure that you have your device opened flat at a 180 degree angle. This will make removal easier.

  16. Dell Inspiron 17" 7786 2-in-1 Motherboard Replacement: 步骤 16 中的图像 1,3 Dell Inspiron 17" 7786 2-in-1 Motherboard Replacement: 步骤 16 中的图像 2,3 Dell Inspiron 17" 7786 2-in-1 Motherboard Replacement: 步骤 16 中的图像 3,3
    在这个步骤中使用的工具:
    Tweezers
    $4.99
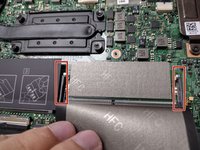
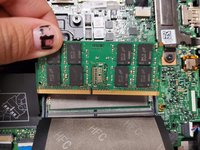
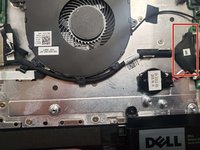
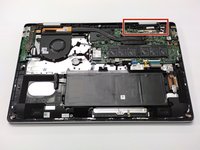
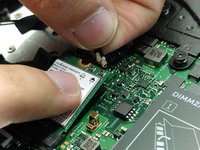
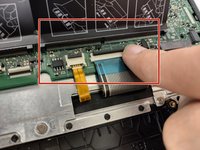
    • Locate the ribbon cables for the assembly on the right hand side marked "MB1" and "MB2."

    • The "MB1" ribbon is locked with a copper/brass colored handle that must be lifted upwards. Then you can remove the ribbon by pulling it away from the socket.

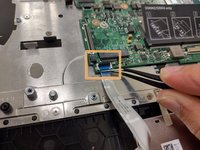
    • The "MB2" ribbon is locked in its socket with a black latch. Using a non-metallic precision tool (such as tweezers) lift the latch and pull away the MB2 cable.

  17. Dell Inspiron 17" 7786 2-in-1 Motherboard Replacement: 步骤 17 中的图像 1,1
    • Remove the two screws holding down the assembly on the right hand area using a Phillips #00 screwdriver.

  18. Dell Inspiron 17" 7786 2-in-1 Motherboard Replacement: 步骤 18 中的图像 1,3 Dell Inspiron 17" 7786 2-in-1 Motherboard Replacement: 步骤 18 中的图像 2,3 Dell Inspiron 17" 7786 2-in-1 Motherboard Replacement: 步骤 18 中的图像 3,3
    • Remove the screw protecting the endpoints of the NIC cables and NIC chip using a Phillips #0 screwdriver.

    • Gently pull away the cabling from the NIC chip.

    • The wires can be removed without removing the heat sink, though this is not advised if you are not familiar with the layout.

  19. Dell Inspiron 17" 7786 2-in-1 Motherboard Replacement: 步骤 19 中的图像 1,1
    • Remove the two screws holding down the bracket of the assembly on the left hand side using a Phillips #0 screwdriver.

  20. Dell Inspiron 17" 7786 2-in-1 Motherboard Replacement: 步骤 20 中的图像 1,2 Dell Inspiron 17" 7786 2-in-1 Motherboard Replacement: 步骤 20 中的图像 2,2
    • Lift the display assembly upwards away from the palm/main assembly.

  21. Dell Inspiron 17" 7786 2-in-1 Motherboard Replacement, Motherboard: 步骤 21 中的图像 1,3 Dell Inspiron 17" 7786 2-in-1 Motherboard Replacement, Motherboard: 步骤 21 中的图像 2,3 Dell Inspiron 17" 7786 2-in-1 Motherboard Replacement, Motherboard: 步骤 21 中的图像 3,3
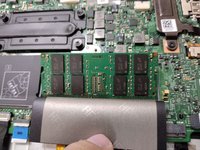
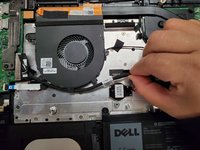
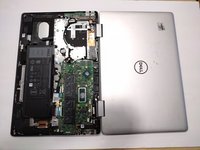
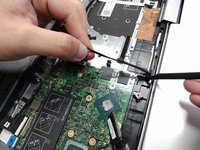
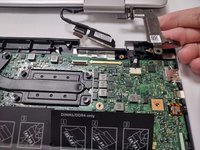
    • Disconnect all cables from the system board:

    • Keyboard cables with latches

    • HDD cable with latch

    • I/O cable that must be lifted or carefully pried away from the board using a spudger

    • It is intended to pull on the black tab of the plug to remove the cable, though it is prone to ripping when doing so.

  22. Dell Inspiron 17" 7786 2-in-1 Motherboard Replacement: 步骤 22 中的图像 1,1
    • Disconnect the touch pad cable with the latch.

  23. Dell Inspiron 17" 7786 2-in-1 Motherboard Replacement: 步骤 23 中的图像 1,3 Dell Inspiron 17" 7786 2-in-1 Motherboard Replacement: 步骤 23 中的图像 2,3 Dell Inspiron 17" 7786 2-in-1 Motherboard Replacement: 步骤 23 中的图像 3,3
    • Remove the two screws holding down the system board using a Phillips #0 screwdriver:

    • One screw is located above the RAM slot to the right.

    • Another screw is located next to the I/O cable near the edge on the left.

    • Lift the motherboard out of the laptop.

结论

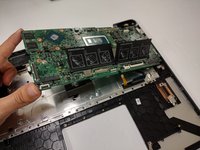
To reassemble your device, follow these instructions in reverse order.

Antonio Franco

于08/25/22注册

1,025 声望

创作了10篇指南

团队

Gateway, Team 1-3, Class Fall 2022 Gateway, Team 1-3, Class Fall 2022 的会员

GCC-CLASS-F22S1G3

4 名成员

创作了15篇指南

0条评论

添加评论

浏览统计数据:

过去 24 小时: 1

过去 7 天: 11

过去 30 天: 19

总计 333