
Dell Inspiron 15-3521 Hard Drive Replacement
你所需要的


-
-
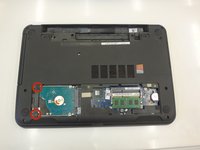
Flip the laptop over.
-
Slide the latches toward the outside of the laptop to unlock the battery.
-
Lift the battery out of the laptop.
-
-
-
Loosen the two screws attaching the access door to the laptop body.
-
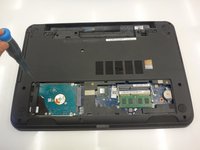
Using a spudger, pry open the access door from the laptop.
-
Using your fingers, open and remove the access door from the laptop, exposing the memory cards underneath.
-
-
-
-
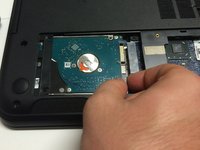
Locate the two hard drive screws, located on the left-hand side of the hard drive casing.
-
Loosen and remove these screws using a phillips head screw driver PH0.
-
Push the hard drive to the left, and then lift out of the laptop casing to remove from laptop.
-
-
-
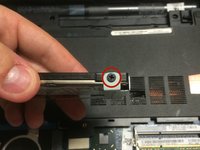
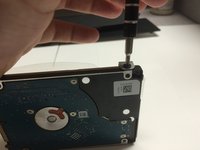
Identify the Hard Drive caddy screws, one on each side of the hard drive casing.
-
Remove these screws using a phillips head PH0 screwdriver.
-
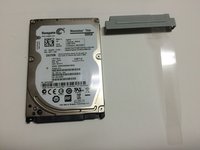
Now, with a new hard drive, attach the caddy/casing using the same screws removed from the old hard drive.
-


To reassemble your device, follow these instructions in reverse order.
To reassemble your device, follow these instructions in reverse order.
28等其他人完成本指南。
团队

Clemson, Team 3-1, Benson Fall 2014 Clemson, Team 3-1, Benson Fall 2014 的会员
CLEM-BENSON-F14S3G1
4 名成员
创作了9篇指南