
Canon PowerShot SD500 Digital ELPH Front and Rear Casing Replacement
简介
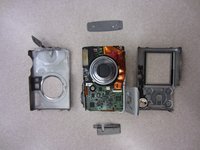
转到步骤 1The outer case of the PowerShot SD500 Digital ELPH camera is the part that takes the greatest beating. Every time the camera falls, it lands on its case. Some common problems include cracking and paint wear.
你所需要的

-
-
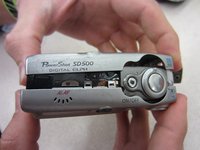
Slide open the battery cover.
-
Push the small orange tab to the side so the battery can be removed.
-
-
-
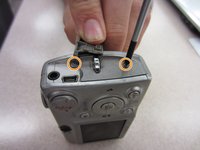
Two Phillips screws need to be removed using a #00 Phillips screwdriver. The upper screw is under the USB port cover, which can simply be pulled away gently from the casing. the lower screw is visible on the panel.
-
The screws are different sizes. The .125 inch screw is located under the USB port cover. The 0.85 inch screw goes in the lower hole on the panel.
-


To reassemble your device, follow these instructions in reverse order.
To reassemble your device, follow these instructions in reverse order.
团队

Clemson, Team 2-1, Benson Fall 2014 Clemson, Team 2-1, Benson Fall 2014 的会员
CLEM-BENSON-F14S2G1
4 名成员
创作了9篇指南