跳转到主内容
Atari Flashback 2 Joystick Replacement

Atari Flashback 2 Joystick Replacement

Faith Julian

Faith Julian5 其他贡献者

最后更新于 July 21, 2021

5 - 10 分钟
简单

If the joystick on an Atari Flashback 2 controller is sticking or broken, then it will need to be cleaned or replaced. This guide covers the steps necessary to disassemble the controller in order to access the joystick efficiently.

你所需要的

工具

  • Phillips #1 Screwdriver
    Phillips #1 Screwdriver
  • Spudger
    Spudger
  1. Atari Flashback 2 Joystick Replacement, Joystick: 步骤 1 中的图像 1,3 Atari Flashback 2 Joystick Replacement, Joystick: 步骤 1 中的图像 2,3 Atari Flashback 2 Joystick Replacement, Joystick: 步骤 1 中的图像 3,3
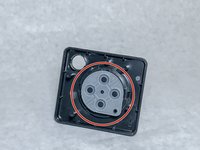
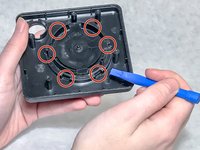
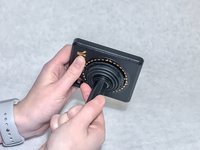
    • Using the screwdriver and the PH1 bit, unscrew the four 10.0 mm screws on the bottom of the joystick.

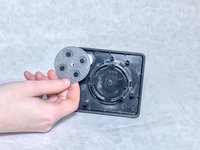
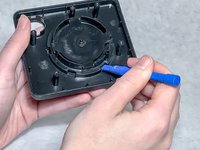
    • Remove the bottom panel from the joystick.

  2. Atari Flashback 2 Joystick Replacement: 步骤 2 中的图像 1,2 Atari Flashback 2 Joystick Replacement: 步骤 2 中的图像 2,2
    • Use the screwdriver with the PH1 bit to remove the one 10.0 mm screw on the circuit board.

    • Remove the circuit board.

  3. Atari Flashback 2 Joystick Replacement: 步骤 3 中的图像 1,2 Atari Flashback 2 Joystick Replacement: 步骤 3 中的图像 2,2
    • Remove the rubber pad from the joystick.

  4. Atari Flashback 2 Joystick Replacement: 步骤 4 中的图像 1,2 Atari Flashback 2 Joystick Replacement: 步骤 4 中的图像 2,2
    • Using a plastic opening tool, poke into the six notches around the bottom of the joystick housing.

    • The joystick's rubber boot will come loose, but stay in place.

  5. Atari Flashback 2 Joystick Replacement: 步骤 5 中的图像 1,2 Atari Flashback 2 Joystick Replacement: 步骤 5 中的图像 2,2
    • The joystick will now unscrew (counter-clockwise) and you can disassemble the top of the controller into these four parts.

结论

To reassemble your device, follow these instructions in reverse order.

Faith Julian

于09/18/18注册

205 声望

创作了2篇指南

团队

0条评论

添加评论

浏览统计数据:

过去 24 小时: 3

过去 7 天: 4

过去 30 天: 15

总计 1,533