跳转到主内容
加入维修社区 - 创建账户

Alienware AW610M Motherboard Replacement

你所需要的

    1. Alienware AW610M Motherboard Replacement, Battery: 步骤 1 中的图像 1,3 Alienware AW610M Motherboard Replacement, Battery: 步骤 1 中的图像 2,3 Alienware AW610M Motherboard Replacement, Battery: 步骤 1 中的图像 3,3
      • Power off the mouse and disconnect any wired connections.

      询问修复机器人

      添加评论

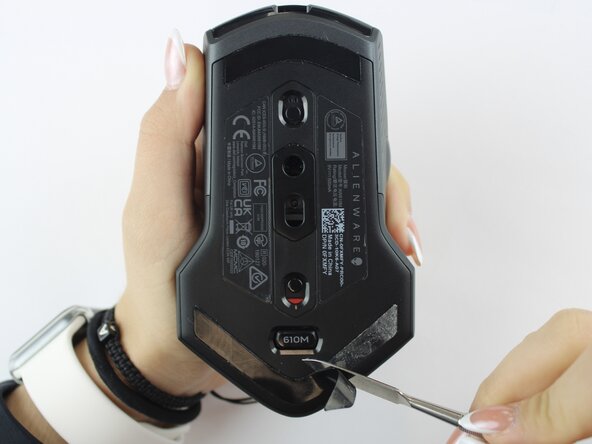
    2. Alienware AW610M Motherboard Replacement: 步骤 2 中的图像 1,2 Alienware AW610M Motherboard Replacement: 步骤 2 中的图像 2,2
      • Use a spudger to gently lift and remove the old mouse feet.

      • If the feet are sticky, try lifting slowly from one corner to avoid tearing them.

      • Be careful not to scratch the mouse surface or damage the plastic housing.

      询问修复机器人

      添加评论

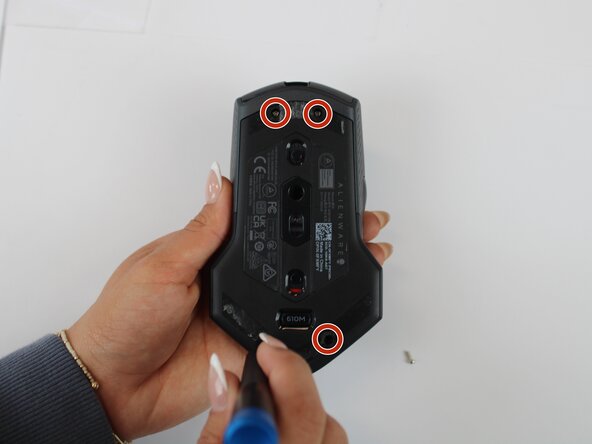
    3. Alienware AW610M Motherboard Replacement: 步骤 3 中的图像 1,2 Alienware AW610M Motherboard Replacement: 步骤 3 中的图像 2,2
      • Remove the four 6.5 mm screws using a Y1 Tri-Point screwdriver.

      询问修复机器人

      添加评论

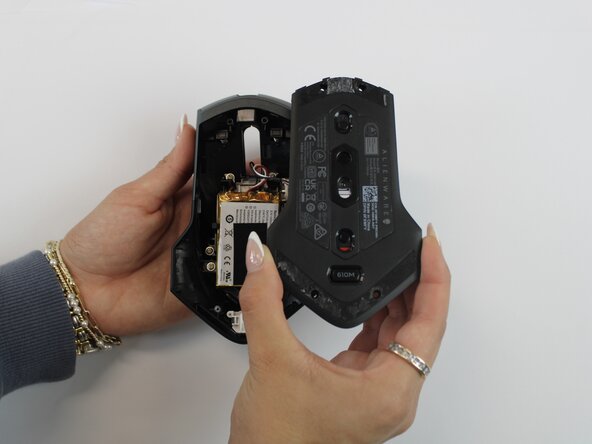
    4. Alienware AW610M Motherboard Replacement: 步骤 4 中的图像 1,2 Alienware AW610M Motherboard Replacement: 步骤 4 中的图像 2,2
      • Using an opening tool, gently pry apart the two halves of the mouse case. Start at the seam and work your way around until the housing is separated.

      • Don't pull the halves completely apart, as internal wires still connect them.

      询问修复机器人

      添加评论

    5. Alienware AW610M Motherboard Replacement: 步骤 5 中的图像 1,3 Alienware AW610M Motherboard Replacement: 步骤 5 中的图像 2,3 Alienware AW610M Motherboard Replacement: 步骤 5 中的图像 3,3
      • Remove the battery pack inside the mouse.

      • If you are having trouble, use a small flat tool to help ease it out.

      • The battery is lightly glued to the mouse, so ease it out gently to avoid breaking the battery or wiring

      询问修复机器人

      添加评论

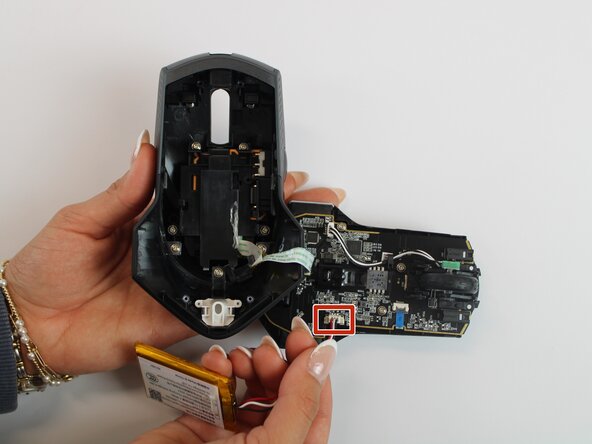
    6. Alienware AW610M Motherboard Replacement: 步骤 6 中的图像 1,2 Alienware AW610M Motherboard Replacement: 步骤 6 中的图像 2,2
      • Remove the old battery from its spot. Lift the wire connector away from the mainboard to disconnect it.

      • Make sure all wires are inside the mouse before sealing it shut for easy reassembly.

      询问修复机器人

      添加评论

    1. Alienware AW610M Motherboard Replacement, Motherboard: 步骤 7 中的图像 1,2 Alienware AW610M Motherboard Replacement, Motherboard: 步骤 7 中的图像 2,2
      • Remove the single 5.4 mm screw using a Phillips #1 screwdriver.

      • Detach the cable connector, and remove the scroll wheel.

      • Gently detach the last connector using your fingers.

      • Be careful when unplugging all connectors to prevent tearing them.

      询问修复机器人

      添加评论

    2. Alienware AW610M Motherboard Replacement: 步骤 8 中的图像 1,2 Alienware AW610M Motherboard Replacement: 步骤 8 中的图像 2,2
      • Detach the blue ribbon that connects the motherboard to the shell casing.

      • Using a Phillips #1 screw driver, remove two 5.4 mm screws to detach the motherboard from the base shell casing.

      询问修复机器人

      添加评论

    3. Alienware AW610M Motherboard Replacement: 步骤 9 中的图像 1,3 Alienware AW610M Motherboard Replacement: 步骤 9 中的图像 2,3 Alienware AW610M Motherboard Replacement: 步骤 9 中的图像 3,3
      • Gently detach the motherboard using your fingers.

      询问修复机器人

      添加评论

结论

To reassemble your device, follow these instructions in reverse order.

取消:我没有完成这个指南。

Sherlyn Herman

于09/24/25注册

97 声望

撰写一个指南

团队

Texas Tech, Team 46-4, Johansen Fall 2025 Texas Tech, Team 46-4, Johansen Fall 2025 的会员

TTU-JOHANSEN-F25S46G4

4 名成员

创作了5篇指南

0指南评论

添加评论

浏览统计数据:

过去 24 小时: 2

过去 7 天: 7

过去 30 天: 52

总计 342