跳转到主内容

Acer Aspire V5-571 Cooling System Replacement

你所需要的

视频概述

  1. Acer Aspire V5-571 Cooling System Replacement, Keyboard: 步骤 1 中的图像 1,3 Acer Aspire V5-571 Cooling System Replacement, Keyboard: 步骤 1 中的图像 2,3 Acer Aspire V5-571 Cooling System Replacement, Keyboard: 步骤 1 中的图像 3,3
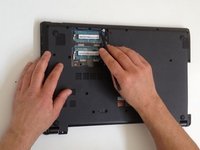
    • Turn off the laptop and remove the battery.

    • Remove two screws securing the Keyboard.

    • The Keyboard is held by two locking clips, under the battery. Use the sharp tip of a plastic tool to release the keyboard.

  2. Acer Aspire V5-571 Cooling System Replacement: 步骤 2 中的图像 1,3 Acer Aspire V5-571 Cooling System Replacement: 步骤 2 中的图像 2,3 Acer Aspire V5-571 Cooling System Replacement: 步骤 2 中的图像 3,3
  3. Acer Aspire V5-571 Cooling System Replacement, Optical Drive: 步骤 3 中的图像 1,3 Acer Aspire V5-571 Cooling System Replacement, Optical Drive: 步骤 3 中的图像 2,3 Acer Aspire V5-571 Cooling System Replacement, Optical Drive: 步骤 3 中的图像 3,3
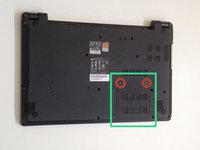
    • Remove the screw securing the Optical drive and gently press the drive to show slightly as at the second pic.

    • Slide the drive to the left and remove it.

  4. Acer Aspire V5-571 Cooling System Replacement, Upper  Cover: 步骤 4 中的图像 1,3 Acer Aspire V5-571 Cooling System Replacement, Upper  Cover: 步骤 4 中的图像 2,3 Acer Aspire V5-571 Cooling System Replacement, Upper  Cover: 步骤 4 中的图像 3,3
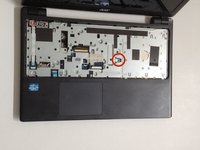
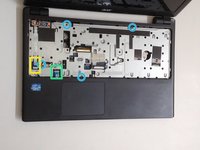
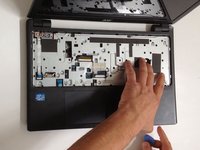
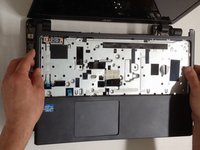
    • Remove 4x phillips screws and disconnect:

    • Power On button flex cable

    • Touch pad flex cable

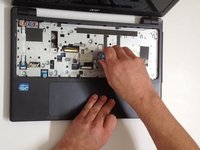
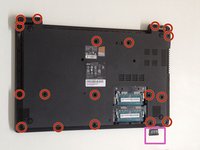
    • Remove 18x Phillips screws from the bottom cover.

    • Remove any memory SD Card from the Card reader.

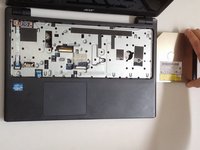
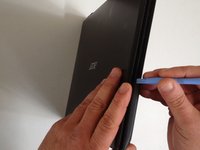
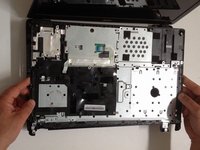
    • Start opening with a plastic opening tool.
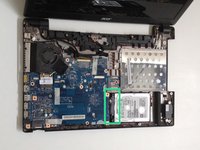
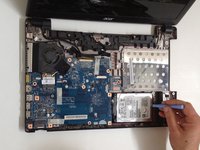
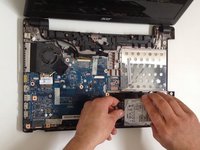
  5. Acer Aspire V5-571 Cooling System Replacement: 步骤 5 中的图像 1,3 Acer Aspire V5-571 Cooling System Replacement: 步骤 5 中的图像 2,3 Acer Aspire V5-571 Cooling System Replacement: 步骤 5 中的图像 3,3
    • Carefully separate the upper cover and remove it.

  6. Acer Aspire V5-571 Cooling System Replacement, HDD (Hard Disk Drive): 步骤 6 中的图像 1,3 Acer Aspire V5-571 Cooling System Replacement, HDD (Hard Disk Drive): 步骤 6 中的图像 2,3 Acer Aspire V5-571 Cooling System Replacement, HDD (Hard Disk Drive): 步骤 6 中的图像 3,3
  7. Acer Aspire V5-571 Cooling System Replacement, Wi-Fi Half Mini PCIe card: 步骤 7 中的图像 1,2 Acer Aspire V5-571 Cooling System Replacement, Wi-Fi Half Mini PCIe card: 步骤 7 中的图像 2,2
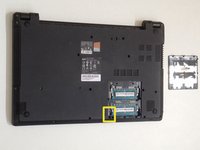
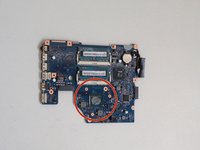
    • Remove one Phillips screw, securing th WLan card and disconnect the two coaxial antenna cables.

    • Remove the Wi-Fi card.

  8. Acer Aspire V5-571 Cooling System Replacement, Mother Board: 步骤 8 中的图像 1,3 Acer Aspire V5-571 Cooling System Replacement, Mother Board: 步骤 8 中的图像 2,3 Acer Aspire V5-571 Cooling System Replacement, Mother Board: 步骤 8 中的图像 3,3
    • Remove the Memory Cover.

    • Disconnect the Loudspeaker cable connector.

  9. Acer Aspire V5-571 Cooling System Replacement: 步骤 9 中的图像 1,3 Acer Aspire V5-571 Cooling System Replacement: 步骤 9 中的图像 2,3 Acer Aspire V5-571 Cooling System Replacement: 步骤 9 中的图像 3,3
    • Remove two Phillips screw from the Mother board and from the Optical drive SATA adapter.

    • Disconnect the LCD Display flex cable.

    • Disconnect the DC Jack cable.

    • Carefully remove the Optical drive SATA adapter.

    • We will disconnect the battery cable when we pick up the board.

  10. Acer Aspire V5-571 Cooling System Replacement: 步骤 10 中的图像 1,3 Acer Aspire V5-571 Cooling System Replacement: 步骤 10 中的图像 2,3 Acer Aspire V5-571 Cooling System Replacement: 步骤 10 中的图像 3,3
    • Carefully pick up the Mother board and disconnect the Battery cable.

  11. Acer Aspire V5-571 Cooling System Replacement, Cooling System and CPU Thermal Paste Replacement: 步骤 11 中的图像 1,2 Acer Aspire V5-571 Cooling System Replacement, Cooling System and CPU Thermal Paste Replacement: 步骤 11 中的图像 2,2
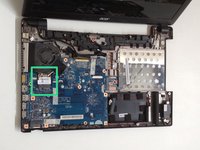
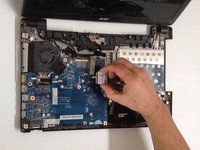
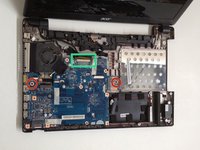
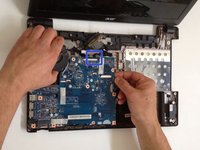
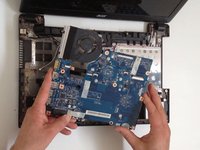
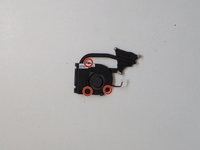
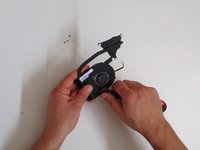
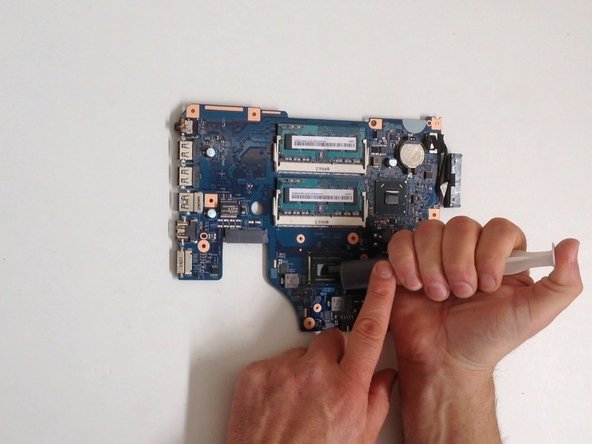
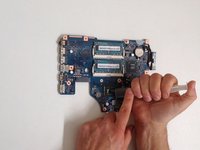
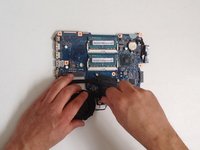
    • Disconnect the Fan cable.

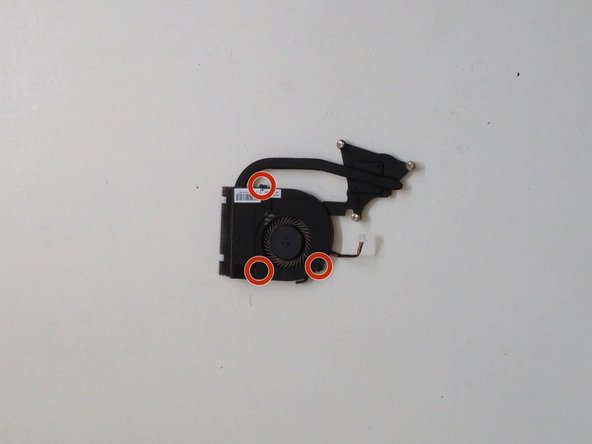
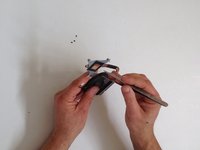
    • Unscrew the screws that hold the Cooling system to the Mother board.

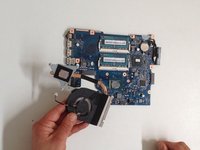
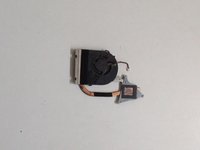
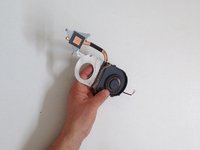
    • Carefully lift the Cooling system right up.

  12. Acer Aspire V5-571 Cooling System Replacement: 步骤 12 中的图像 1,2 Acer Aspire V5-571 Cooling System Replacement: 步骤 12 中的图像 2,2
    • Use a lint-free cloth to clean the old thermal compound.

    • If the thermal compound is solidified, you can use a flat end of any plastic tool to scrape it off.

    • Use again cloth with isopropyl alcohol to clean the Thermal surface.

    • Remove three Philips screws held the Fan shield.

  13. Acer Aspire V5-571 Cooling System Replacement: 步骤 13 中的图像 1,3 Acer Aspire V5-571 Cooling System Replacement: 步骤 13 中的图像 2,3 Acer Aspire V5-571 Cooling System Replacement: 步骤 13 中的图像 3,3
    • Unstick the black tape that hold the Fan to the cooler.

    • Unlock the clip and open the Fan case.

    • Use a soft brush and clean the Fan and the Cooler

    • Close the Fan system.

  14. Acer Aspire V5-571 Cooling System Replacement: 步骤 14 中的图像 1,3 Acer Aspire V5-571 Cooling System Replacement: 步骤 14 中的图像 2,3 Acer Aspire V5-571 Cooling System Replacement: 步骤 14 中的图像 3,3
    • Use the same technic to clean the surface of the processor from the old thermal compound

    • Be carefully,if you don't want to break the CPU.

    • Dispense a small amount of thermal compound and gently smear it over the entire processor surface.

    • .

    • .

    • .

    • Did you do it successful?

结论

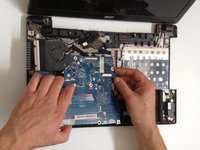
To reassemble your device, follow these instructions in reverse order.

4等其他人完成本指南。

ZFix

于12/09/13注册

191,278 声望

创作了330篇指南

团队

Master Techs Master Techs 的会员

Community

322 名成员

创作了2,528篇指南

一条评论

Hello!

Is ist possible to installa SSD storage to the V5-571G without removing the SATA?

Thanks for your reply

lukasrohrer - 回复

添加评论

浏览统计数据:

过去 24 小时: 1

过去 7 天: 10

过去 30 天: 48

总计 9,136