简介
本指南教导你如何更换小米 Mi 9 坏掉的电池。
如果你的电池鼓包了, 请采取适当措施。为了你的安全,在拆手机之前请放电到25%以下 。这将会降低维修中起火的危险。
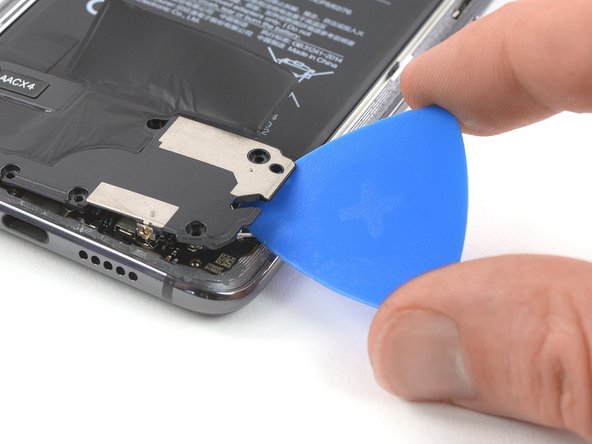
尽管可以在不拆卸扬声器的情况下取出电池,但我们建议先拆扬声器可以简化拆卸过程。
你将会需要 更换粘合剂 来重组设备。
你所需要的


如果可能,请打开手机并测试修复效果,然后再安装新的粘合剂并重新密封手机。
用预先切割的粘合剂或双面胶带固定新电池。 为了正确定位,请将新粘合剂涂在手机上旧粘合剂所在的位置,而不是直接涂在电池上。 将新电池用力按入到位。
为了获得最佳性能,校准新安装的电池:将其充电至 100%,并继续充电至少两个小时。 然后,使用它直到它因电池电量低而关闭。 最后不间断充电至100%
要重新组装你的设备,请按相反顺序执行这些说明。
将你的电子废物带到 R2 或 e-Stewards 认证回收商。
修复没有按计划进行? 请查看我们的 Answers 社区 获取故障排除帮助。
如果可能,请打开手机并测试修复效果,然后再安装新的粘合剂并重新密封手机。
用预先切割的粘合剂或双面胶带固定新电池。 为了正确定位,请将新粘合剂涂在手机上旧粘合剂所在的位置,而不是直接涂在电池上。 将新电池用力按入到位。
为了获得最佳性能,校准新安装的电池:将其充电至 100%,并继续充电至少两个小时。 然后,使用它直到它因电池电量低而关闭。 最后不间断充电至100%
要重新组装你的设备,请按相反顺序执行这些说明。
将你的电子废物带到 R2 或 e-Stewards 认证回收商。
修复没有按计划进行? 请查看我们的 Answers 社区 获取故障排除帮助。
51等其他人完成本指南。


15条评论
Is it possible to swap mi 9 battery with mi 9 pro battery?
Hi Marcel,
the Antenna connector is a COAX connector. You can find a little more information here.
I’ve changed the battery but device has not started even I tried to charge for 1-2 hours..( charger, USB-C cable checked). Btw, the symptoms was like the device started to turn off on around 50% of battery life. And charged too fast in about 10-15 minutes by the original fast charger. What could happen?