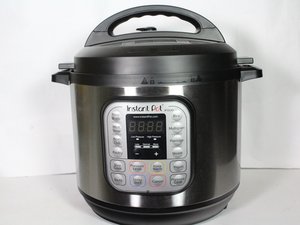
学生贡献的维基
此维基页面由我们教育项目的学生团队编写。
LED 显示屏闪烁
LED 显示屏上的按钮闪烁且无法保持常亮。
高压或低压传感器故障
压力传感器故障意味着传感器的导线已断开,或者传感器本身已损坏,屏幕上会显示 C6 错误代码。请参考此指南来诊断并解决 C6 错误。
温度传感器故障
显示屏上会出现 C1 或 C2 错误。这意味着传感器已断开连接,或者食物或水中断了与传感器的连接,抑或传感器已损坏。如果传感器断开或连接中断,可以通过连接设备内的导线,或使用干净干燥的布清理导线上的碎屑来修复。
内胆未正确放置
只需将内胆从设备中取出并重新装入即可。如果这样做无效,试着用干净干燥的布擦拭内胆,以清除可能存在的碎屑。
内胆中没有水
Instant Pot 需要在内胆中加水以防止过热。只需在锅内加水,烹饪即可恢复正常。
锅盖位置不正确
将锅盖从设备上取下并重新盖上。一旦盖好,烹饪即可恢复正常。
锅内蒸汽泄漏
蒸汽未留在锅内,而是外泄了。
密封圈损坏
你需要更换设备上的密封圈。购买新的密封圈后,请查看 此指南。
密封圈粘有碎屑
使用湿布轻轻擦拭密封圈,直到所有食物残渣和碎屑都被清除。
锅盖未盖好
如果锅盖没有盖好,请打开锅盖并重新盖上,确保锅身的把手与锅盖侧面的黑色塑料延伸部分对齐。
蒸汽释放阀未处于密封位置
确保顺时针转动蒸汽释放阀,直到它锁定在标记为“Sealing”(密封)的位置。
浮子阀硅胶圈工作异常
浮子阀(锅盖内侧)上的硅胶圈已磨损,无法有效密封锅体。请按照 此指南 更换浮子阀。
设备无响应
按下 LED 显示屏上的按钮时,锅没有反应。
电源连接不良
这是一个外部问题。首先,尝试拔下设备电源并重新插上。如果无效,尝试将设备连接到另一个插座。
锅具保险丝烧断
LED 显示屏内的一个保险丝烧断,需要更换显示屏组件。请参阅此 更换指南。
浮子阀无法升起
浮子阀卡住,无法移动以释放压力。
锅内食物或水太少
如果浮子阀无法升起,可能需要增加烹饪分量。另一个原因可能是餐点准备过程中加水不足。没有足够的水量,Instant Pot 就无法建立足够的压力来烹饪食物。如果你需要更换浮子阀,请参阅此 更换指南。
浮子阀被锅盖锁定销阻挡
很可能是锅盖没有完全关好。当锅盖未完全闭合时,锁定销可能会压住浮子阀。请完全关好锅盖。锅盖锁定时会发出咔哒声。如果你需要更换浮子阀,请参阅此 更换指南。
设备过热
锅内温度过高,导致食物烧焦。
锅内稀薄液体不足
如果 Instant Pot 内液体不足,就无法产生足够的蒸汽来给容器加压。总液体量至少应为一杯。请确保使用的是稀薄液体;如果液体太稠(例如浓酱),则无法沸腾,导致锅内食物受热不均。如果是浓稠液体,请加在其他配料之上(不要搅拌)或在烹饪周期结束后再加入。
直接在锅内烹饪乳制品
如果乳制品直接接触锅底烹饪,受热后会焦糊并形成薄膜,导致设备过热。如果食谱需要牛奶或奶油,请在压力烹饪结束后再加入这些配料。
忘记将排气旋钮转到密封位置
这是 Instant Pot 用户最常犯的错误之一。如果排气旋钮没有转到密封位置,蒸汽就会泄露,导致锅内食物变干,且无法建立压力。修复方法很简单:记得一定要转动旋钮。当密封时,浮子阀会自动弹起。如果排气旋钮损坏,请参阅此 更换指南。
锅盖密封不严(蒸汽泄漏)
如果锅盖漏气,最常见的原因是密封圈。请确保密封圈正确固定在锅盖内,并且没有粘附任何食物残渣。如果密封圈损坏,请在此处查看如何更换。最后,有时修复方法很简单,只需确保锅盖正确旋紧即可。关上锅盖时,它应该会发出咔哒声卡入到位。这个声音表示锅盖已锁定,可以正常工作了。
加热元件上残留有食物
由于内胆很容易拆卸和清洗,有时你可能会忘记检查内胆下方。食物碎屑可能会掉进内胆和加热元件之间,因此请务必检查是否有残留物,以免导致设备过热。

团队

Cal Poly, Team S18-G2, Livingston Winter 2018 Cal Poly, Team S18-G2, Livingston Winter 2018 的会员
CPSU-LIVINGSTON-W18S18G2
4 名成员
创作了60篇指南

16条评论
My C6 fault was from the Pressure switch being burnt up on the heater side. It’s a double mechanical, momentary double throw contact switch. Like you would see in very old equipment. One side has much smaller wires and seem to be some sort of “presence” sensor. The other side has thicker wires and seen to route the current to the heater element. In my case, this is the side that burnt up. This isn’t obvious to look at from above. I had to remove the switch and look at it from the side. The small wire became discolored and no longer holding the shape necessary for it to toggle with pressure.
Charles Thompson - 回复 分享
I will say without a doubt this switch was undersized for the amount of current. I think they should have used the presence side then ran the higher current to an SCR to improve it’s life. I can do this for about $15 at my cost and will never see this issue again. Then again, perhaps they want it to fail over time so you have to purchase a new one.
In any case, when you control alot of current with a mechanical contact, over time the contact will develops small arc’s across the face. when the wire overheats it deforms and never makes good contact again. This is why we don’t see many mechanical relays anymore.
Charles Thompson - 回复 分享
Please tell me how. Cannot afford a new on. Cl6 error
It quit after I opened the bottom cover wiggled wires. I do not see a yellow wire to a white disc. My yellow wire it attached in center of the pot…
nursiedeer - 回复 分享
UNPLUG!
Open the bottom by removing the single Philips head screw were the cord goes into the IP. Then slightly turn the bottom plate to remove
You will see the pressure switch. It has shiny metal bars and will be surrounded by white, soft rubber. It has 4 wires coming off it. Take a picture of this before you attempt to remove anything.
Order a new one. I found one on Amazon.
Charles Thompson - 回复 分享
Charles Thompson I would be interested in directions on how to replace this using the method and parts that you did.
Nursiedeer@ gmail. com
No spaces
nursiedeer - 回复 分享