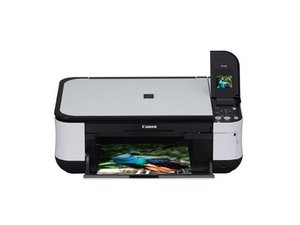
打印机无法开机
按下电源按钮后,打印机没有反应。
打印机未连接到墙壁插座
确保打印机的电源线已连接到墙壁插座以及打印机背面。
墙壁插座故障
将打印机插入另一个墙壁插座试试。
打印机需要重置
拔掉打印机的电源插头,等待 3 分钟,然后重新插上。
主板故障
主板需要更换。请参考主板安装指南。
电源供应器故障
需要更换电源供应器。
打印机无法打印
发送打印指令后,打印机没有打印。
打印机未连接到电脑
确保 USB 线已连接到电脑以及打印机背面。
打印机缺纸
确保打印机的进纸器中有纸。
打印机需要重置
拔掉打印机的电源插头,等待 3 分钟,然后重新插上。
打印机墨水用尽
用新的墨盒更换当前的墨盒。
墨盒未安装到位
打开扫描单元盖板,用力向下按压墨盒锁定盖板,直到听到咔哒声锁定到位。
未安装打印机驱动程序
前往制造商页面 此处,下载该设备的最新驱动程序。
打印或扫描质量不佳
打印机可以正常打印和扫描,但结果不理想。
打印质量设置过低
使用操作面板上的“菜单”按钮,将打印质量更改为所需的质量。
墨水斑点
打开扫描单元并取出墨盒。清洁墨盒底部,然后将墨盒重新正确装回原位。
打印颜色异常
使用操作面板上的“菜单”按钮,选择清洁功能。
扫描图像有不想要的背景
使用扫描仪盖板安装指南更换扫描仪盖板。
打印机总是卡纸
无论打印什么,打印机总是不断卡纸。
纸盒装纸过多
取出超过装纸限量线的纸张。
后托盘或出纸槽周围有异物
清除打印机中所有不属于这里的异物。
纸张太厚或太薄
更换当前纸张,使用克重在 17 磅(64 gsm)以上且 28 磅(105 gsm)以下的纸张。
纸盒中的纸张卷曲
将纸张弄平,然后重新装入纸盒。
液晶显示屏不亮
无法让液晶显示屏亮起。
打印机未开启
将打印机连接到墙壁插座并开启打印机。
液晶显示屏处于屏保模式
按下操作面板上的任意按钮。
按钮损坏
使用按钮安装指南更换按钮。
液晶显示屏损坏
使用液晶显示屏安装指南更换液晶显示屏。
前置数据端口(USB 和存储卡读卡器)无法工作
插入闪存驱动器或存储卡读卡器时,打印机无法识别
闪存驱动器或存储卡损坏
尝试将您的存储设备插入电脑,看看电脑是否能识别。如果不能,说明您的存储设备已损坏,需要更换新的。
闪存驱动器损坏
如果电脑可以识别闪存驱动器但打印机无法识别,请重新格式化该闪存驱动器,或者直接更换闪存驱动器。
存储设备卡住
将存储设备从打印机上拔下,等待 3 分钟,然后重新插上。
数据端口损坏
使用数据端口安装指南更换数据端口。

团队

Cal Poly, Team 19-41, Regan Winter 2013 Cal Poly, Team 19-41, Regan Winter 2013 的会员
CPSU-REGAN-W13S19G41
4 名成员
创作了72篇指南

5条评论
1 of 2
Here's a suggestion for cleaning out the printhead. I did this on a Canon Pixma MP630 that was showing error B200. It didn't fix the problem, so I can't be sure this is good advice, but it did clean a lot of ink out of the printhead.
Open the lid, remove all of the ink cartridges and lift the grey lever. Slide the printhead assembly out.
Set up a work area with several layers of newspaper because it gets messy! Unscrew the two silver Phillips-head screws holding the postage-stamp-sized printhead "puck" onto the plastic structure and prise them apart gently at the end opposite the orange flat flex cable. Remove the grey rubbery gasket and clean it in isopropyl alcohol.
Pour some isopropyl alcohol into a shallow tray slightly larger than the printhead element and hold the printhead puck in it, with the printing side downwards and the ink feed holes upwards.
Get a one foot length of plastic tube and slide something soft and rubbery over one end so it will make an airtight seal with the ...
KrisBlueNZ - 回复 分享
2 of 2
... top surface of the printhead puck. I used a small rubbery "collar" from the tray suspension system in a CD drive, but you could use a rubber washer, a rubber grommet, or anything that will "kiss" the surface and form a good seal.
For each ink hole, press the tube and grommet around the hole, and suck on the tube. This will suck the isopropyl alcohol from the tray, up through the printhead puck, and into the bottom part of the tube. Stop sucking, slide the grommet off the edge of the puck and blow the crap out. Slide it back and repeat until you see bubbles coming through the alcohol in the tube, showing that air is able to flow through the puck. Repeat for the other holes.
Clean up both sides (lots of toilet paper is good here), refit the gasket and reassemble. You'll need to run a few pages through it to clear the alcohol out.
KrisBlueNZ
"That's a nasty clog!" - Groundskeeper Willie
KrisBlueNZ - 回复 分享
Hi. I dont have the wall outlet piece. Is
there anyway that i could turn it on without it.
Creasie beal - 回复 分享
Anyone know how to make the copy complete. All we get is a portion of the page we need to copy.
Grace - 回复 分享
Can you tell me how to solve red lines across the a photo copy. Paxma MP480 printer.
dajo88 - 回复 分享