简介
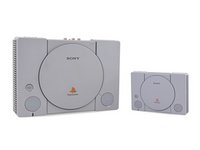
Originally developed as part of a joint venture between Sony and Nintendo to make a CD-equipped SNES console, PlayStation is now one of the world’s most recognized brands. In honor of its 25th anniversary, we got our hands on the unit that started it all, the Japan-only SCPH-1000 model. And we’re celebrating the only way we know how—time to tear it down!
Twitchy for more teardowns? Follow us on Instagram, Twitter, and Facebook for all the latest teardown and repair news. For news delivered, sign up for our newsletter.
你所需要的
视频概述
-
-
You youngsters may not remember, but the PlayStation was only available in Japan during its first year on the market. Here in America, we awaited its arrival with bated breath. Let's recall what we were waiting for:
-
MIPS R3000 33.9 MHz, 32-bit RISC CPU
-
32-bit GPU
-
2 MB RAM
-
1 MB VRAM
-
16-bit 24-channel PCM stereo sound
-
2x CD-ROM Drive
-
-
-
From several feet away, our fancy Japanese model (on the right) looks identical to the original North American unit. But upon closer inspection, our peepers notice a few slight differences:
-
The inside of the CD trays are nearly identical, save for some small differences in the plastic molding.
-
The most noticeable cosmetic difference is the PlayStation logos on the lids. The Japanese model sports a bit of green instead of the PlayStation Blue we're used to seeing, as well as a brownish color in the negative space of the logo.
-
-
-
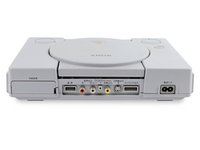
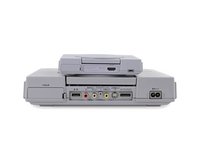
Turning the console to its backside reveals a plethora of ports. A two-port MacBook Pro, this is not.
-
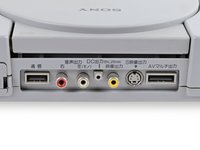
Our Japanese is a bit rough, but if we had to guess, these labels are probably trying to tell us something about the ports.
-
-
-
Oh yeah, we've got an English version, too! Let's decrypt these labels and take a closer look at all the connection options we have:
-
Parallel I/O: Funnily enough, Sony never released an official product that took advantage of the parallel port, but many third-parties made cheat devices for it.
-
Serial I/O: This port is used to link two PlayStations together for multiplayer on separate TVs, but only certain games supported it.
-
RCA Out: These ports provided a non-proprietary method for connecting the PlayStation to the TV.
-
RFU DC Out: Since many older TVs didn't have RCA ports, this port was used to plug in an RF modulator, which would convert the video and audio to an RF signal in order to communicate with the TV.
-
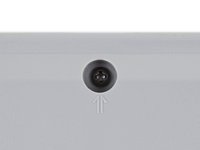
S-Video Out: This elusive port only appeared on the original SCPH-1000 Japanese model. Depending on the TV, many argue the dedicated S-Video port provides a better image quality than the other output options.
-
AV Multi Out: This was Sony's proprietary connector for video and audio output. The development of RCA, S-Video, and RF cables for this port phased out all of the other outputs over the years.
-
AC In: The PlayStation uses a standard C7/C8 cable and connector, with the North American model using a polarized version. Sony has used this AC connector on all of its PlayStations thus far.
-
-
-
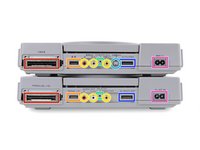
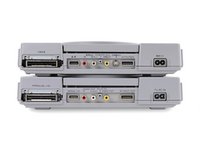
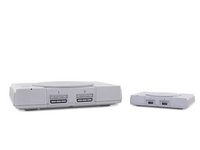
Stacked up against its contemporary nostalgia machine, the PlayStation Classic, our original PlayStation is a veritable giant.
-
The PSC does an honorable job of culling all the memorable bits of its namesake's design and cramming them into a cute little gray box. We appreciate the attention to detail—everything from the vents along the side of the console to the "memory card" slots seem to be present and accounted for.
-
One omission we simply cannot overlook, however, is the un-open-able CD lid. Why, Sony, would you taunt us with a real, push-able Open button if it does not, in fact, open anything? Perhaps that's why sales never took off.
-
-
-
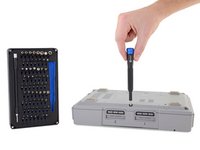
在这个步骤中使用的工具:Mako Driver Kit - 64 Precision Bits$39.95
-
Alright, how do we get inside this thing? Maybe it has something to do with these arrows ...
-
Turns out each screw holding the two halves of the console together is marked with a helpful little arrow!
-
We won't need every bit (spoiler alert: we only need one) for this trip down
Rocky Passmemory lane, but we're still glad we brought our trusty Mako driver kit along for the ride.
-
-
-
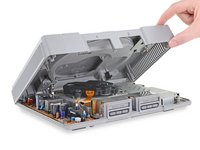
We lift the lid off of this curious console, secretly hoping that gems will come flying out for us to collect.
-
Unfortunately we are left empty-handed in the gems department, but there is some pretty cool stuff in here. No dragons, though.
-
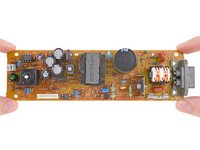
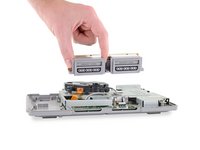
First things first, let's carefully dispose of this power supply before we get zapped.
-
Speaking of breaking a sweat—90's silicon didn't run as hot as today's hardware does, but it's still impressive to see an internal power supply, a whole optical drive assembly, and everything on the main board (more on that later), all running in a fanless configuration.
-
-
-
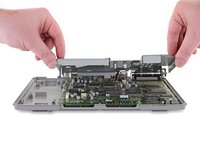
Next up, the controller ports and memory card slots come out as one assembly.
-
The CD laser and motor assembly rests on three pegs secured in place by rubber grommets. This allows the entire mechanism to move around slightly and absorb vibrations from the spinning disc.
-
In case your mother never taught you: NEVER TOUCH THE LENS.
-
-
-
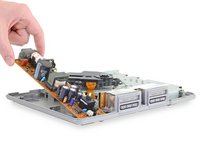
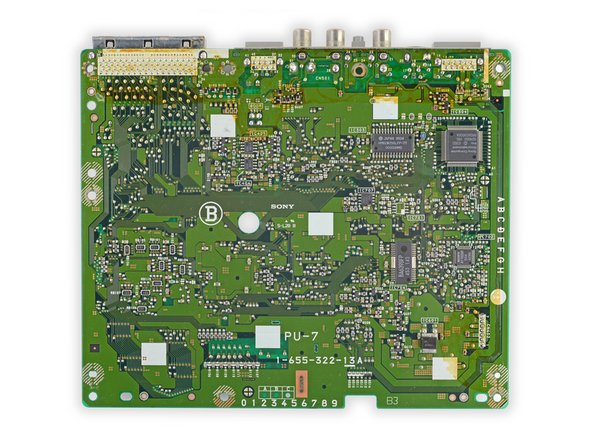
With nowhere left to turn, we lift up the giant metal shield hiding the motherboard to reveal the main act.
-
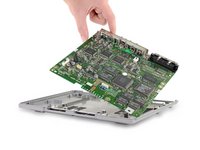
Like Lara Croft, we carefully lift this dusty relic from its home, hoping we haven't tripped some sort of booby trap.
-
To our relief, it appears we haven't sprung any traps—the coast is clear; now let's assess this treasure we've found.
-
-
-
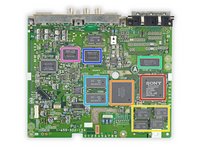
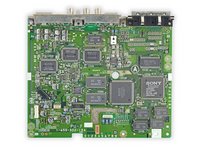
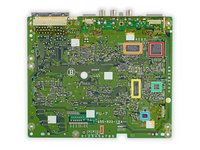
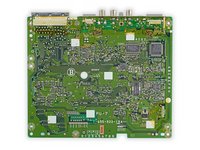
All it takes is one look to be sure we've struck gold here—this thing has more chips than three bags of Tostitos Scoops…
-
Sony CXD8530BQ CPU (designed by MIPS)
-
Sony CXD8514Q GPU (designed by Toshiba)
-
Samsung KM48V514BJ-6 (4 x 512 KB) DRAM
-
Sony M534032C-02 ROM
-
Samsung KM4216V256G-60 (2 x 512 KB) VRAM
-
Sony CXD2922Q SPU
-
Sony CXD1199BQ CD decoder
-
-
-
And that's it! There's not much inside this original PlayStation, which is a testament to Sony's design and engineering chops—or maybe technology was just simpler back then... Probably a bit of both.
-
It's hard to remember a time when Sony wasn't a game console maker, and it's easy to see why: they nailed a lot of the essentials on their first try.
-
That, plus a steady stream of award-winning games has led to PlayStation's rise to the top of the best-selling-console list multiple times over the course of the last couple decades. The original PlayStation is currently #5 on that list, even though it remains #1 in many of our hearts.
-
And with that, it's time to end this special 25th anniversary teardown from the past. If you need us, we'll be with a certain web-slinging crime fighter. First, though, let's give this thing a repairability score.
-
- The console is made up of few components, and each one is straightforward to remove and replace.
- Only a Phillips screwdriver and a spudger are needed for complete disassembly.
- The optical drive is one of the easiest components to remove—a good sign knowing these were prone to fail on older models.
- Because the PlayStation has been around the block several times, repair and service information is widely available, although likely much to Sony's chagrin.
- All of the I/O ports on the back of the console are soldered to the motherboard.


最后的想法
可修复性评分


(10是最容易修复)

7条评论
This is nostalgic, most will also remember the epic PS1 startup sound.
https://www.youtube.com/watch?v=PXF9zRqZ...
Not mentioned some people are very “creative”, doing mods breaking away those Sony Games protection at that time.
AFAIK, different sets apart from languages, some video output, e.g. NTSC, PAL.
Love it will all my heart
Funny I just disassembled my old playstation last month after many years lying on a desk. The motherboard was totally rusted because my cat peed on it :(
It just followed the disassembly of an old sony radio (80’s) and a sony cd player(90’s). That’s amazing how it was designed and easily repairable. A few Phillips screws and that’s it.