你所需要的
-
-
在这个步骤中使用的工具:Anti-Static Wrist Strap$7.95
-
Make sure Pro Data is disconnected from power and Thunderbolt, then set it upside down on an anti-static mat or flat surface with appropriate protection from electrostatic discharge, such as an anti-static wrist strap.
-
Using a #2 Phillips screwdriver, remove the two screws securing the service panel into place.
 询问修复机器人
-
-
-
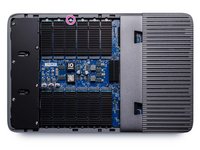
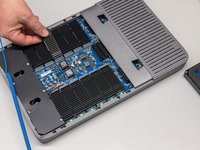
Turn Pro Data over to the top side. Grip the chassis from the long sides, and push the service panel slightly down and away from the vent. It should slide about 5mm or .2" before stopping.
-
Grab the service panel from the left edge and lift up about 30°, dislodging its tabs from the vent, and remove to reveal the chassis interior.
-
-
-
-
-
-
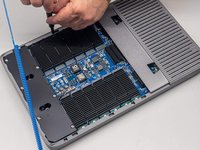
Identify the SSD module for replacement and note its retaining screw on the chassis perimeter.
-
Unfasten and remove the retention screw for the SSD module to be replaced using a #2 Phillips screwdriver.
-
-
-
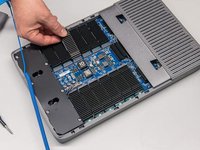
Lift the outer edge of the SSD module to a 15° angle from the motherboard.
-
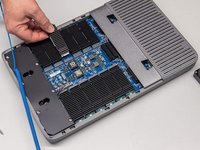
Pull the SSD module up and away from its port to remove.
-
Insert the new SSD module at the same angle, then lower it into position and fasten its retention screw.
-
-
-
After reassembling the chassis by following the steps in this guide in reverse, verify that the new SSD module is recognized and healthy by launching iodyne from the Applications folder and navigating to the Status tab.
-
-


To reassemble your device, follow these instructions in reverse order, then validate that the replacement SSD module is healthy by launching iodyne.app and navigating to the Status tab.
另外一个人完成了本指南。
