简介
此指南会教导你如何更换你iPhone 6s里的Taptic Engine 线性马达。Taptic Engine 线性马达主要功能是让手机震动及触控震动。若你的手机无法震动或是发出怪声, 此时更换Taptic Engine 线性马达也许是个不错的选择。
你所需要的
-
-
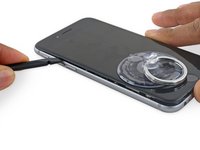
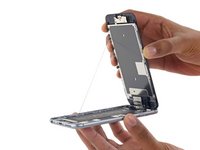
将蓝色的手柄朝铰链的方向拉,以解除反向钳的分离模式。
-
将支撑臂滑过 iPhone 的左边缘或右边缘。
-
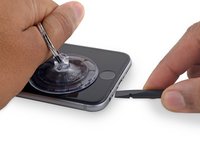
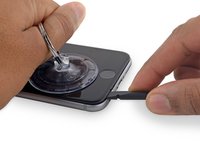
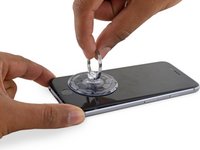
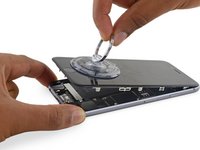
将两个吸盘放到Home键上方的屏幕——一个在前,一个在后(屏幕朝向自己的地方为前)。
-
将上方吸盘向下压以施加吸力到目标位置。
-
-
-
在这个步骤中使用的工具:Magnetic Project Mat$19.95
-
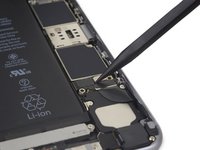
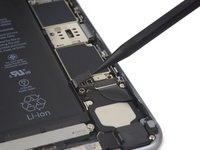
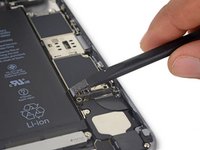
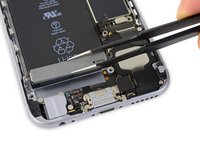
卸下电池排线固定架上的2颗十字 #00 螺丝。
-
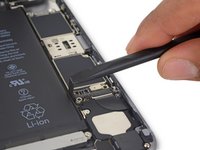
1颗2.9 mm螺丝
-
1颗2.2 mm螺丝
-


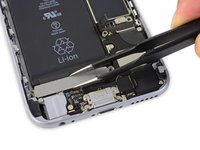
如要组装的话, 请按逆序操作。
如要组装的话, 请按逆序操作。
112等其他人完成本指南。


5条评论
Guide very clear and toolset and replacement battery worked just fine. I replaced battery without disconnecting front panel. Both glued strips got broken (I didn’t remove Taptic Engine) but I managed to rescue strips by carefully leveling up battery with the spudger and picking the strips with twezzer. Then it was easy to pull the glued strips thanks to the gap gained between battery and rear panel
Iphone 6s is back to life. Sorry for my poor English writing skills (creo que escribo mejor en Spanish)
Thank you all
A very good clear guide, and my iphone 6s works fine, restored with the new replacement battery. The replacement battery came with a full set of tools, including sucker, screwdrivers, spudgers and even a packet of screws.
I must admit, although the guide was excellent and well illustrated, I found it a bit of a challenge. I don’t know if my age (nearly 80) didn’t help , with a slightly shaky hand! Those tiny, tiny screws that can ping all over the place, and replacing the weenie terminals that could so easily be damaged if you press in the wrong place, I found the worst to cope with. However the guide was very helpful with its warnings, such as when you are getting the old battery out and the danger of damaging the volume button connector if you work too near the top end.
To conclude I think the guide is very good, and thank you.
Excellent source. I was able to repurpose an old iPhone for reuse as a quasi iPod and keep it out of the trash cycle. HINT: when disassembling devices such as this with many tiny screws I use an enlarged screen shot from the directions, tape it to a steel sheet. I lay out tiny magnets on the picture in the exact pattern as the place from which they came before I remove them. For reassembly, I remove them from the magnets one-by-one as used. This way each screw goes back in the place from which it came.
I am not a tech person, and this is the second time I have replaced the battery in my iPhone 6s using your kit and replacement battery. The first time was a year and a half ago, and all was good until that first replacement battery simply stopped charging. It lasted a year and a half, so I think that's pretty good!
The hardest part of the repair for me is getting all those tiny screws back in. Otherwise, easy to follow instructions, photos and tools. You guys do great work -- thank you!