简介
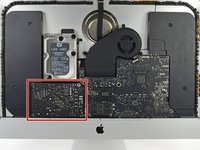
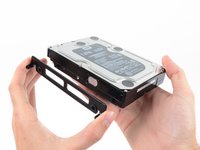
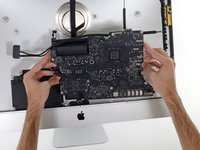
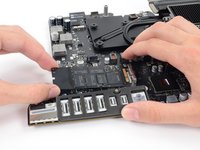
If your iMac was configured with a solid state drive or Fusion Drive, it includes a blade SSD on the back of the logic board. Use this guide to access and remove the blade SSD.
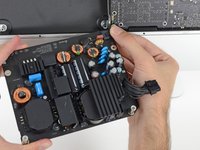
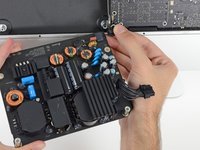
Before beginning any work on your iMac: Unplug the computer and press and hold the power button for ten seconds to discharge the power supply's capacitors.
Be very careful not to touch the capacitor leads or any exposed solder joints on the back of the power supply.
你所需要的
-
在这个步骤中使用的工具:iMac Intel 27" Cardboard Service Wedge$4.99
-
With the hinge free to move, the iMac will be unbalanced and hard to work on. Repairs can be completed with the iMac laying down, but are faster and easier with an iMac service wedge.
-
If you are using the iFixit cardboard service wedge, follow these assembly directions to put it together.
-
-
-
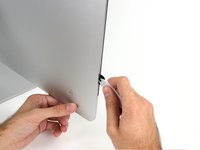
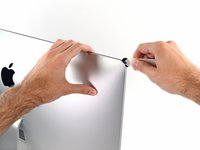
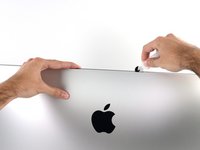
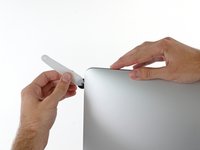
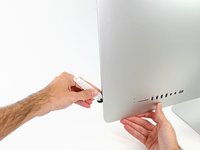
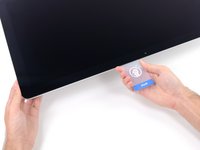
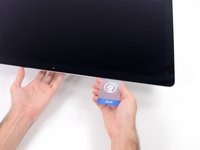
Starting on the left of the display, near the power button, insert the iMac Opening Tool into the gap between the glass panel and the rear case.
-
-
-
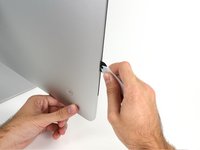
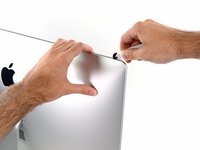
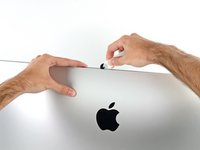
Use the tool like a pizza cutter—roll it along through the gap, and it will cut the foam adhesive through the center.
-
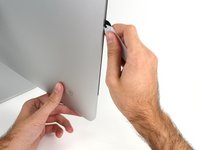
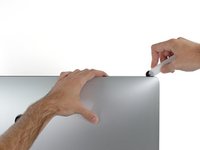
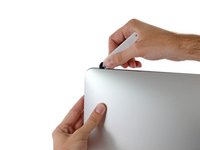
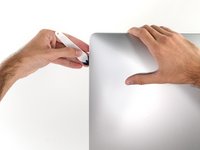
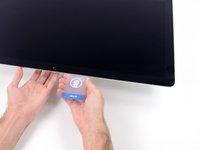
Run the tool up along the left side of the display.
-
-
-
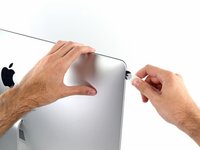
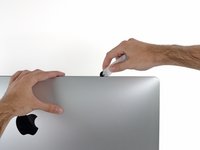
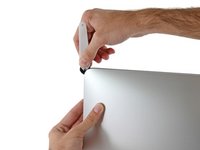
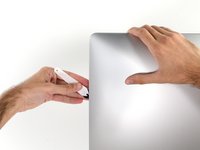
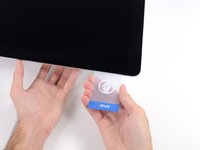
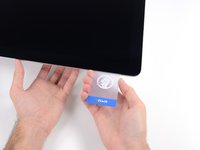
Continue wheeling the tool up around the top left corner.
-
-
-
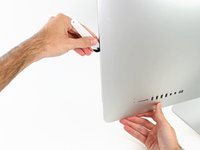
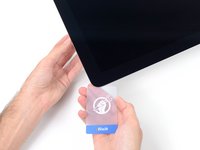
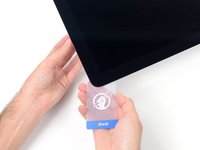
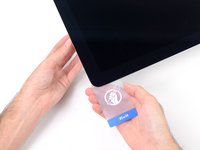
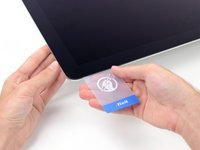
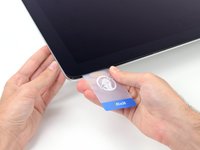
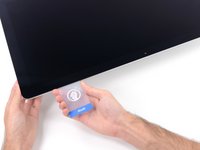
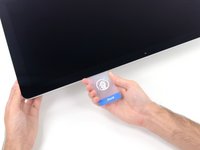
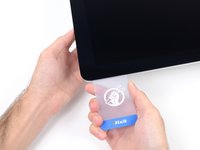
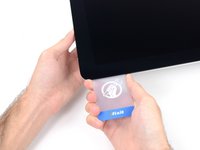
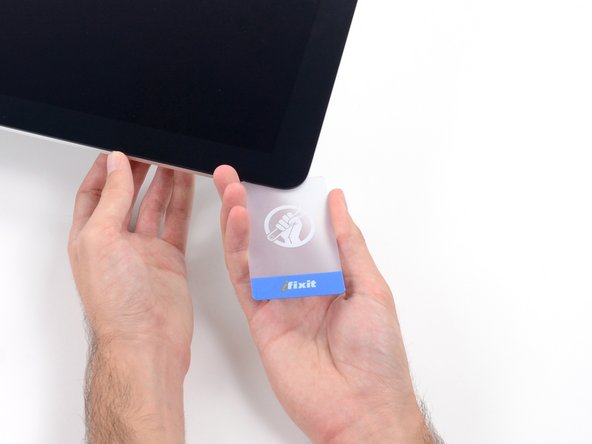
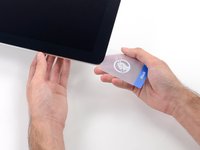
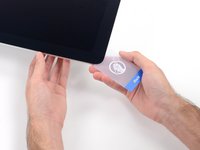
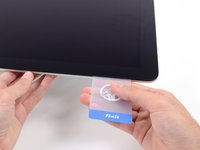
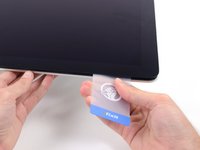
With the cards inserted as shown near the corners, gently twist the cards to increase the gap between display and case.
-
If there are any sections that seem to stick and won't separate, stop twisting and use one of the cards to cut the adhesive in the problem area.
-
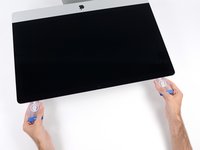
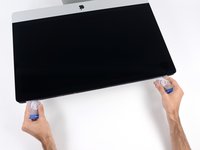
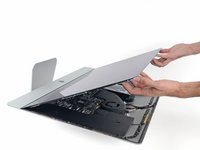
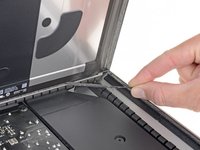
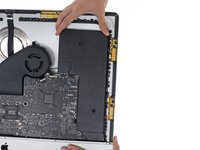
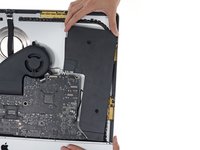
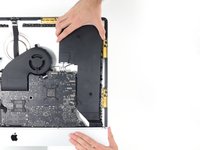
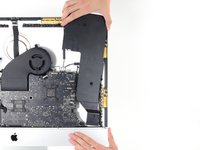
Begin to lift the top of the display up from the frame.
-
-
-
While holding the display up with one hand, use the other to unplug the display power cable.
-
-
-
-
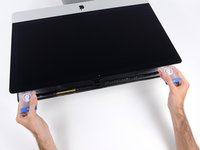
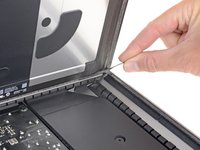
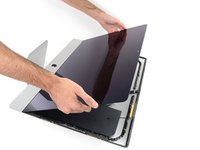
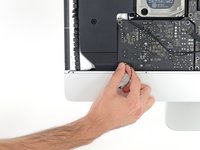
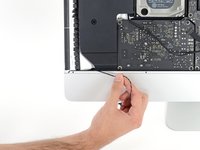
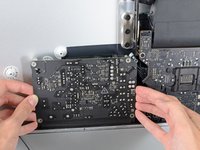
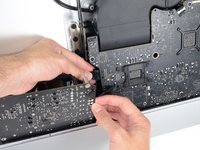
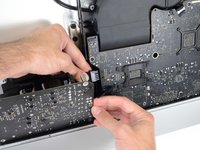
Grasp the small tab at the end of one of the bottom edge display adhesive strips and pull the adhesive toward the top of the iMac to remove it.
-
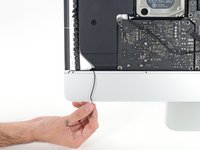
Repeat this step with the other adhesive strip and remove it.
-
-
-
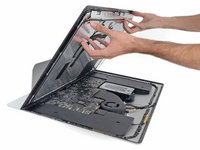
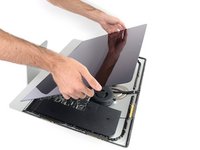
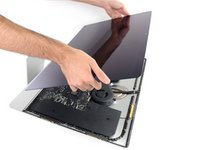
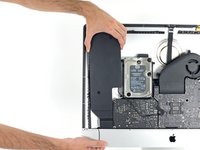
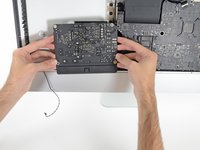
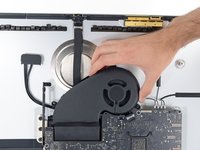
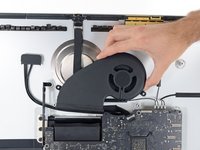
Lift the display up from the frame and remove it from the iMac. Lay the display face down on a flat, soft surface.
-
It may be necessary to slowly lift from one side, to peel against the remaining adhesive.
-
-
-
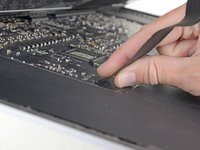
Use a Phillips screwdriver to remove the nine 3.2 mm screws securing the support bracket.
-
You may need to peel up the display adhesive lining the bottom edge of the iMac enclosure to access the screws.
-
-
-
Remove the lower support bracket (a.k.a. "chin strap") from the iMac enclosure.
-
Position the bracket diagonally.
-
Secure the rightmost screw enough to hold the bracket in place; keep it loose for now so the bracket can pivot.
-
Swing the left side of the bracket down until it sits horizontally in its original position.
-
Starting with the leftmost screw, install and tighten the remaining screws.
-
-
-
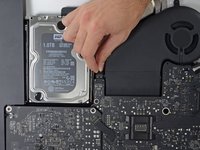
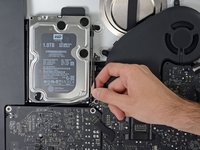
Pull straight up on the SATA data/power cable to disconnect it from the drive.
-
-
-
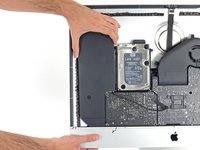
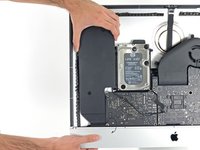
Use a T10 Torx screwdriver to remove the two 10 mm screws securing the right speaker.
-
-
-
Use the tip of a spudger to disconnect the fan cable's connector from its socket on the logic board.
-
-
-
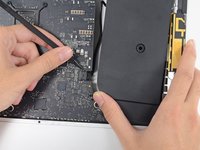
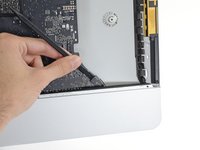
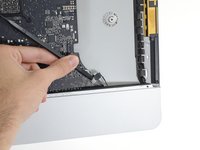
Use a T5 Torx screwdriver to remove the two 4 mm screws securing the AirPort/Bluetooth antenna cables.
-
-
在这个步骤中使用的工具:Tweezers$4.99
-
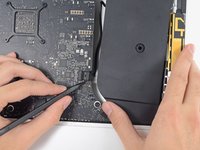
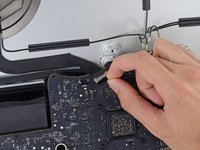
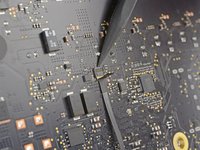
Use the tip of a spudger to flip open the retaining flap on the microphone ribbon cable ZIF socket.
-
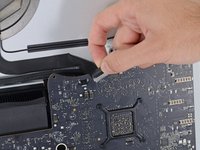
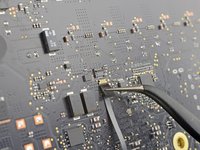
Use tweezers to gently pull the microphone ribbon cable straight out of its socket.
-
-
-
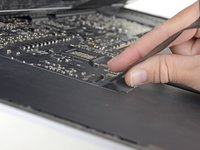
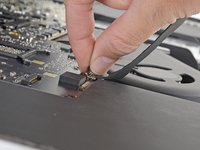
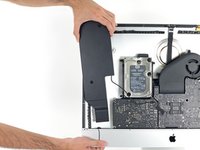
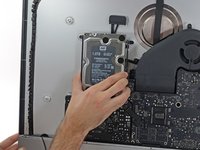
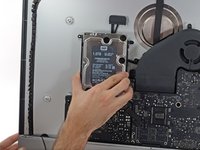
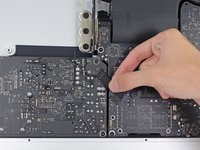
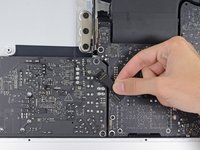
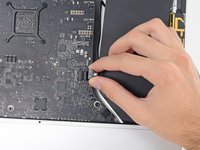
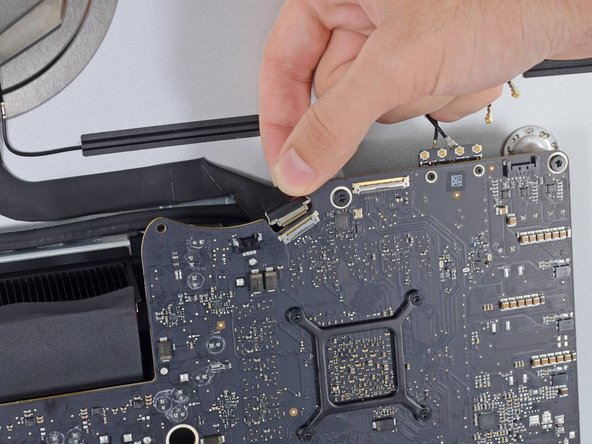
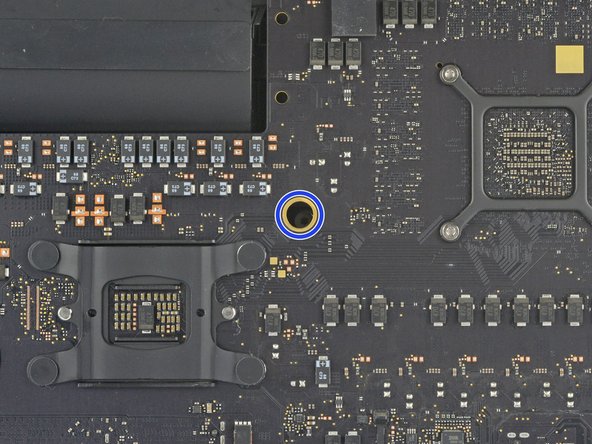
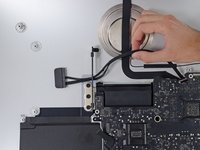
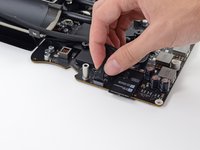
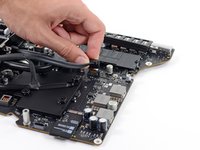
Pull up on the SATA power cable connector to disconnect it.
-
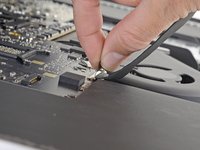
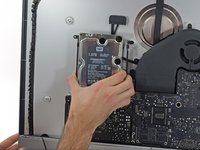
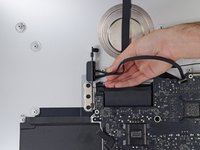
Unplug the SATA data cable connector by depressing its locking tab and pulling straight up on the connector.
-
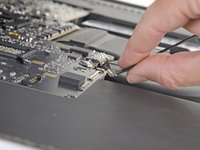
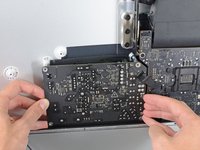
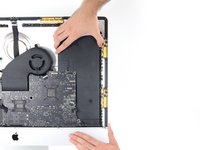
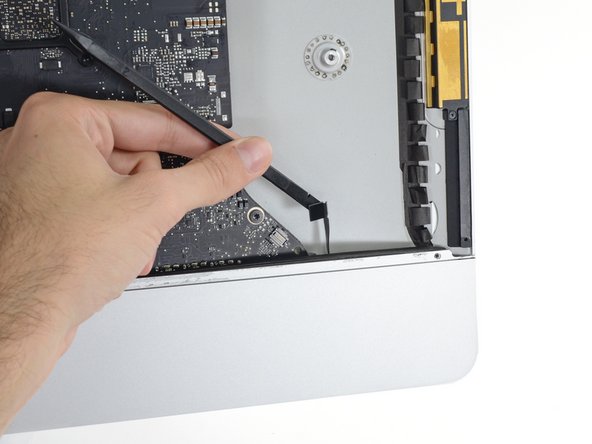
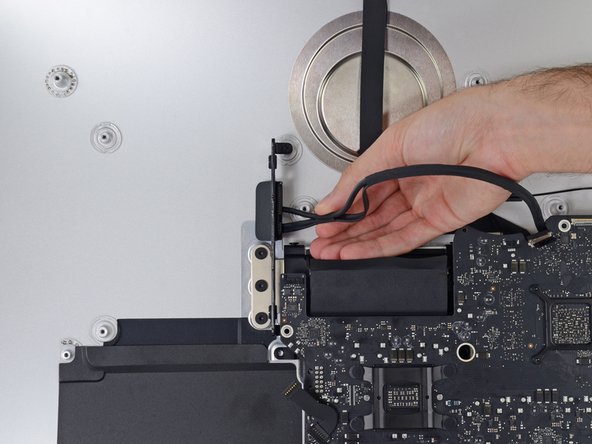
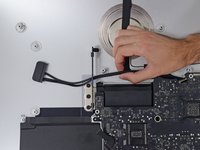
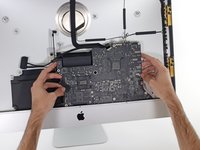
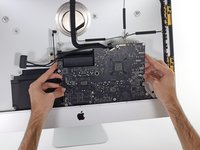
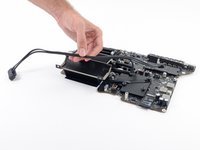
Remove the SATA cable from the logic board assembly to get it out of the way and prevent it from being damaged.
-


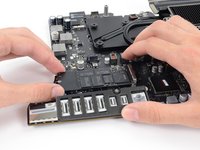
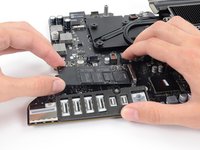
Compare your new replacement part to the original part—you may need to transfer remaining components or remove adhesive backings from the new part before installing.
To reassemble your device, follow the above steps in reverse order.
Take your e-waste to an R2 or e-Stewards certified recycler.
Repair didn’t go as planned? Check out our Answers community for troubleshooting help.
20等其他人完成本指南。

14指南评论
About as complex as a Mac gets in the modern era :-)
I struggled with re-engaging the ZIF socket for the microphone. Patience won out.
Re-seating the rear ports took a little effort; tolerances for USB-C is less than the motherboard screws. I wound up loosening all the MB screws, fully populated the rear USB/Ethernet/etc, then tightened them.
Having the correct tools definitely helped. The pizza cutter and Service Wedge makes quite the difference. Well stocked with iFixit tools here, but purchase of the adhesive package definitely helped the build.
Great teardown, thanks.
And, wow, Terminal command I haven’t used before - “diskutil resetFusion”.
Made setting up a Fusion drive a snack!
Hat problemlos funktioniert, neue WD 2 TB -SSD eingebaut.
Adapter von Amazon: NGFF M.2 NVMe SSD Convert Adapter Card für Upgrade MacBook Air 2013 2014 2015 2016 2017 und Mac Pro Retina 2013 2014 2015 (Schwarz) von Anyoyo
MMOBIEL Klebe Sticker Strip Set für LCD Display kompatibel mit iMac 27" A1419 iMac13,2 2012, iMac14,2 2013, iMac15,1 Retina 5K 2014 mid 2015, bei Amazon gefunden und damit das Ganze wieder verklebt.
jetzt läuft die Monterey-Installation durch…
Vorsicht mit den Kabeln, wie immer, ist Alles sehr fummelig.
Mit Vorsicht hat die Bastelei etwa 3 Stunden gedauert…
Reparatur-Set für iMac 5,6 cm (21,5 Zoll) / 68,6 cm (27 Zoll), rutschfester Griff + 4 Ersatzrollen aus Karbonfaser ebenfalls von Amazon zum Öffnen.
das Teil hier zum Öffnen.
Hey need help !
I lost 8 screws ***Step 24*** Remove the support bracket during the reassemble. The manual tells I need eight 3.2mm screws.
Can anyone help to clarify what screws I need. I don't really understand this size. Is this M2x3mm?