跳转到主内容

Xbox Series X SSD Replacement

你所需要的

  1. Xbox Series X SSD Replacement, Uncover the back panel screws: 步骤 1 中的图像 1,2 Xbox Series X SSD Replacement, Uncover the back panel screws: 步骤 1 中的图像 2,2
    • Before you begin, completely power down and unplug all cables from your console.

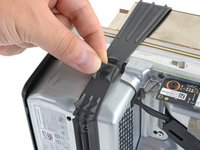
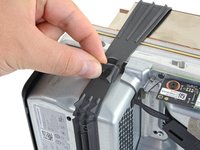
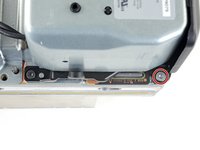
    • Use a pair of tweezers to remove the sticker hiding the first screw on the back panel, near the base.

  2. Xbox Series X SSD Replacement: 步骤 2 中的图像 1,3 Xbox Series X SSD Replacement: 步骤 2 中的图像 2,3 Xbox Series X SSD Replacement: 步骤 2 中的图像 3,3
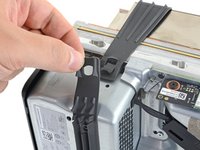
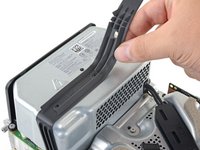
    • Use a pair of blunt tweezers to peel back the large sticker on the back panel to reveal the second screw.

    • You only need to peel this sticker to where you can access the hidden screw. You don't need to pull it completely off.

    • Technically, these are tamper-evident stickers, but don't worry—Microsoft can't legally void your warranty, as long as you don't damage anything. Have fun!

  3. Xbox Series X SSD Replacement, Remove the back panel screws: 步骤 3 中的图像 1,1
    在这个步骤中使用的工具:
    Magnetic Project Mat
    $19.95
    购买
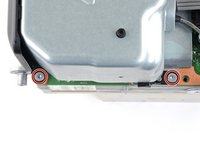
    • Use a T8 Torx driver to remove the two 7.4 mm-long screws securing the back panel.

    • Throughout this repair, keep track of each screw and make sure it goes back exactly where it came from to avoid damaging your console.

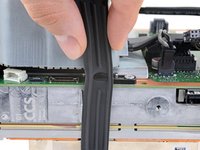
  4. Xbox Series X SSD Replacement, Unclip the back panel: 步骤 4 中的图像 1,3 Xbox Series X SSD Replacement, Unclip the back panel: 步骤 4 中的图像 2,3 Xbox Series X SSD Replacement, Unclip the back panel: 步骤 4 中的图像 3,3
    • Insert the flat end of a spudger into the gap between the back panel and the shell, near the left side of the base.

    • Pry up the back panel to release it from the locking clips.

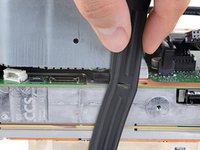
  5. Xbox Series X SSD Replacement: 步骤 5 中的图像 1,2 Xbox Series X SSD Replacement: 步骤 5 中的图像 2,2
    • Insert the flat end of a spudger into the gap between the back panel and the shell, near the right side of the base.

    • Pry up the back panel to release it from the locking clips.

  6. Xbox Series X SSD Replacement, Remove the back panel: 步骤 6 中的图像 1,3 Xbox Series X SSD Replacement, Remove the back panel: 步骤 6 中的图像 2,3 Xbox Series X SSD Replacement, Remove the back panel: 步骤 6 中的图像 3,3
    • Grip the back panel at the opening you just created and pull it up and away from the shell to unclip the long edges.

    • During reassembly, press along the edges of the back panel to snap it into place.

  7. Xbox Series X SSD Replacement: 步骤 7 中的图像 1,3 Xbox Series X SSD Replacement: 步骤 7 中的图像 2,3 Xbox Series X SSD Replacement: 步骤 7 中的图像 3,3
    • The back panel slots into a gap at the top of the shell.

    • Tilt the back panel up and pull it away from the top edge of the shell to release it from the gap.

    • Remove the back panel.

  8. Xbox Series X SSD Replacement, Remove the fan screws: 步骤 8 中的图像 1,1
    • Use a T8 Torx driver to remove the three screws securing the fan to the center chassis:

    • One 10.5 mm pancake screw

    • Two 8.8 mm screws

  9. Xbox Series X SSD Replacement, Disconnect the fan cable: 步骤 9 中的图像 1,3 Xbox Series X SSD Replacement, Disconnect the fan cable: 步骤 9 中的图像 2,3 Xbox Series X SSD Replacement, Disconnect the fan cable: 步骤 9 中的图像 3,3
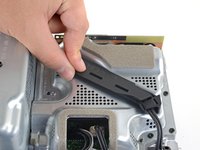
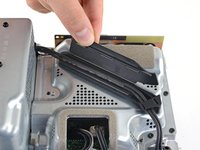
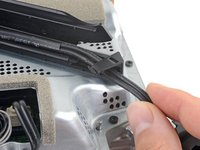
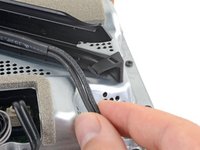
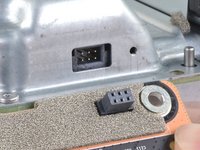
    • Use your fingers or a pair of blunt tweezers to grip the edges of the fan cable connector, and pull up to disconnect it from the center chassis.

    • Always pull cables by their connectors and not the wires themselves.

    • During reassembly, route the fan cable underneath its small cable guide on the fan housing so it doesn't interfere with the back panel.

  10. Xbox Series X SSD Replacement, Remove the fan: 步骤 10 中的图像 1,2 Xbox Series X SSD Replacement, Remove the fan: 步骤 10 中的图像 2,2
    • Slide the fan out of its slot to remove it.

    • During reinstallation, note that the fan can only be installed one way—make sure Master Chief is facing you.

    • If you are replacing the fan, a new fan will probably not include the plastic installation bracket. The bracket is attached to the fan with four T10 Torx screws. This is not pictured in this guide.

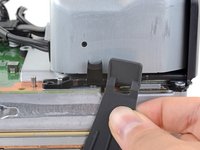
  11. Xbox Series X SSD Replacement, Unlatch the base: 步骤 11 中的图像 1,3 Xbox Series X SSD Replacement, Unlatch the base: 步骤 11 中的图像 2,3 Xbox Series X SSD Replacement, Unlatch the base: 步骤 11 中的图像 3,3
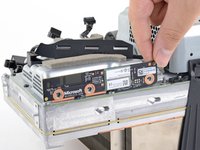
    • Use the flat end of a spudger to lift up on the locking tab holding the base to the shell.

  12. Xbox Series X SSD Replacement, Twist and remove the base: 步骤 12 中的图像 1,3 Xbox Series X SSD Replacement, Twist and remove the base: 步骤 12 中的图像 2,3 Xbox Series X SSD Replacement, Twist and remove the base: 步骤 12 中的图像 3,3
    • Grip the base and rotate it counterclockwise to unlock it from the shell.

    • You may need to hold the locking tab open while you get the base started.

    • Remove the base.

    • During reassembly, drop the base tabs into their holes on the shell and twist clockwise until the base snaps into the interior locking tab.

    • When locked in place, the "Hello from Seattle" line will be parallel with the device's sides.

  13. Xbox Series X SSD Replacement, Remove the optical drive screws: 步骤 13 中的图像 1,2 Xbox Series X SSD Replacement, Remove the optical drive screws: 步骤 13 中的图像 2,2
    • Use a T8 Torx driver to remove the two 8.8 mm screws securing the optical drive's vibration isolator to the shell: one on the base and one on the top of the isolator.

  14. Xbox Series X SSD Replacement, Remove the vibration isolator: 步骤 14 中的图像 1,3 Xbox Series X SSD Replacement, Remove the vibration isolator: 步骤 14 中的图像 2,3 Xbox Series X SSD Replacement, Remove the vibration isolator: 步骤 14 中的图像 3,3
    • Lift up the optical drive's vibration isolator to remove it.

    • The vibration isolator grips the sides of the optical drive with silicone pads, so you may need to "walk" the isolator off of the drive to slip it off each side.

    • During reassembly, ensure the vibration isolator is pushed down and around both edges of the optical drive, so it sits flush with the rest of the center chassis.

  15. Xbox Series X SSD Replacement, Disconnect the power and data cables: 步骤 15 中的图像 1,3 Xbox Series X SSD Replacement, Disconnect the power and data cables: 步骤 15 中的图像 2,3 Xbox Series X SSD Replacement, Disconnect the power and data cables: 步骤 15 中的图像 3,3
    • Use a pair of blunt tweezers to grip the edges of the optical drive power connector and pull up to disconnect it from the optical drive.

    • Always pull cables by their connectors and not the wires themselves.

    • Use your fingers to pull up and disconnect the data cable from the optical drive.

  16. Xbox Series X SSD Replacement, Remove the optical drive: 步骤 16 中的图像 1,2 Xbox Series X SSD Replacement, Remove the optical drive: 步骤 16 中的图像 2,2
    • Grip the top edge of the optical drive and pull it out of its slot in the shell to remove it.

    • During reassembly, align the pegs on the bottom edge of the optical drive with the guide holes on the bottom of the shell.

    • If the drive is misaligned, the top vibration isolator will not be able to be installed correctly, and the disc reader will be misaligned with the front of the console.

  17. Xbox Series X SSD Replacement, Disconnect the USB port cable: 步骤 17 中的图像 1,3 Xbox Series X SSD Replacement, Disconnect the USB port cable: 步骤 17 中的图像 2,3 Xbox Series X SSD Replacement, Disconnect the USB port cable: 步骤 17 中的图像 3,3
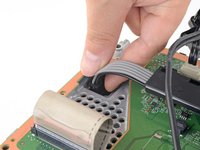
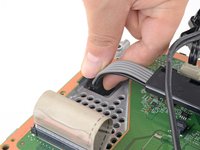
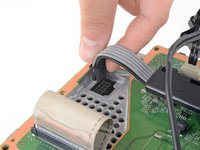
    • The ribbon cables and their connectors are extremely fragile, so always open locking tabs gently and pull cables slowly.

    • Use the flat end of a spudger to flip open the metal locking tab on the USB port ribbon cable.

    • During reassembly, gently snap the metal locking tab back into place once the cable has been inserted.

  18. Xbox Series X SSD Replacement: 步骤 18 中的图像 1,2 Xbox Series X SSD Replacement: 步骤 18 中的图像 2,2
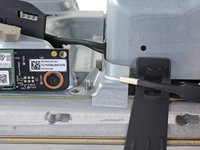
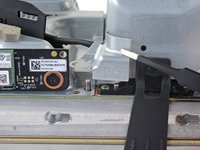
    • Use a pair of tweezers to pull up on the black plastic pull tab to disconnect the USB port cable.

    • Pull only on the pull tab, not the cable itself.

    • If the USB port cable feels adhered to the metal chassis, apply an iOpener or carefully heat it with a hair dryer to soften the adhesive.

  19. Xbox Series X SSD Replacement, Disconnect the power button cable: 步骤 19 中的图像 1,3 Xbox Series X SSD Replacement, Disconnect the power button cable: 步骤 19 中的图像 2,3 Xbox Series X SSD Replacement, Disconnect the power button cable: 步骤 19 中的图像 3,3
    • Use the pointed end of a spudger to depress the metal tab on the side of the power button cable's board connector.

    • With the metal tab depressed, use a pair of tweezers to pull up on the pull tab to disconnect the power button cable from the center chassis.

    • Pull only on the pull tab, not the cable itself.

    • Don't pull on the cable without depressing the metal tab, otherwise you risk damaging either the cable or the connector.

    • During reassembly, the cable should lightly "snap" into place when inserted.

  20. Xbox Series X SSD Replacement, Remove the chassis screws: 步骤 20 中的图像 1,1
    • Use a T8 Torx driver to remove the three 7.4 mm screws securing the center chassis assembly to the shell.

  21. Xbox Series X SSD Replacement, Peel up the USB port cable: 步骤 21 中的图像 1,2 Xbox Series X SSD Replacement, Peel up the USB port cable: 步骤 21 中的图像 2,2
    • Gently peel the taped USB port ribbon cable off of the heatsink.

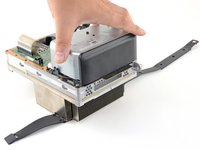
  22. Xbox Series X SSD Replacement, Remove the center chassis assembly: 步骤 22 中的图像 1,3 Xbox Series X SSD Replacement, Remove the center chassis assembly: 步骤 22 中的图像 2,3 Xbox Series X SSD Replacement, Remove the center chassis assembly: 步骤 22 中的图像 3,3
    • The center chassis is aligned to the shell with guide pegs. These pegs will need to slide out of their slots to allow the chassis to be lifted out.

    • Grip the center chassis and pull it towards the green fan grille at the top of the shell, uncoupling the guide pegs from the shell.

    • Lift out the center chassis assembly to remove it from the shell.

    • During reassembly, make sure neither of the ribbon cables get pinched as you lower the center chassis into the shell.

  23. Xbox Series X SSD Replacement, Unlatch the chassis strap: 步骤 23 中的图像 1,3 Xbox Series X SSD Replacement, Unlatch the chassis strap: 步骤 23 中的图像 2,3 Xbox Series X SSD Replacement, Unlatch the chassis strap: 步骤 23 中的图像 3,3
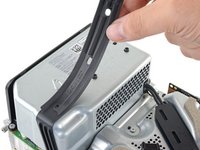
    • Unlatch the chassis strap from the right side of the power supply.

  24. Xbox Series X SSD Replacement: 步骤 24 中的图像 1,3 Xbox Series X SSD Replacement: 步骤 24 中的图像 2,3 Xbox Series X SSD Replacement: 步骤 24 中的图像 3,3
    • Pull the chassis strap over and off of the power supply.

    • Once the strap is off of the power supply, set the loose section to the side.

  25. Xbox Series X SSD Replacement, Remove the power cable port: 步骤 25 中的图像 1,1
    • Use a T8 Torx driver to remove the three screws securing the power cable port to the chassis:

    • Two 13.1 mm screws

    • One 35 mm screw

  26. Xbox Series X SSD Replacement: 步骤 26 中的图像 1,2 Xbox Series X SSD Replacement: 步骤 26 中的图像 2,2
    • Lift the power connector out of its recess in the chassis.

  27. Xbox Series X SSD Replacement, De-route the power cables: 步骤 27 中的图像 1,2 Xbox Series X SSD Replacement, De-route the power cables: 步骤 27 中的图像 2,2
    • Unlatch and open the lid on the power cable's plastic guide.

  28. Xbox Series X SSD Replacement: 步骤 28 中的图像 1,2 Xbox Series X SSD Replacement: 步骤 28 中的图像 2,2
    • Lift the power cable out from underneath the extra section of the cable guide.

  29. Xbox Series X SSD Replacement, Remove the corner cover: 步骤 29 中的图像 1,1
    • Use a T8 Torx driver to remove the 8.8 mm screw securing the power supply corner cover.

  30. Xbox Series X SSD Replacement: 步骤 30 中的图像 1,2 Xbox Series X SSD Replacement: 步骤 30 中的图像 2,2
    • Use your fingers or a pair of tweezers to lift and remove the power supply corner cover.

  31. Xbox Series X SSD Replacement, Remove the accessory antenna board: 步骤 31 中的图像 1,1
    • Use a T8 Torx driver to remove the three 9.6 mm screws securing the accessory antenna board to the center chassis.

  32. Xbox Series X SSD Replacement: 步骤 32 中的图像 1,3 Xbox Series X SSD Replacement: 步骤 32 中的图像 2,3 Xbox Series X SSD Replacement: 步骤 32 中的图像 3,3
    • Grip the antenna board and pull it directly away from the center chassis to disconnect it.

    • During reassembly, align the board's connector with the port on the center chassis and press to reconnect.

  33. Xbox Series X SSD Replacement, Remove the board shield: 步骤 33 中的图像 1,1
    • Use a T8 Torx driver to remove the nine screws securing the board shield:

    • Six 8.8 mm black screws

    • Two 35 mm silver screws

    • One 13.1 mm silver screw

  34. Xbox Series X SSD Replacement: 步骤 34 中的图像 1,3 Xbox Series X SSD Replacement: 步骤 34 中的图像 2,3 Xbox Series X SSD Replacement: 步骤 34 中的图像 3,3
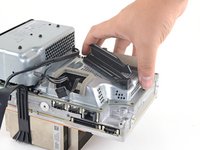
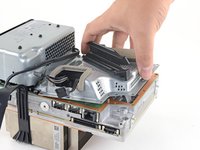
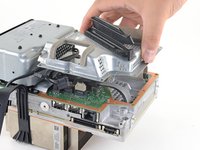
    • Lift up the board shield to remove it from the center chassis.

  35. Xbox Series X SSD Replacement, Remove the chassis strap: 步骤 35 中的图像 1,3 Xbox Series X SSD Replacement, Remove the chassis strap: 步骤 35 中的图像 2,3 Xbox Series X SSD Replacement, Remove the chassis strap: 步骤 35 中的图像 3,3
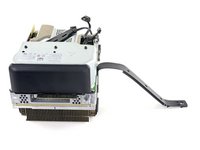
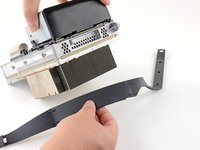
    • Disconnect the chassis strap from the locking tabs on either side of the power supply.

  36. Xbox Series X SSD Replacement: 步骤 36 中的图像 1,2 Xbox Series X SSD Replacement: 步骤 36 中的图像 2,2
    • Remove the chassis strap.

  37. Xbox Series X SSD Replacement, Remove the 10-pin power cable: 步骤 37 中的图像 1,3 Xbox Series X SSD Replacement, Remove the 10-pin power cable: 步骤 37 中的图像 2,3 Xbox Series X SSD Replacement, Remove the 10-pin power cable: 步骤 37 中的图像 3,3
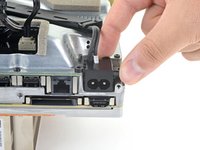
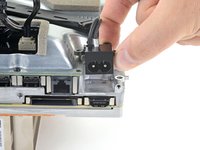
    • Grip and compress the locking tab on the 10-pin power connector.

    • While compressing the locking tab, lift the connector straight up to disconnect it from the board.

    • Always pull cables by their connectors and not the wires themselves.

  38. Xbox Series X SSD Replacement, Remove the 2-pin power cable: 步骤 38 中的图像 1,3 Xbox Series X SSD Replacement, Remove the 2-pin power cable: 步骤 38 中的图像 2,3 Xbox Series X SSD Replacement, Remove the 2-pin power cable: 步骤 38 中的图像 3,3
    • Grip and compress the locking tab on the 2-pin power connector.

    • While compressing the locking tab, lift the connector straight up to disconnect it from the board.

  39. Xbox Series X SSD Replacement, Open the cable guide: 步骤 39 中的图像 1,2 Xbox Series X SSD Replacement, Open the cable guide: 步骤 39 中的图像 2,2
    • Open the lid on the power supply's plastic cable guide.

  40. Xbox Series X SSD Replacement, Remove the power supply screws: 步骤 40 中的图像 1,2 Xbox Series X SSD Replacement, Remove the power supply screws: 步骤 40 中的图像 2,2
    • Use a T8 Torx driver to remove the four screws securing the power supply around its perimeter:

    • Three 35 mm silver screws

    • One 8.8 mm black screw

  41. Xbox Series X SSD Replacement, Remove the power supply: 步骤 41 中的图像 1,2 Xbox Series X SSD Replacement, Remove the power supply: 步骤 41 中的图像 2,2
    • Remove the power supply.

  42. Xbox Series X SSD Replacement, Remove the Wi-Fi board: 步骤 42 中的图像 1,1
    • Use a T8 Torx driver to remove the three 8.8 mm screws securing the Wi-Fi antenna board.

  43. Xbox Series X SSD Replacement: 步骤 43 中的图像 1,3 Xbox Series X SSD Replacement: 步骤 43 中的图像 2,3 Xbox Series X SSD Replacement: 步骤 43 中的图像 3,3
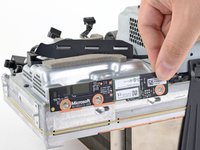
    • Grip the antenna board and pull it directly away from the center chassis to disconnect it.

    • Don't pull the antenna board up until it is completely disconnected.

    • Remove the antenna board.

    • During reassembly, align the board's connector with the port on the center chassis and press to reconnect.

  44. Xbox Series X SSD Replacement, Disconnect the interconnect cable: 步骤 44 中的图像 1,3 Xbox Series X SSD Replacement, Disconnect the interconnect cable: 步骤 44 中的图像 2,3 Xbox Series X SSD Replacement, Disconnect the interconnect cable: 步骤 44 中的图像 3,3
    • Grip the base of the interconnect cable connector with your fingers.

    • Depress each side of the connector to unlock the cable locking tabs.

    • With the locking tabs depressed, grip the edges of the interconnect cable and pull it straight out of the connector to disconnect it.

    • With the locking tabs depressed correctly, the interconnect cable will slide out with very little force.

    • During reassembly, the interconnect cable should "snap" into place when fully inserted.

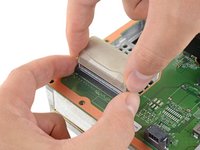
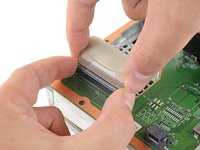
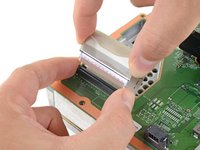
  45. Xbox Series X SSD Replacement, Remove the center chassis: 步骤 45 中的图像 1,3 Xbox Series X SSD Replacement, Remove the center chassis: 步骤 45 中的图像 2,3 Xbox Series X SSD Replacement, Remove the center chassis: 步骤 45 中的图像 3,3
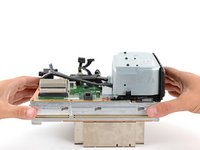
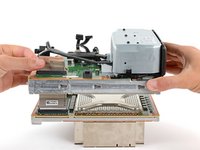
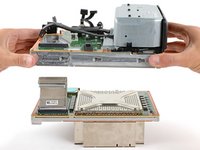
    • Lift the center chassis off of the motherboard and heatsink assembly.

    • Route the interconnect cable through the cutout on the center chassis as you remove it.

  46. Xbox Series X SSD Replacement, Pry off the SSD shield: 步骤 46 中的图像 1,3 Xbox Series X SSD Replacement, Pry off the SSD shield: 步骤 46 中的图像 2,3 Xbox Series X SSD Replacement, Pry off the SSD shield: 步骤 46 中的图像 3,3
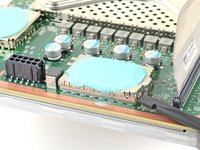
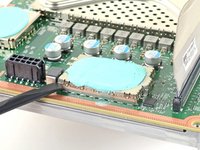
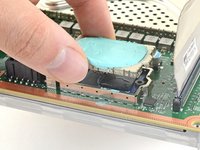
    • The SSD shield has thermal pads on either side, so ensure these are kept as intact as possible during this procedure.

    • Use the flat end of a spudger to pry up the edges of the metal SSD shield.

    • Remove the SSD shield.

  47. Xbox Series X SSD Replacement, Remove the SSD screw: 步骤 47 中的图像 1,1
    • Use a T8 Torx driver to remove the 5.2 mm screw securing the SSD.

  48. Xbox Series X SSD Replacement, Remove the SSD: 步骤 48 中的图像 1,2 Xbox Series X SSD Replacement, Remove the SSD: 步骤 48 中的图像 2,2
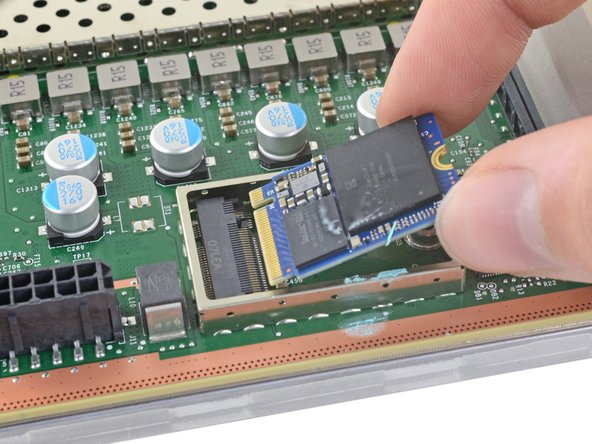
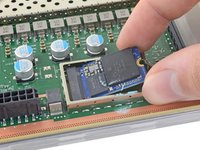
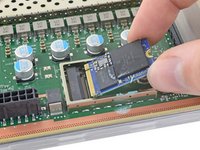
    • With the SSD screw removed, the SSD will pop up at a shallow angle.

    • Grip the end of the SSD and pull it away from its M.2 board connector to remove it.

    • During reassembly, insert the SSD at a shallow angle into its board connector, and secure it back into its horizontal position with the SSD screw.

结论

To reassemble your device, follow these instructions in reverse order.

Take your e-waste to an R2 or e-Stewards certified recycler.

Repair didn’t go as planned? Try some basic troubleshooting, or ask our Xbox Series X Answers community for help.

16等其他人完成本指南。

Carsten Frauenheim

于03/10/20注册

113,086 声望

创作了338篇指南

团队

iFixit iFixit 的会员

Staff

135 名成员

创作了16,767篇指南

8条评论

What name cards are compatible to install in the series x and what is the max storage capacity that can be installed?

Keith Horton - 回复

Theoretically speaking, any M.2 NVMe 2230 SSD PCIe 4.0 that’s been formatted to New Technology File System (NTFS, proprietary MS formatting for Windows 7 onwards) should work. You’ll also need to make a Xbox OS installer USB as well, in the same style as making a Media Creation Tool for Windows 8.1 and 10 installation on new HDDs and SSDs.

https://support.xbox.com/en-AU/help/hard...

The issue I want to find out is which sector allocation value is required -> leads into the theoretical max storage of a single internal SSD (around 16TB assuming a 4KB sector size). https://docs.microsoft.com/en-us/windows...

Noobgamer0111 -

The Xbox SSDs are all PCIe 4.0x2 so you need WD CH (NOT PC) SN530/SN560 or SSSDTC/Lite-On XA1 SSDs.

The CH SN560 is a newer model that has faster read speeds (2400 vs 2000 MB/s) but is much more rare. Most of the CH WD SSDs on the market is CH SN530.

Mike -

I thought these were married to the board? Say if I were to buy one from ebay that's missing its ssd wouldn't installing a new one just make it so that the console won't power on? I'm hoping that I'm wrong because there are several out there.

John - 回复

Correct the SSD has a hidden partition that contains encrypted info marrying the SSD to the main board. However you can do a bit by bit clone of this partition providing your drive hasn't failed already.

Dunno about size or make I suspect you can only install 1GB until MS update the firmware and release models with bigger SSDs in.

NorfolknGood - 回复

添加评论

浏览统计数据:

过去 24 小时: 92

过去 7 天: 504

过去 30 天: 2,633

总计 74,923