跳转到主内容
加入维修社区 - 创建账户

Texas Instruments TI-92 Batteries Replacement

你所需要的

    1. Texas Instruments TI-92 Batteries Replacement, Back Cover: 步骤 1 中的图像 1,3 Texas Instruments TI-92 Batteries Replacement, Back Cover: 步骤 1 中的图像 2,3 Texas Instruments TI-92 Batteries Replacement, Back Cover: 步骤 1 中的图像 3,3
      • The first step to any repair operation is to remove the front cover.

      • Grab the back of the calculator with one hand and the cover with the other.

      • Pull the cover off from one of the sides for easy removal.

      询问修复机器人

      添加评论

    2. Texas Instruments TI-92 Batteries Replacement: 步骤 2 中的图像 1,2 Texas Instruments TI-92 Batteries Replacement: 步骤 2 中的图像 2,2
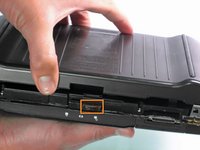
      • Orientate the calculator with the top facing towards you.

      • Slide the locking tab,found on the top part of the calculator, to the unlock position.

      询问修复机器人

      添加评论

    3. Texas Instruments TI-92 Batteries Replacement: 步骤 3 中的图像 1,2 Texas Instruments TI-92 Batteries Replacement: 步骤 3 中的图像 2,2
      • "Locking Tab"

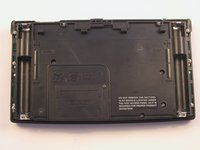
      • To remove the back cover, slide the cover away from the locking tab towards the bottom of the calculator until the cover no longer slides.

      • Then with the front of the calculator facing down, pull up on the back cover.

      • The calculator should now be orientated with the front facing down, as shown in picture 2.

      询问修复机器人

      添加评论

    1. Texas Instruments TI-92 Batteries Replacement, Batteries: 步骤 4 中的图像 1,3 Texas Instruments TI-92 Batteries Replacement, Batteries: 步骤 4 中的图像 2,3 Texas Instruments TI-92 Batteries Replacement, Batteries: 步骤 4 中的图像 3,3
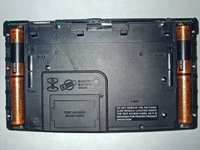
      • The Batteries are now exposed and the calculator is face down with the back towards you.

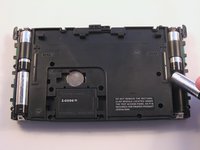
      • Remove the bottom batteries by pressing the battery towards you while pulling it out from the far end.

      • If you can not do the previous step with your finger try using a flat ended tool such as an Ipod opening tool.

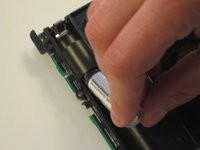
      • After the bottom battery has been removed push or slide the other(top) battery towards you until it is fully exposed in the battery slot.

      • Now simply remove the battery.

      询问修复机器人

      添加评论

结论

To reassemble your device, follow these instructions in reverse order.

取消:我没有完成这个指南。

4等其他人完成本指南。

团队

Cal Poly, Team 15-51, Garner Spring 2010 Cal Poly, Team 15-51, Garner Spring 2010 的会员

CPSU-GARNER-S10S15G51

5 名成员

创作了27篇指南

0指南评论

添加评论

浏览统计数据:

过去 24 小时: 2

过去 7 天: 10

过去 30 天: 57

总计 8,115