跳转到主内容

SwagTron T1 Wheel Replacement

你所需要的

  1. SwagTron T1 Wheel Replacement, Back Panels: 步骤 1 中的图像 1,1
    • Ensure that the SwagTron is off.

    • Turn the SwagTron upside down to see the underside.

  2. SwagTron T1 Wheel Replacement: 步骤 2 中的图像 1,3 SwagTron T1 Wheel Replacement: 步骤 2 中的图像 2,3 SwagTron T1 Wheel Replacement: 步骤 2 中的图像 3,3
    • Unscrew the eighteen 10mm screws that secure the back panels using a Phillips #2 screwdriver.

    • The screws are tightly in place. It will take effort to screw them out.

    • The panel is still attached to the SwagTron by wires that go to the motherboard.

    • Carefully lift the panels off

  3. SwagTron T1 Wheel Replacement: 步骤 3 中的图像 1,3 SwagTron T1 Wheel Replacement: 步骤 3 中的图像 2,3 SwagTron T1 Wheel Replacement: 步骤 3 中的图像 3,3
    • Follow the wires from the panels to the motherboard.

    • You may need to cut any zip ties that are holding the wires together.

    • There is one connection on the battery side and three on the other side that must be removed.

    • These connections may be difficult to remove. Try to securely press the connection and pull firmly.

    • Your back panels are now completely removed.

  4. SwagTron T1 Wheel Replacement, Wheel: 步骤 4 中的图像 1,3 SwagTron T1 Wheel Replacement, Wheel: 步骤 4 中的图像 2,3 SwagTron T1 Wheel Replacement, Wheel: 步骤 4 中的图像 3,3
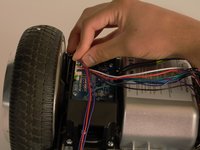
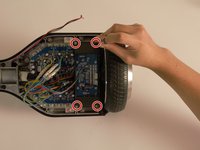
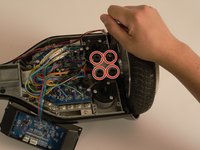
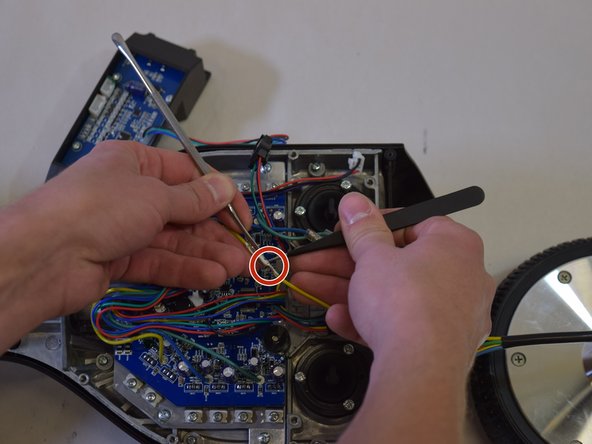
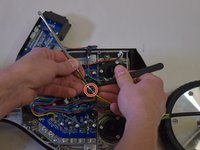
    • Using your Phillips #2 screwdriver, remove the four 1cm screws that attach the gyroscope and its black case to the hoverboard.

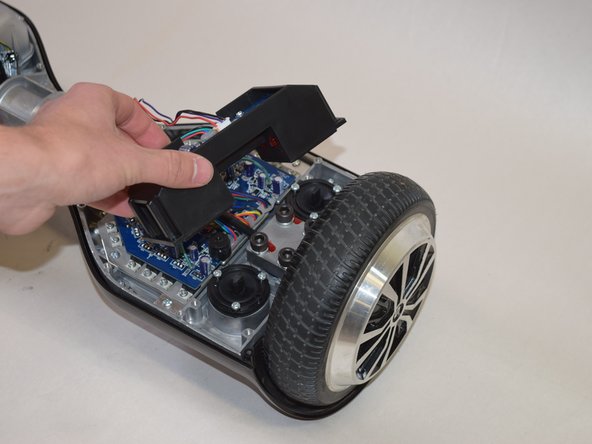
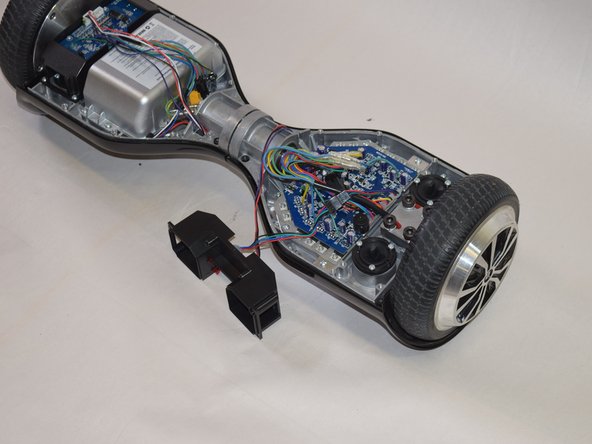
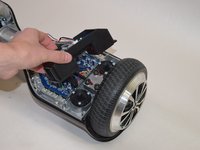
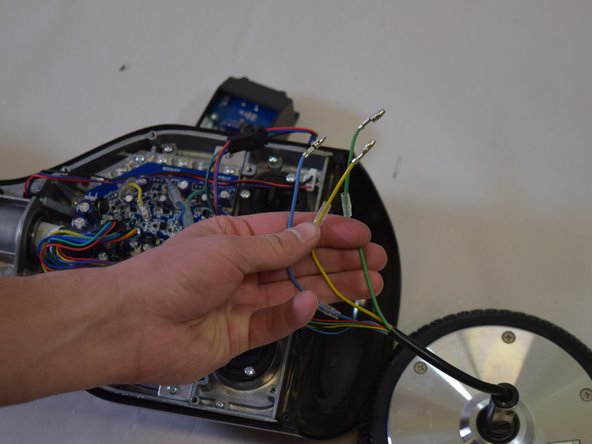
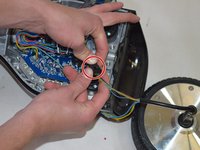
    • Carefully remove this component and set it off to the side.

  5. SwagTron T1 Wheel Replacement: 步骤 5 中的图像 1,3 SwagTron T1 Wheel Replacement: 步骤 5 中的图像 2,3 SwagTron T1 Wheel Replacement: 步骤 5 中的图像 3,3
    • Using your H 6.0 allen wrench, remove the four 20mm black bolts shown in the picture.

    • Take off the iron plate holding the wheel in place.

    • Remove the Motor/Wheel and set it aside close by to the hoverboard.

    • The wires from the Motor/Wheel should still be connected to the motherboard.

    • These bolts are very tight, it may be difficult to remove them. Try using a tool with a long handle.

  6. SwagTron T1 Wheel Replacement: 步骤 6 中的图像 1,3 SwagTron T1 Wheel Replacement: 步骤 6 中的图像 2,3 SwagTron T1 Wheel Replacement: 步骤 6 中的图像 3,3
    • Slide the protective plastic off the connectors on the marked wires (green, blue, and yellow) using your hands or a set of tweezers.

    • The connectors on the wires of your hoverboard may be different from those shown in the pictures on the left due to differences in manufacturing.

    • Separate the set of marked green, blue, and yellow wires from their connectors.

  7. SwagTron T1 Wheel Replacement: 步骤 7 中的图像 1,3 SwagTron T1 Wheel Replacement: 步骤 7 中的图像 2,3 SwagTron T1 Wheel Replacement: 步骤 7 中的图像 3,3
    • Finally separate the last connector shown on the left.

    • Your wheel is completely removed; slide in a new Motor/Wheel into the slot and follow the previous steps in reverse order.

    • Make sure the replacement wheel is snug. Neither rubbing on the outer rim nor on the side of the hoverboard.

结论

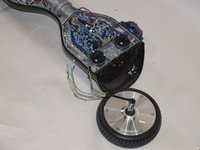
To reassemble your device, follow these instructions in reverse order.

4等其他人完成本指南。

Teagan Allen

于04/18/17注册

426 声望

创作了2篇指南

团队

Cal Poly, Team S17-G5, Banghart Spring 2017 Cal Poly, Team S17-G5, Banghart Spring 2017 的会员

CPSU-BANGHART-S17S17G5

4 名成员

创作了5篇指南

3条评论

Where do you get replacement wheels?

Elizabeth Schumacher - 回复

Where can we find replacement wheels?

Liz Vance - 回复

Mine won't stop beeping?? Fully charged.

Rachael Anderson - 回复

添加评论

浏览统计数据:

过去 24 小时: 1

过去 7 天: 5

过去 30 天: 32

总计 5,596