跳转到主内容

Sony Reader Touch Edition PRS-600 Screen Replacement

你所需要的

  1. Sony Reader Touch Edition PRS-600 Screen Replacement, Back Panel: 步骤 1 中的图像 1,1
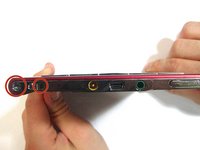
    • Using the Phillips head screwdriver PH000, remove the two 1.4 mm screws that are located on the backside of the device.

  2. Sony Reader Touch Edition PRS-600 Screen Replacement: 步骤 2 中的图像 1,1
    • Slide the back cover off by pushing it to the left, away from the side that held the screws.

    • Remove the cover.

  3. Sony Reader Touch Edition PRS-600 Screen Replacement: 步骤 3 中的图像 1,1
    • This is what the device should look like once the back cover panel has been removed.

  4. Sony Reader Touch Edition PRS-600 Screen Replacement, Battery: 步骤 4 中的图像 1,1
    • Once the back cover has been removed locate the battery in the bottom right corner of the device.

    • Using the pointed end of the spudger, push out the white plug that is connected to the battery from its beige base.

  5. Sony Reader Touch Edition PRS-600 Screen Replacement: 步骤 5 中的图像 1,1
    • Use the flat end of the spudger to pry the battery out of its holder. There may be glue holding it in place.

  6. Sony Reader Touch Edition PRS-600 Screen Replacement, Power Button: 步骤 6 中的图像 1,1
    • Remove the stylus from the device.

  7. Sony Reader Touch Edition PRS-600 Screen Replacement: 步骤 7 中的图像 1,3 Sony Reader Touch Edition PRS-600 Screen Replacement: 步骤 7 中的图像 2,3 Sony Reader Touch Edition PRS-600 Screen Replacement: 步骤 7 中的图像 3,3
    • Using the Phillips screwdriver remove the 1.4 mm screw from the top panel.

    • Using the same screwdriver, remove the 1.4 mm screw from the back of the device.

    • Pry apart off the top panel of the device.

  8. Sony Reader Touch Edition PRS-600 Screen Replacement, Side and Bottom Panel: 步骤 8 中的图像 1,2 Sony Reader Touch Edition PRS-600 Screen Replacement, Side and Bottom Panel: 步骤 8 中的图像 2,2
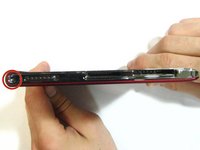
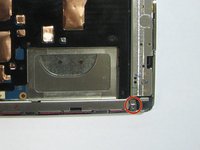
    • Using a Phillips head screwdriver, remove the two 1.4 mm screws from the bottom panel of the device.

    • Using the same screwdriver, remove the 1.4 mm screw that is located on the back of the device.

  9. Sony Reader Touch Edition PRS-600 Screen Replacement: 步骤 9 中的图像 1,2 Sony Reader Touch Edition PRS-600 Screen Replacement: 步骤 9 中的图像 2,2
    • Pull the panel away from the device. You may have to use the flat end of the spudger to remove the side portion of the panel because it will be glued in place.

  10. Sony Reader Touch Edition PRS-600 Screen Replacement, Inner Casing: 步骤 10 中的图像 1,1
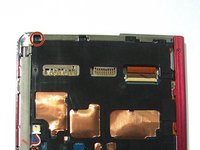
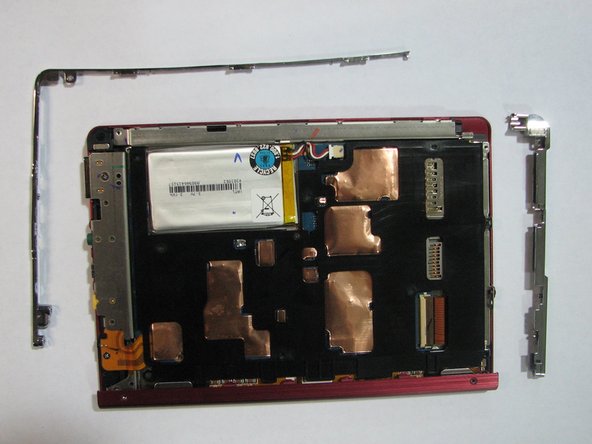
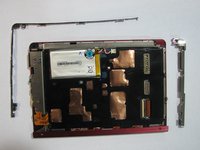
    • Using a screwdriver remove the four 1.4 mm screws that are holding the black plastic casing in place.

  11. Sony Reader Touch Edition PRS-600 Screen Replacement: 步骤 11 中的图像 1,1
    • Pry open the black casing to access the screw that is holding down the battery holder.

    • Remove the one 1.4 mm screw that is holding down the battery holder located under black casing.

    • Lift the black inner casing and the battery holder out of the device.

    • The battery holder and the black inner casing are connected by a thin strip of copper. There may be glue holding the black inner casing in place.

  12. Sony Reader Touch Edition PRS-600 Screen Replacement, Motherboard: 步骤 12 中的图像 1,1
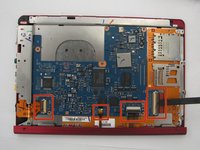
    • Using a Phillips head screwdriver, remove the one 1.4 mm screw holding in the motherboard.

  13. Sony Reader Touch Edition PRS-600 Screen Replacement: 步骤 13 中的图像 1,2 Sony Reader Touch Edition PRS-600 Screen Replacement: 步骤 13 中的图像 2,2
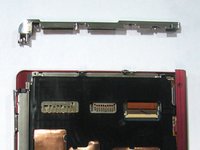
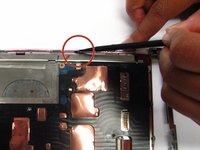
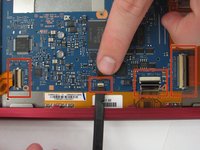
    • Using the flat end of the spudger, flip up the 4 latches holding down the thin, orange strips that connect the motherboard to the screen, audio/AC adapter/micro USB ports, and SD card/PRODuo ports.

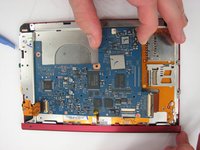
    • To disconnect the the screen, audio/AC adapter/micro USB ports, and SD card/PRODuo ports pull each orange slip away from their corresponding latch.

  14. Sony Reader Touch Edition PRS-600 Screen Replacement: 步骤 14 中的图像 1,2 Sony Reader Touch Edition PRS-600 Screen Replacement: 步骤 14 中的图像 2,2
    • Lift the end of the motherboard closest to the memory cards and pull out.

  15. Sony Reader Touch Edition PRS-600 Screen Replacement, Screen: 步骤 15 中的图像 1,2 Sony Reader Touch Edition PRS-600 Screen Replacement, Screen: 步骤 15 中的图像 2,2
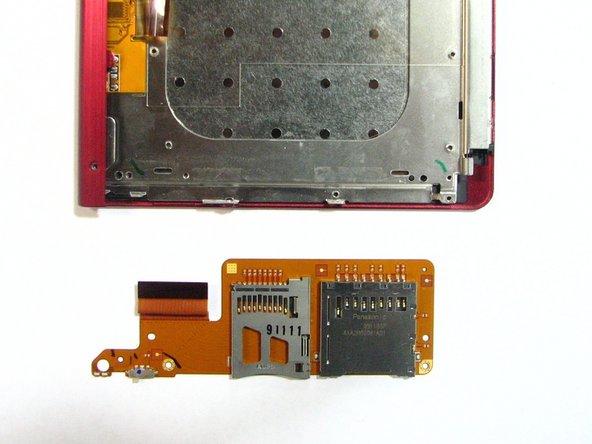
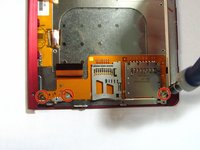
    • Using a Phillips head screwdriver, remove the three 1.4 mm screws located on the SD/memory card holder.

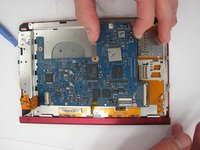
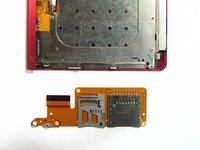
    • Remove the SD/memory card holder from the device.

  16. Sony Reader Touch Edition PRS-600 Screen Replacement: 步骤 16 中的图像 1,1
    • Using the Phillips head screwdriver, remove the two 1.4 mm screws in the screen at the bottom of the device that are usually covered by the power switch panel.

  17. Sony Reader Touch Edition PRS-600 Screen Replacement: 步骤 17 中的图像 1,1
    • Using the same screwdriver, remove the 1.4 mm screw at the bottom of the device that is usually covered by the bottom and side panel.

  18. Sony Reader Touch Edition PRS-600 Screen Replacement: 步骤 18 中的图像 1,1
    • Remove the four 1.4 mm screws that are located on the side of the device that are usually covered by the bottom and side panel.

  19. Sony Reader Touch Edition PRS-600 Screen Replacement: 步骤 19 中的图像 1,1
    • Be sure to lift the thin, orange strip that is attached to the audio/AC/mini USB ports out of the way, before removing the screen.

  20. Sony Reader Touch Edition PRS-600 Screen Replacement: 步骤 20 中的图像 1,1
    • Lift the end of screen opposite the red edge and pull it out of the casing.

结论

To reassemble your device, follow these instructions in reverse order.

3等其他人完成本指南。

Zachary Jeffers

于10/13/14注册

412 声望

创作了4篇指南

团队

Clemson, Team 1-4, Benson Fall 2014 Clemson, Team 1-4, Benson Fall 2014 的会员

CLEM-BENSON-F14S1G4

4 名成员

创作了22篇指南

一条评论

where can I get the screen and how much it cost in INR ?

kkrao22 - 回复

添加评论

浏览统计数据:

过去 24 小时: 0

过去 7 天: 3

过去 30 天: 14

总计 2,122