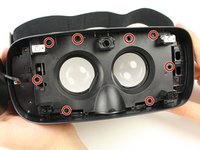
跳转到主内容
加入维修社区 - 创建账户

Samsung Gear VR With Controller Lens Replacement

你所需要的

  1. Samsung Gear VR With Controller Lens Replacement, Inner Mask: 步骤 1 中的图像 1,3 Samsung Gear VR With Controller Lens Replacement, Inner Mask: 步骤 1 中的图像 2,3 Samsung Gear VR With Controller Lens Replacement, Inner Mask: 步骤 1 中的图像 3,3
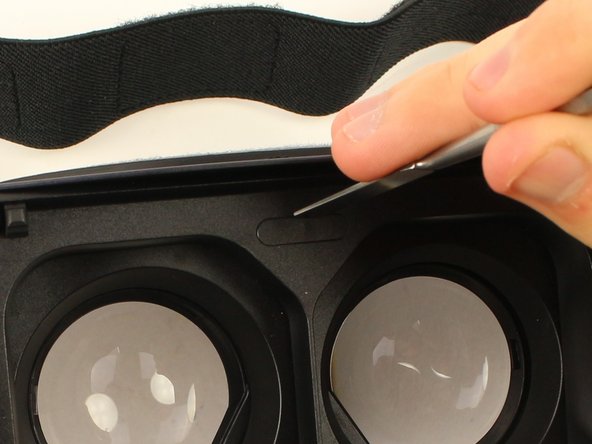
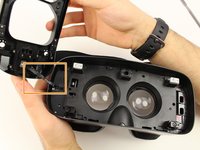
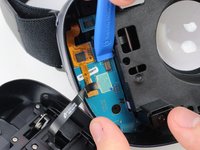
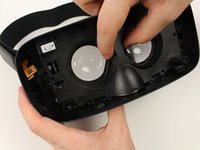
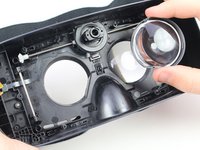
    • Push the switch on the right-hand side of the device to separate the cover from the main body.

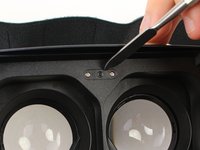
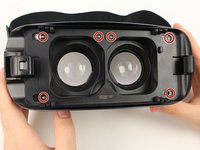
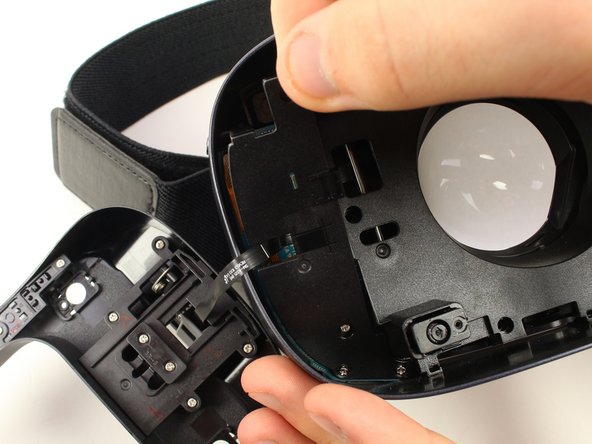
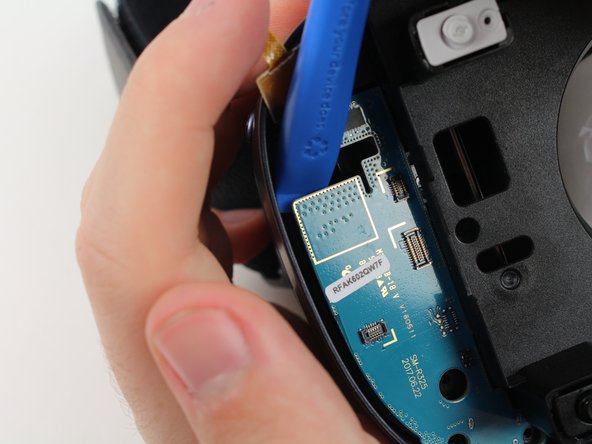
    • Pull the cover away from the main device.

    询问修复机器人

    添加评论

  2. Samsung Gear VR With Controller Lens Replacement: 步骤 2 中的图像 1,3 Samsung Gear VR With Controller Lens Replacement: 步骤 2 中的图像 2,3 Samsung Gear VR With Controller Lens Replacement: 步骤 2 中的图像 3,3
    • Remove the four corner screw covers with a metal spudger.

    • The screw covers fly off when removed, so make sure to keep track of them.

    询问修复机器人

    添加评论

  3. Samsung Gear VR With Controller Lens Replacement: 步骤 3 中的图像 1,3 Samsung Gear VR With Controller Lens Replacement: 步骤 3 中的图像 2,3 Samsung Gear VR With Controller Lens Replacement: 步骤 3 中的图像 3,3
    • Use a metal spudger to remove the screw cover centered at the top.

    询问修复机器人

    添加评论

  4. Samsung Gear VR With Controller Lens Replacement: 步骤 4 中的图像 1,3 Samsung Gear VR With Controller Lens Replacement: 步骤 4 中的图像 2,3 Samsung Gear VR With Controller Lens Replacement: 步骤 4 中的图像 3,3
    • Remove the six 5mm Phillips #000 screws to detach the front phone mount.

    • Lift the front phone mount up and to the left.

    • Remove the front phone mount carefully because there is a wire harness on the left side of the headset.

    询问修复机器人

    添加评论

  5. Samsung Gear VR With Controller Lens Replacement: 步骤 5 中的图像 1,2 Samsung Gear VR With Controller Lens Replacement: 步骤 5 中的图像 2,2
    • Remove the four 5mm Phillips #000 screws that secure the plate on the left side of the headset.

    • Pull the plate away from the motherboard gently.

    询问修复机器人

    添加评论

  6. Samsung Gear VR With Controller Lens Replacement: 步骤 6 中的图像 1,2 Samsung Gear VR With Controller Lens Replacement: 步骤 6 中的图像 2,2
    • Use the iFixit opening tool to remove the pop connector holding the wire harness to the motherboard.

    • You can now completely remove the front phone mount from the headset.

    询问修复机器人

    添加评论

  7. Samsung Gear VR With Controller Lens Replacement: 步骤 7 中的图像 1,3 Samsung Gear VR With Controller Lens Replacement: 步骤 7 中的图像 2,3 Samsung Gear VR With Controller Lens Replacement: 步骤 7 中的图像 3,3
    • Remove the rest of the pop connectors on the motherboard using the iFixit opening tool.

    • Pry at the top of the motherboard with the iFixit opening tool to remove the motherboard.

    • The largest pop connector may require more effort to remove.

    • Make sure that nothing is connected to the motherboard before you pull it out.

    询问修复机器人

    添加评论

  8. Samsung Gear VR With Controller Lens Replacement: 步骤 8 中的图像 1,3 Samsung Gear VR With Controller Lens Replacement: 步骤 8 中的图像 2,3 Samsung Gear VR With Controller Lens Replacement: 步骤 8 中的图像 3,3
    • Remove the eight 5mm Phillips #000 screws on the inner mask.

    • Gently separate the inner mask from the headset by pulling the mask from the inner sides of the lens sockets.

    询问修复机器人

    添加评论

  9. Samsung Gear VR With Controller Lens Replacement, Lens: 步骤 9 中的图像 1,2 Samsung Gear VR With Controller Lens Replacement, Lens: 步骤 9 中的图像 2,2
    • Use the metal spudger to press on the three tabs around each of the sockets.

    • Press the tabs gently to prevent damaging them.

    • Pull out the lenses with your fingers to remove them from the mask.

    询问修复机器人

    添加评论

结论

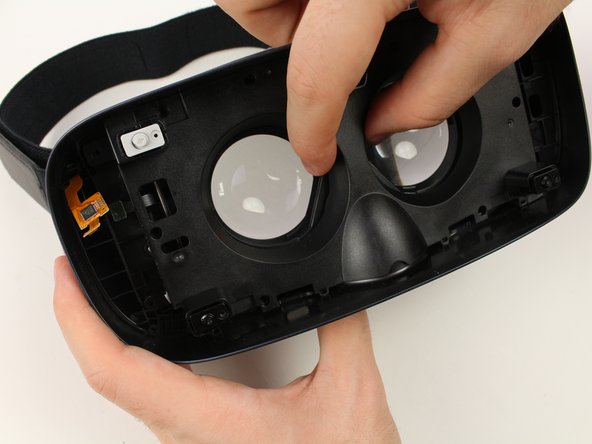
To reassemble your device, follow these instructions in reverse order.

取消:我没有完成这个指南。

另外一个人完成了本指南。

团队

Cal Poly, Team S18-G3, White Winter 2019 Cal Poly, Team S18-G3, White Winter 2019 的会员

CPSU-WHITE-W19S18G3

4 名成员

创作了7篇指南

0指南评论

添加评论

浏览统计数据:

过去 24 小时: 0

过去 7 天: 7

过去 30 天: 29

总计 1,262