跳转到主内容

Samsung Galaxy Tab S2 9.7 SM-T813 SD Card Reader Replacement

你所需要的

  1. Samsung Galaxy Tab S2 9.7 SM-T813 SD Card Reader Replacement, Screen: 步骤 1 中的图像 1,1
    • Heat the iOpeners in a microwave for 1-2 minutes.

    • The iOpeners will be hot. Use caution and hold the tabs on the ends.

    • Place heated iOpeners on screen edges to heat the adhesive.

    • For more detailed instructions on how to use the iOpeners, please refer to the iOpener Instructions.

  2. Samsung Galaxy Tab S2 9.7 SM-T813 SD Card Reader Replacement: 步骤 2 中的图像 1,1
    • Separate the screen assembly from the back by wedging the picks between the two components.

    • Slide the picks along the edge and leave them holding the device open all around the edges.

  3. Samsung Galaxy Tab S2 9.7 SM-T813 SD Card Reader Replacement: 步骤 3 中的图像 1,1
    • Place suctioning device near the corner of the screen and gently lift up to create a gap between the front panel assembly and the back.

    • Insert the picks to hold the two components apart once a gap is created.

  4. Samsung Galaxy Tab S2 9.7 SM-T813 SD Card Reader Replacement: 步骤 4 中的图像 1,1
    • Once all edges have been disconnected, carefully lift the screen off by pulling one side up.

    • Be careful not to cut yourself. Any broken glass from the screen will be sharp.

  5. Samsung Galaxy Tab S2 9.7 SM-T813 SD Card Reader Replacement: 步骤 5 中的图像 1,1
    • Using the tweezers, gently peel up on the silver tape covering the connector.

  6. Samsung Galaxy Tab S2 9.7 SM-T813 SD Card Reader Replacement: 步骤 6 中的图像 1,1
    • Use the plastic opening tool to get under the connector piece. This will allow you to remove the front panel assembly from the rest of the device.

  7. Samsung Galaxy Tab S2 9.7 SM-T813 SD Card Reader Replacement: 步骤 7 中的图像 1,1
    • Detach the connecter from the inside of the device.

    • Lift the screen to separate the front panel assembly from the rest of the device.

  8. Samsung Galaxy Tab S2 9.7 SM-T813 SD Card Reader Replacement, Central Panel: 步骤 8 中的图像 1,2 Samsung Galaxy Tab S2 9.7 SM-T813 SD Card Reader Replacement, Central Panel: 步骤 8 中的图像 2,2
    • Remove the 17 silver 3.0 mm Phillips head screws located around the edge of the device using the screwdriver.

    • For additional information on how to remove screws, please refer to Screwdriver Best Practices.

  9. Samsung Galaxy Tab S2 9.7 SM-T813 SD Card Reader Replacement: 步骤 9 中的图像 1,2 Samsung Galaxy Tab S2 9.7 SM-T813 SD Card Reader Replacement: 步骤 9 中的图像 2,2
    • Remove the 2 centrally-located black 3.0 mm Phillips head screws using the screwdriver.

  10. Samsung Galaxy Tab S2 9.7 SM-T813 SD Card Reader Replacement: 步骤 10 中的图像 1,2 Samsung Galaxy Tab S2 9.7 SM-T813 SD Card Reader Replacement: 步骤 10 中的图像 2,2
    • Use the plastic opening tools to gently separate the middle panel from the rest of the device.

    • Move the tool around under the edges until you can remove the panel by hand.

    • Popping/cracking noises are completely normal. These are the sounds of the panel separating from the rest of the device.

  11. Samsung Galaxy Tab S2 9.7 SM-T813 SD Card Reader Replacement: 步骤 11 中的图像 1,3 Samsung Galaxy Tab S2 9.7 SM-T813 SD Card Reader Replacement: 步骤 11 中的图像 2,3 Samsung Galaxy Tab S2 9.7 SM-T813 SD Card Reader Replacement: 步骤 11 中的图像 3,3
    • Lift up the central panel starting from one corner to separate it from the rest of the device.

    • Pull towards the top of the device as you lift out to ensure that the charging port connection is not damaged.

  12. Samsung Galaxy Tab S2 9.7 SM-T813 SD Card Reader Replacement, SD Card Reader: 步骤 12 中的图像 1,3 Samsung Galaxy Tab S2 9.7 SM-T813 SD Card Reader Replacement, SD Card Reader: 步骤 12 中的图像 2,3 Samsung Galaxy Tab S2 9.7 SM-T813 SD Card Reader Replacement, SD Card Reader: 步骤 12 中的图像 3,3
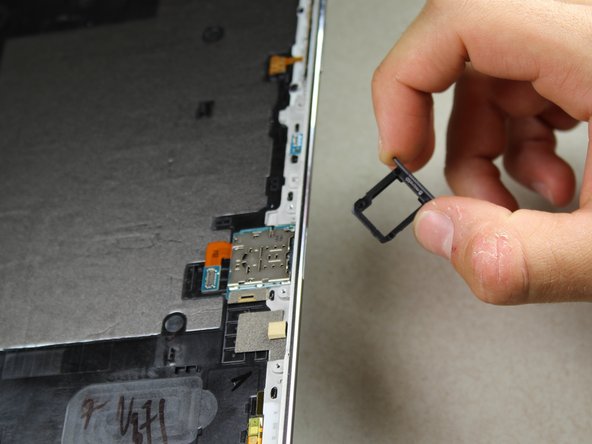
    • Insert the pointed end of the black spudger into the hole located on the right side of the device.

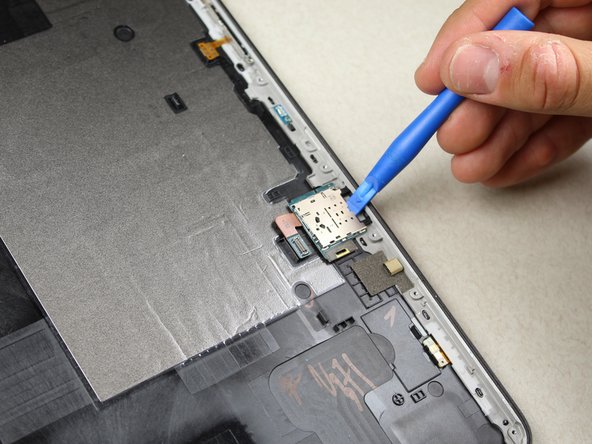
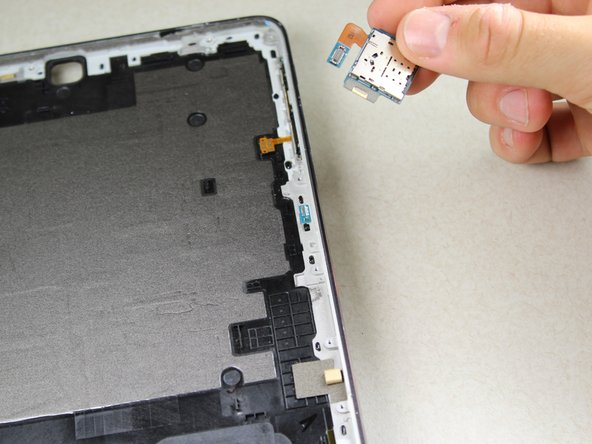
    • Use the spudger as a lever to remover the SD Card plastic piece from the reader.

  13. Samsung Galaxy Tab S2 9.7 SM-T813 SD Card Reader Replacement: 步骤 13 中的图像 1,3 Samsung Galaxy Tab S2 9.7 SM-T813 SD Card Reader Replacement: 步骤 13 中的图像 2,3 Samsung Galaxy Tab S2 9.7 SM-T813 SD Card Reader Replacement: 步骤 13 中的图像 3,3
    • Use the plastic opening tool to unlock the SD card reader from the back panel.

    • Wedge the tool under the reader and gently lift up to pop it out.

  14. Samsung Galaxy Tab S2 9.7 SM-T813 SD Card Reader Replacement: 步骤 14 中的图像 1,2 Samsung Galaxy Tab S2 9.7 SM-T813 SD Card Reader Replacement: 步骤 14 中的图像 2,2
    • Pick up the SD card reader with your fingers. There is no adhesive, so the reader will come off easily.

结论

To reassemble your device, follow these instructions in reverse order.

另外一个人完成了本指南。

Nash Elder

于04/18/18注册

740 声望

创作了4篇指南

团队

Cal Poly, Team S16-G5, Livingston Spring 2018 Cal Poly, Team S16-G5, Livingston Spring 2018 的会员

CPSU-LIVINGSTON-S18S16G5

5 名成员

创作了12篇指南

0条评论

添加评论

浏览统计数据:

过去 24 小时: 1

过去 7 天: 2

过去 30 天: 13

总计 1,749