跳转到主内容

Samsung Galaxy S5 Screen Replacement

已存档的指南
本指南只作为历史记录保留。请使用指南的最新版本来进行维修。

你所需要的

  1. Samsung Galaxy S5 Screen Replacement, Battery: 步骤 1 中的图像 1,3 Samsung Galaxy S5 Screen Replacement, Battery: 步骤 1 中的图像 2,3 Samsung Galaxy S5 Screen Replacement, Battery: 步骤 1 中的图像 3,3
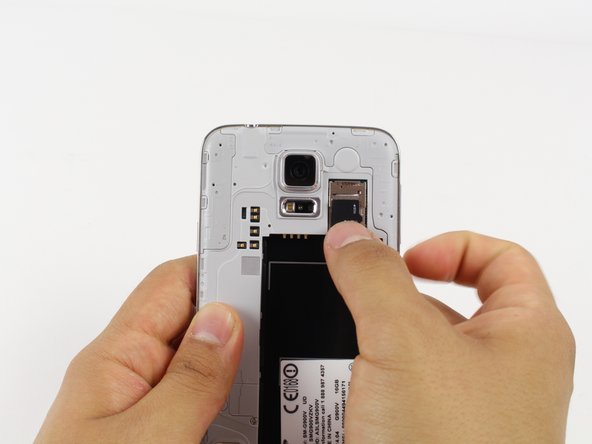
    • Remove the rear case by using moderate force to pry the divot on the left of the rear facing camera with a plastic opening tool or your fingernail.

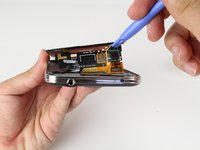
    • Continue to lift the case, working your way around the perimeter until the entire rear cover is removed.

  2. Samsung Galaxy S5 Screen Replacement: 步骤 2 中的图像 1,2 Samsung Galaxy S5 Screen Replacement: 步骤 2 中的图像 2,2
    • Lift the battery upward with your finger or plastic opening tool by pushing on the notch located on the bottom of the battery.

    • Remove the battery from the phone.

  3. Samsung Galaxy S5 Screen Replacement, microSD Card: 步骤 3 中的图像 1,3 Samsung Galaxy S5 Screen Replacement, microSD Card: 步骤 3 中的图像 2,3 Samsung Galaxy S5 Screen Replacement, microSD Card: 步骤 3 中的图像 3,3
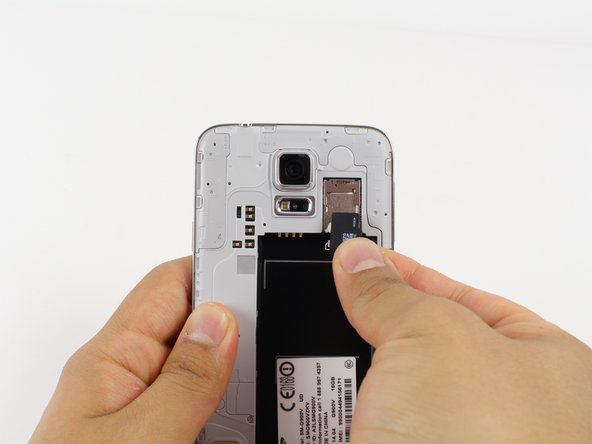
    • Gently slide out the SD card using your fingernail or a plastic opening tool.

    • For reassembly, gently slide in the microSD card until it stops.

  4. Samsung Galaxy S5 Screen Replacement, Screen: 步骤 4 中的图像 1,3 Samsung Galaxy S5 Screen Replacement, Screen: 步骤 4 中的图像 2,3 Samsung Galaxy S5 Screen Replacement, Screen: 步骤 4 中的图像 3,3
    • Removing the screen will cause your device to be less water-resistant.

    • There are many ways to remove the adhesive from the screen. You could use a heatgun, blow dryer, or the iOpener. We used an iOpener.

    • We recommend that you clean your microwave before proceeding, as any nasty gunk on the bottom may end up stuck to the iOpener.

    • Place the iOpener in the center of the microwave.

    • For carousel microwaves: Make sure the plate spins freely, if your iOpener gets stuck it may overheat and burn.

    • If you have not used your iOpener for some time, or this is the first time you are using the iOpener, microwave it wrapped in a damp paper towel. This will prevent it from burning if it is overheated.

  5. Samsung Galaxy S5 Screen Replacement: 步骤 5 中的图像 1,1
    • Heat the iOpener for one minute on the highest power setting.

    • Be careful not to overheat the iOpener during the repair procedure. Wait at least two minutes before reheating the iOpener.

  6. Samsung Galaxy S5 Screen Replacement: 步骤 6 中的图像 1,1
    • The bag will be very hot, so be careful when handling it. Use an oven mitt if necessary.

    • Remove the iOpener from the microwave, holding it by the printed tag.

  7. Samsung Galaxy S5 Screen Replacement: 步骤 7 中的图像 1,3 Samsung Galaxy S5 Screen Replacement: 步骤 7 中的图像 2,3 Samsung Galaxy S5 Screen Replacement: 步骤 7 中的图像 3,3
    • Throughout this procedure you may need to reheat the iOpener. To prevent overheating the iOpener, always wait at least two minutes before microwaving again. Do not microwave the iOpener for more than one minute at a time.

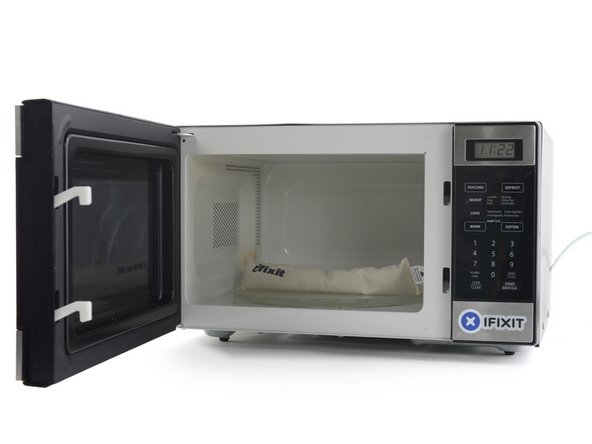
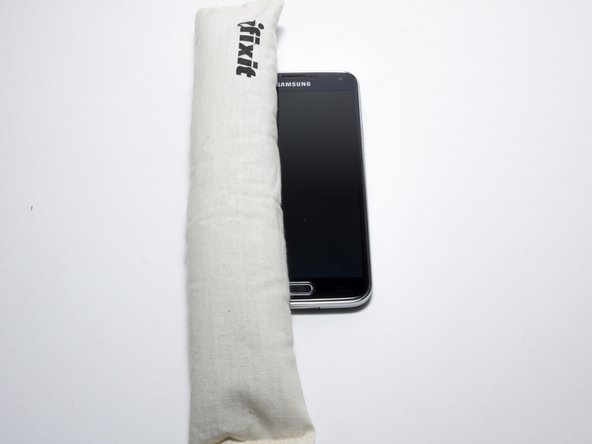
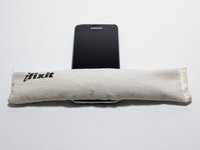
    • Lay the iOpener flat on the bottom of the device, directly over the home button. Smooth the iOpener along the surface to ensure good contact with the device. Leave the bag on the device for around 90 seconds.

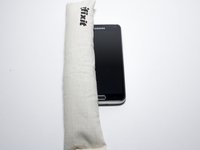
    • Repeat the process laying the bag on the left and right edge of the screen.

  8. Samsung Galaxy S5 Screen Replacement: 步骤 8 中的图像 1,2 Samsung Galaxy S5 Screen Replacement: 步骤 8 中的图像 2,2
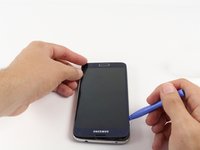
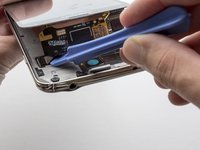
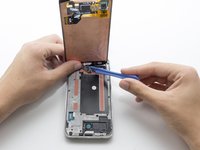
    • Use a light amount of force when removing the screen.

    • A black ribbon cable attaching the display to the motherboard and a black cable attaching the home button to the motherboard will be damaged if you force the screen off.

    • Starting at the top of the device, work the plastic opening tool under the screen. The top of the device has the Samsung logo and headphone port.

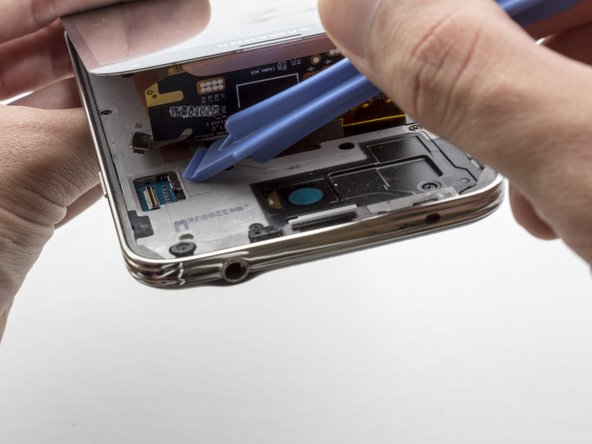
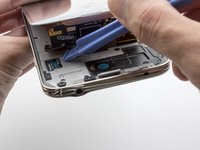
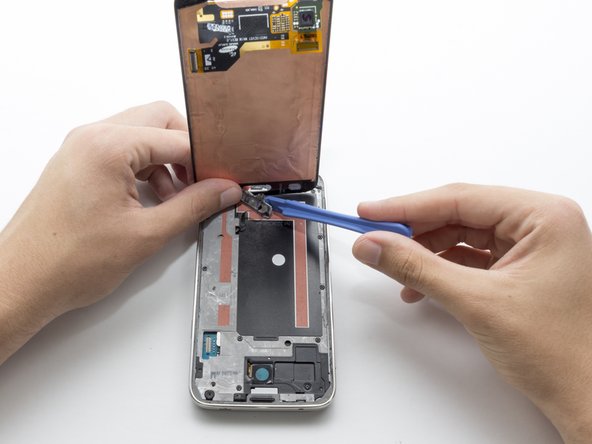
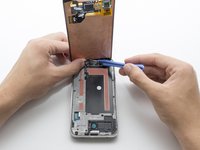
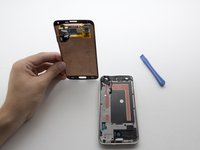
    • Start separating the screen from the glue. Work your way around the screen until the glue is no longer holding the screen in place.

    • The screen will not come off completely yet, there are still cables attaching it to the phone.

  9. Samsung Galaxy S5 Screen Replacement: 步骤 9 中的图像 1,3 Samsung Galaxy S5 Screen Replacement: 步骤 9 中的图像 2,3 Samsung Galaxy S5 Screen Replacement: 步骤 9 中的图像 3,3
    • Start lifting the screen from the top. You will see a black ribbon cable attaching the display to the motherboard. Use the plastic opening tool to lightly detach the connector.

  10. Samsung Galaxy S5 Screen Replacement: 步骤 10 中的图像 1,3 Samsung Galaxy S5 Screen Replacement: 步骤 10 中的图像 2,3 Samsung Galaxy S5 Screen Replacement: 步骤 10 中的图像 3,3
    • Continue to lift the display. You will notice a black cable connecting the home button to the motherboard.

    • Use the plastic opening tool to pry the home button off. Moderate force is required.

    • When reassembling the phone you may need to apply glue to the button to keep it in place.

    • When putting the new screen in place you will need to put double sided tape attaching it to the midframe to stop it from wobbling when in use.

结论

To reassemble your device, follow these instructions in reverse order.

68等其他人完成本指南。

Alex Ottoboni

于04/22/14注册

5,147 声望

撰写一个指南

团队

Cal Poly, Team 10-57, Amido Spring 2014 Cal Poly, Team 10-57, Amido Spring 2014 的会员

CPSU-AMIDO-S14S10G57

4 名成员

创作了9篇指南

11条评论

Is there a way to take off the front glass ONLY? With the S4 the front glass was ONLY attached to a cable for the buttons on the bottom. Any help would be greatly appreciated.

Sam Giler - 回复

Or the galaxy S5 as well?

Brayden Meixner - 回复

How do I get a new light to light up my screen as I'm hoping I can use it n just change the light

susan.nelson14 -

I would also know if the iopener will allow me to take off only the glass and NOT the digitizer with it. If anyone knows, please share.

bsims - 回复

My S5 fell down and and after some hours there appears ink on the screen. Please what is wrong? Do I need to change the whole screen or is there a unit that brings out ink and have to change only that unit only?

charlesonumoh - 回复

添加评论

浏览统计数据:

过去 24 小时: 0

过去 7 天: 1

过去 30 天: 2

总计 59,181