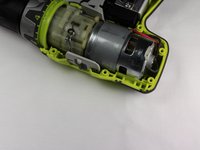
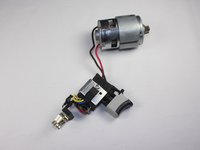
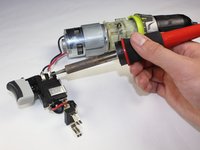
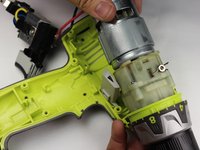
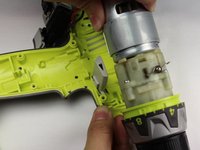
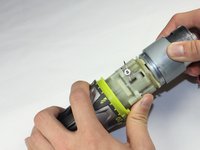
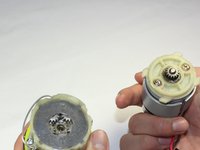
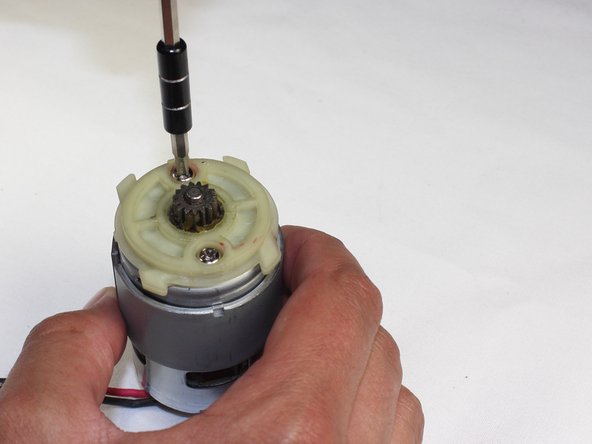
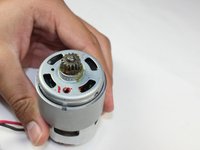
跳转到主内容

Ryobi P202 Motor Replacement

你所需要的

  1. Ryobi P202 Motor Replacement, Battery: 步骤 1 中的图像 1,3 Ryobi P202 Motor Replacement, Battery: 步骤 1 中的图像 2,3 Ryobi P202 Motor Replacement, Battery: 步骤 1 中的图像 3,3
    • The battery can shock you. Only touch plastic, non-conductive components.

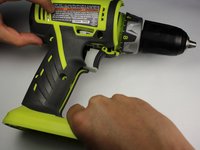
    • Detach the battery unit from the drill body by pressing the battery release buttons on both sides of the unit and pulling outwards.

  2. Ryobi P202 Motor Replacement, Right Side Case: 步骤 2 中的图像 1,2 Ryobi P202 Motor Replacement, Right Side Case: 步骤 2 中的图像 2,2
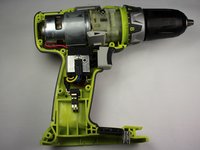
    • Use a Torx T10 screw driver to unscrew all ten 13.5 mm screws from the drill casing to gain access to the interior.

  3. Ryobi P202 Motor Replacement: 步骤 3 中的图像 1,2 Ryobi P202 Motor Replacement: 步骤 3 中的图像 2,2
    • Gently lift the casing from the drill body.

    • Take the casing completely off the drill body to gain access to the interior of the drill.

    • The Ryobi P202 casing has Part #: 200690001

  4. Ryobi P202 Motor Replacement, Magnetic Tray: 步骤 4 中的图像 1,2 Ryobi P202 Motor Replacement, Magnetic Tray: 步骤 4 中的图像 2,2
    • Gently lift the magnetic tray from the bottom of the drill body.

    • The magnet is Part #: 303001015

  5. Ryobi P202 Motor Replacement, Bit Storage Clip: 步骤 5 中的图像 1,2 Ryobi P202 Motor Replacement, Bit Storage Clip: 步骤 5 中的图像 2,2
    • Grip the bit-clip and gently lift up to remove it from the case.

    • The bit-clip is Part #: 630206007

  6. Ryobi P202 Motor Replacement, Level Gauge: 步骤 6 中的图像 1,3 Ryobi P202 Motor Replacement, Level Gauge: 步骤 6 中的图像 2,3 Ryobi P202 Motor Replacement, Level Gauge: 步骤 6 中的图像 3,3
    • Rotate the Drill 180 degrees so that the top is facing you.

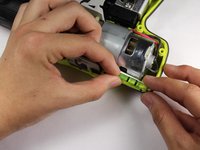
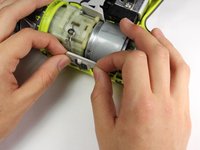
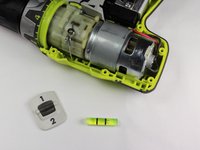
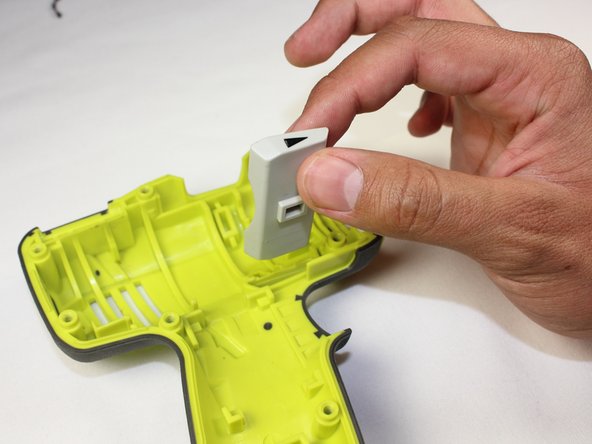
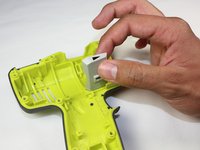
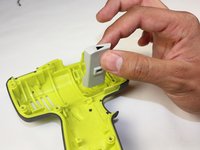
    • Lift the level gauge out from the top corner of the drill.

    • The level gauge is Part #: 3000909

  7. Ryobi P202 Motor Replacement, Gear Select Switch: 步骤 7 中的图像 1,2 Ryobi P202 Motor Replacement, Gear Select Switch: 步骤 7 中的图像 2,2
    • Lift the gear switch upwards from the top of the drill head.

    • The gear switch is Part #: 341098001

  8. Ryobi P202 Motor Replacement, Battery Contacts: 步骤 8 中的图像 1,2 Ryobi P202 Motor Replacement, Battery Contacts: 步骤 8 中的图像 2,2
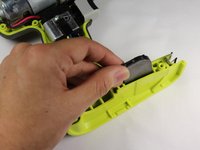
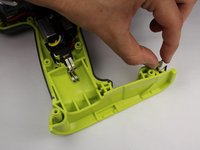
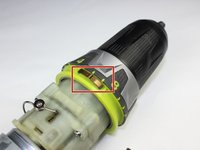
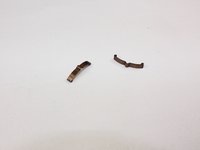
    • Grip the battery clip and pull straight up to remove the metal battery contacts.

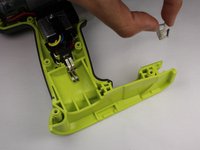
    • You can now clean the metal battery contacts with isopropyl alcohol.

  9. Ryobi P202 Motor Replacement, Trigger Assembly: 步骤 9 中的图像 1,2 Ryobi P202 Motor Replacement, Trigger Assembly: 步骤 9 中的图像 2,2
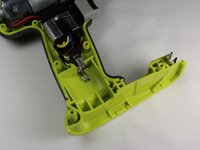
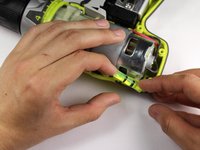
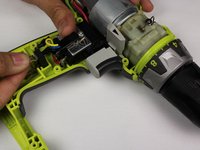
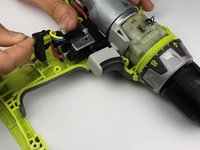
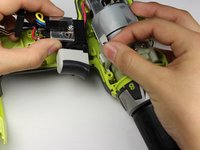
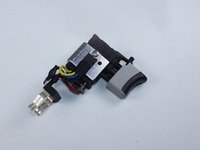
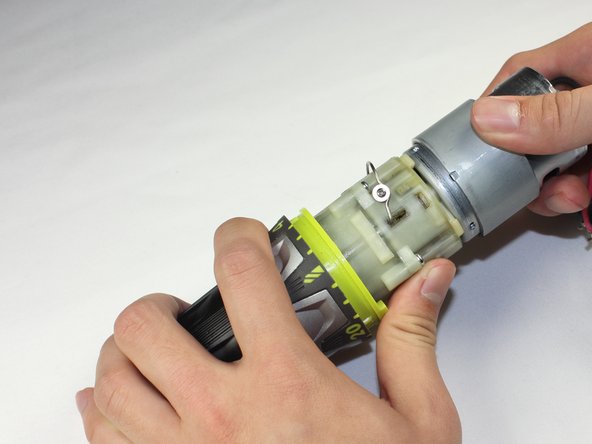
    • Holding the direction select switch in place, grip both sides of the trigger assembly and lift it up and towards the base of the drill.

  10. Ryobi P202 Motor Replacement: 步骤 10 中的图像 1,2 Ryobi P202 Motor Replacement: 步骤 10 中的图像 2,2
    • To separate the trigger assembly from the motor, use a soldering iron to melt the solder and pull gently on the red and black wires from the trigger.

    • Heating the solder may melt the plastic packaging. Prior experience with soldering is required.

    • The trigger assembly is Part #: 270001392

  11. Ryobi P202 Motor Replacement, Motor: 步骤 11 中的图像 1,2 Ryobi P202 Motor Replacement, Motor: 步骤 11 中的图像 2,2
    • Gripping the rear of the motor and the chuck, lift up.

    • There are two copper springs that are attached to the front of the chuck. They may fall off when lifting the chuck, so be careful when doing so.

  12. Ryobi P202 Motor Replacement: 步骤 12 中的图像 1,2 Ryobi P202 Motor Replacement: 步骤 12 中的图像 2,2
    • Remove the copper springs. There are two on the either sides of the chuck and are loosely placed in the chuck's grooves.

    • These springs are small and may fall off when you lift the motor up. Take note of the springs when doing so.

  13. Ryobi P202 Motor Replacement: 步骤 13 中的图像 1,2 Ryobi P202 Motor Replacement: 步骤 13 中的图像 2,2
    • Lift up on the direction toggle to remove it from the case.

  14. Ryobi P202 Motor Replacement: 步骤 14 中的图像 1,3 Ryobi P202 Motor Replacement: 步骤 14 中的图像 2,3 Ryobi P202 Motor Replacement: 步骤 14 中的图像 3,3
    • Hold the chuck and twist the motor clockwise and then pull apart to separate the motor from the chuck.

    • The chuck has a loose black washer that holds five gears in place. Be careful not to separate the washer.

    • When reassembling the chuck and motor, take note that the red wire in the back of the motor is farthest from the top of the assembly. In other words, the red wire should be closest to the trigger.

  15. Ryobi P202 Motor Replacement: 步骤 15 中的图像 1,2 Ryobi P202 Motor Replacement: 步骤 15 中的图像 2,2
    • Unscrew the two 10mm Philips #1 screws to remove the plastic spacer. Be careful not to lose the metal ring washers that come with the screws.

  16. Ryobi P202 Motor Replacement: 步骤 16 中的图像 1,3 Ryobi P202 Motor Replacement: 步骤 16 中的图像 2,3 Ryobi P202 Motor Replacement: 步骤 16 中的图像 3,3
    • Remove the plastic spacer by lifting it straight up.

结论

To reassemble your device, follow these instructions in reverse order.

4等其他人完成本指南。

Joseph Eckstein

于04/07/15注册

1,596 声望

创作了9篇指南

团队

Cal Poly, Team 17-6, Forte Spring 2015 Cal Poly, Team 17-6, Forte Spring 2015 的会员

CPSU-FORTE-S15S17G6

4 名成员

创作了10篇指南

一条评论

How can I order the copper motor for P202?

Wilfredo. A. Burgos - 回复

添加评论

浏览统计数据:

过去 24 小时: 1

过去 7 天: 9

过去 30 天: 40

总计 11,438