简介
Use this guide to replace the motherboard in a Retroid Pocket Flip handheld gaming console. The motherboard is the main circuit board of the device and connects all internal components, including the battery, display, controls, and wireless modules. If the device does not power on, fails to respond to inputs, or shows signs of internal electrical failure, the motherboard may need to be replaced.
This repair requires moderate technical experience and careful handling of internal components.
For your safety, power off the device completely and remove the microSD card before beginning this repair.
Follow Electrostatic Discharge when working inside the device to avoid damaging internal components.
Joystick removal is required before removing the motherboard.
你所需要的
-
-
Remove the four 5.9 mm screws from the backplate of the device with a 1.3mm hex screwdriver.
-
Use a plastic opening pick to carefully separate the back cover from the device.
 询问修复机器人
-
-
-
Remove the two 3.2 mm screws securing the top of the shield with a JIS #000 screwdriver.
-
Remove the five 3.2mm screws securing the plastic insulating shield to the motherboard.
-
-
-
-
Use a plastic spudger to disconnect the sliding connector by pushing on the tab to slide it out of its socket.
-
Use tweezers to disconnect the ribbon cables from the board.
-
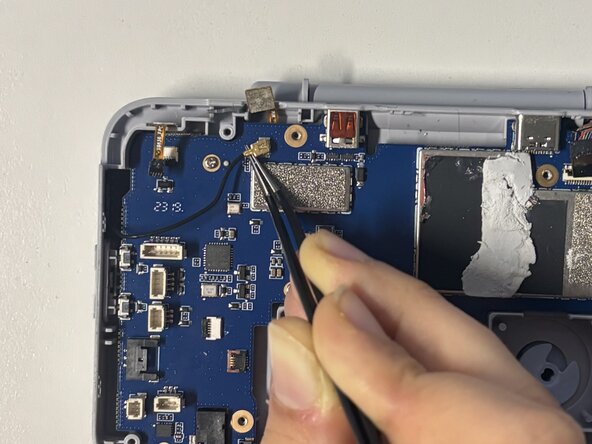
Disconnect the coaxial connector on the left of the motherboard by positioning tweezers under the metal neck of the connector to lift it straight up.
-


To reassemble your device, follow these instructions in reverse order.

团队

Université Paris Cité, Team 2-2, Grohan Winter 2026 Université Paris Cité, Team 2-2, Grohan Winter 2026 的会员
UPARIS-GROHAN-W26S2G2
4 名成员
创作了6篇指南